Coat Closet Inspiration
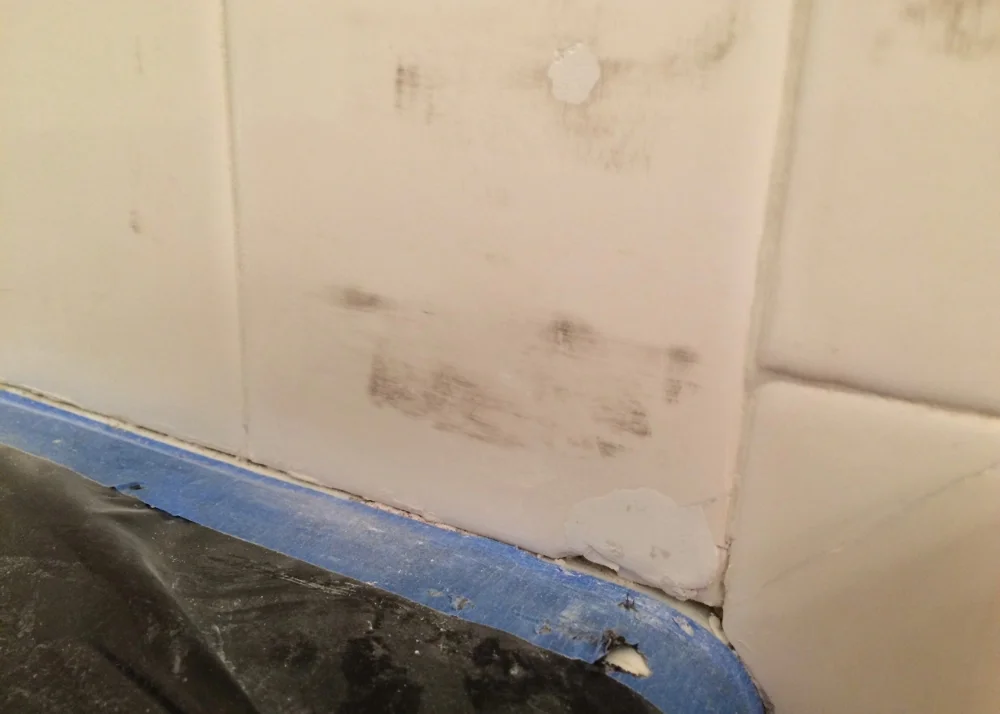
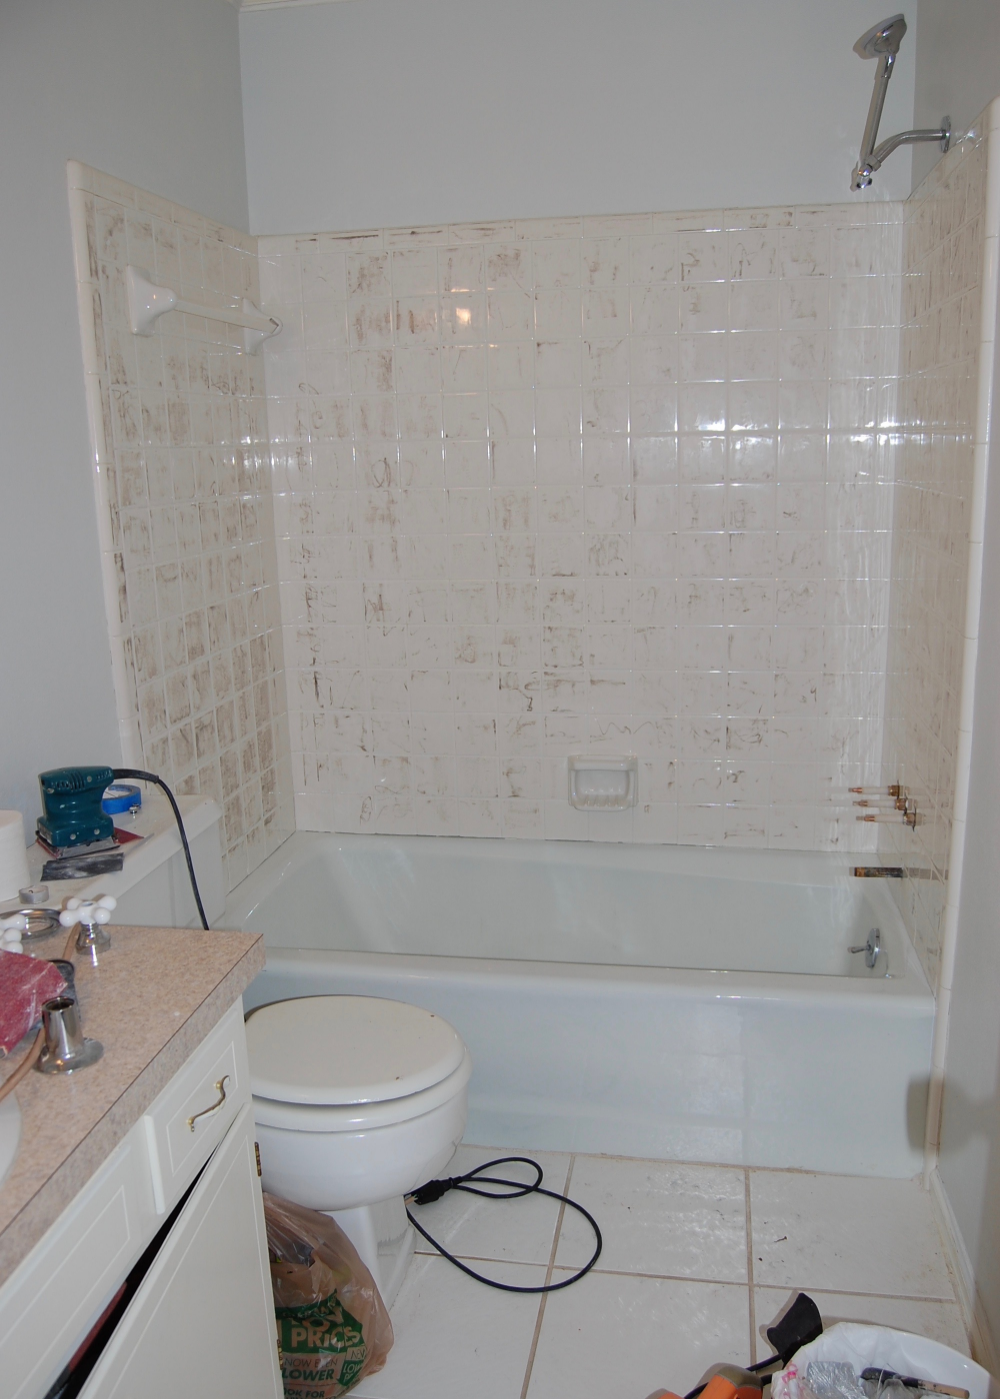
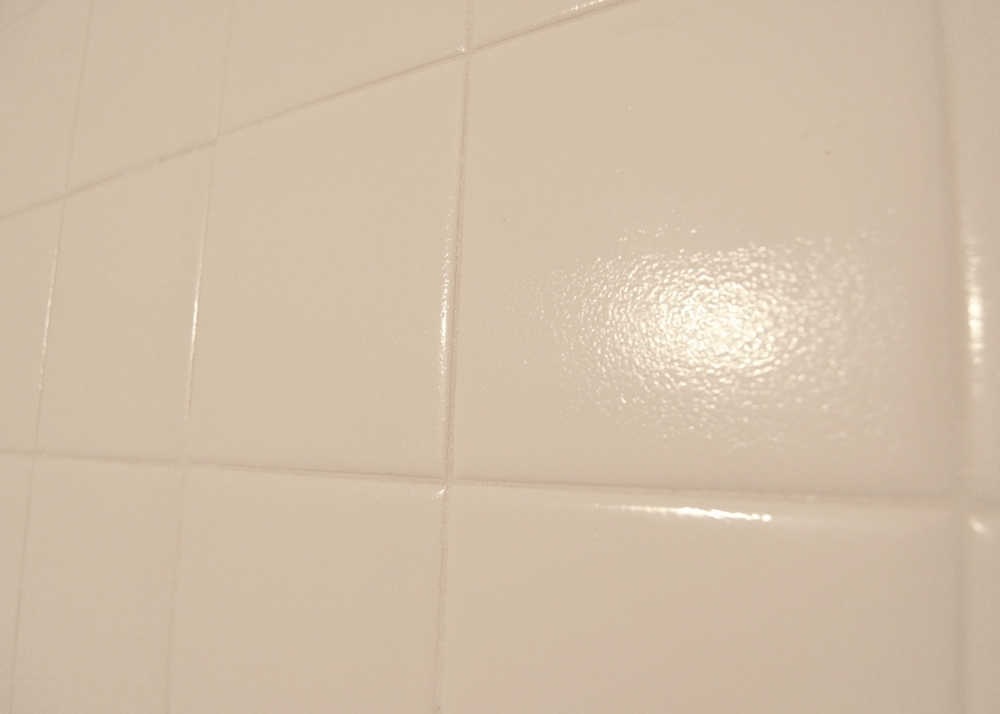
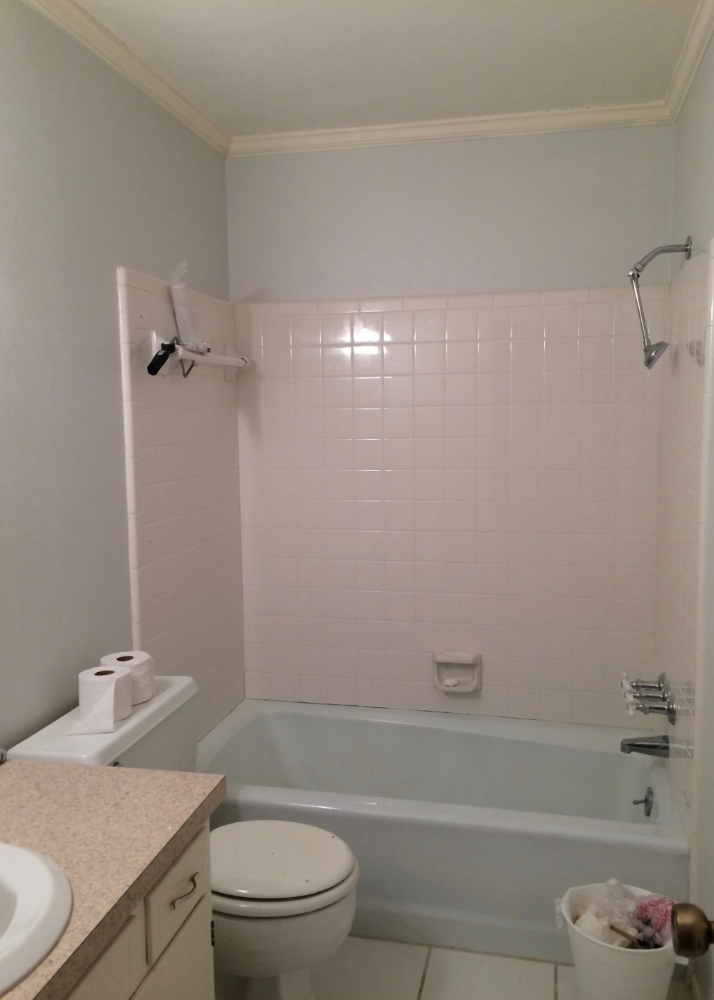
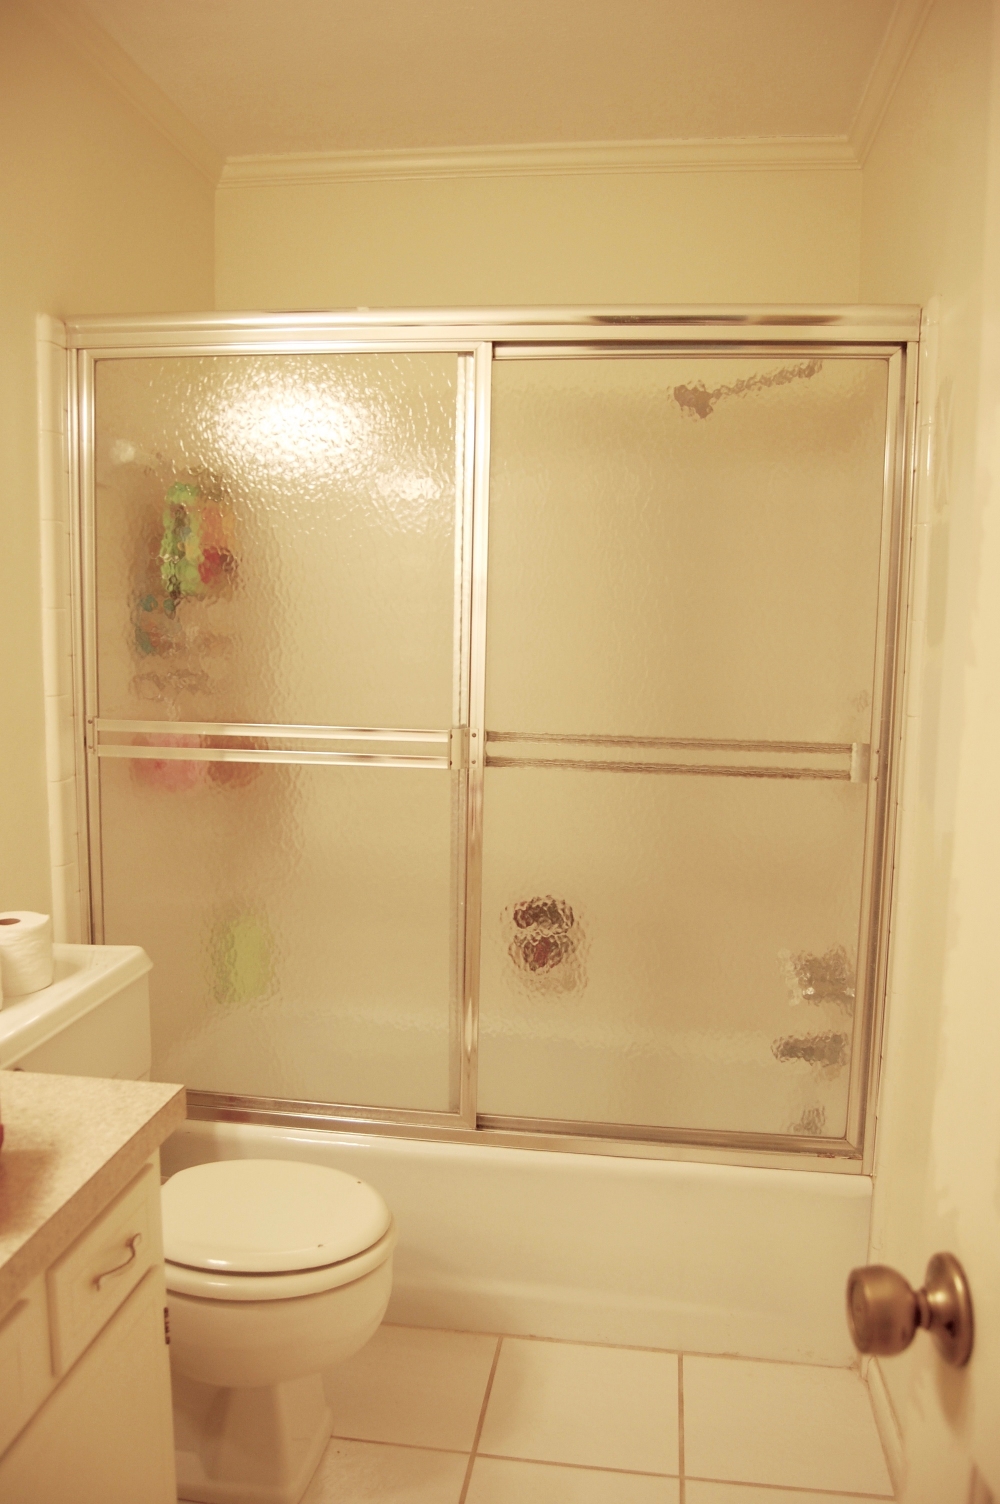
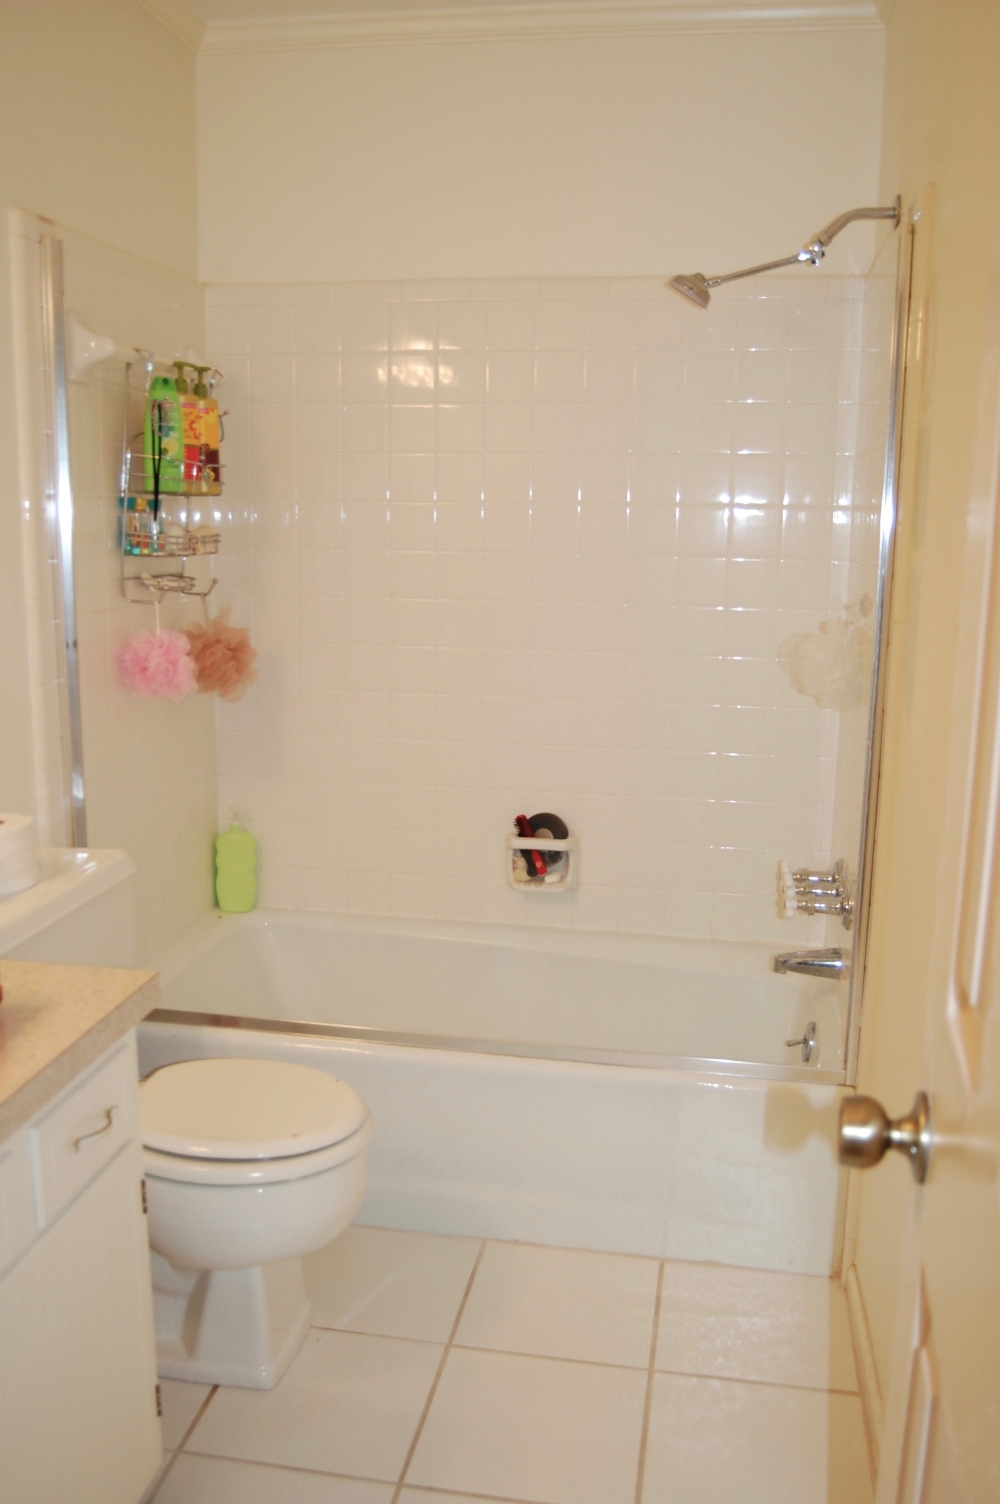
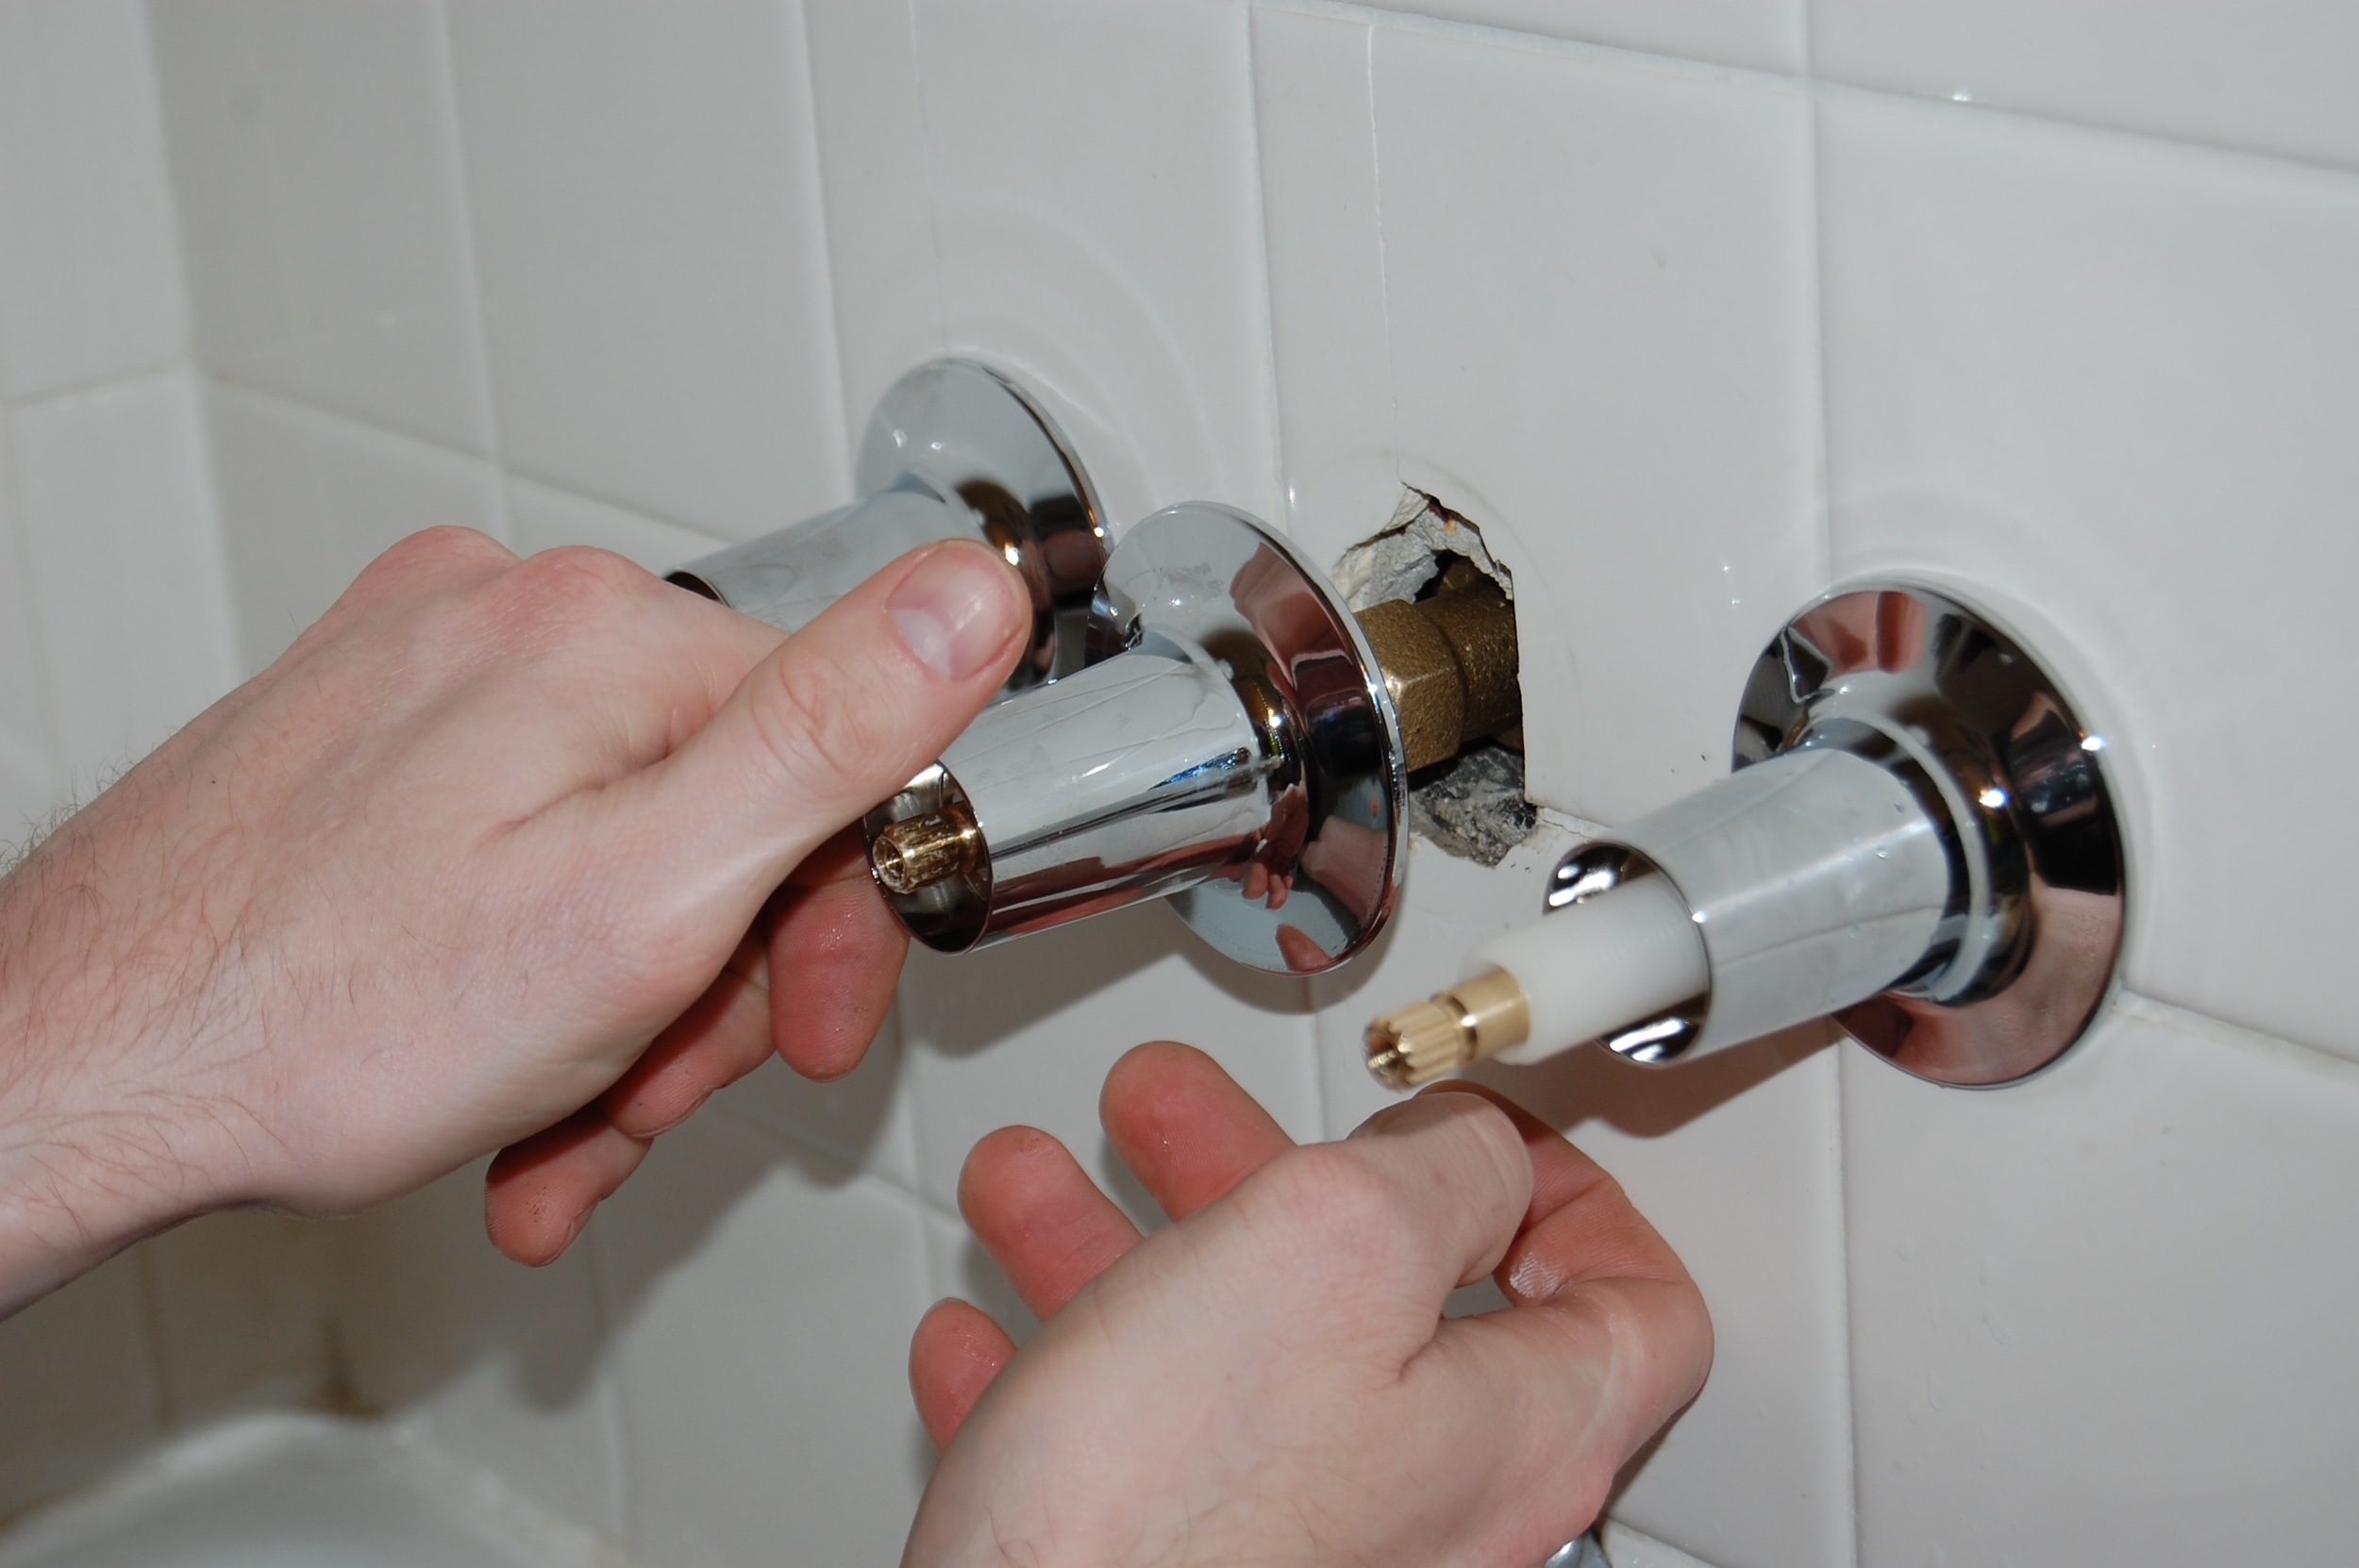
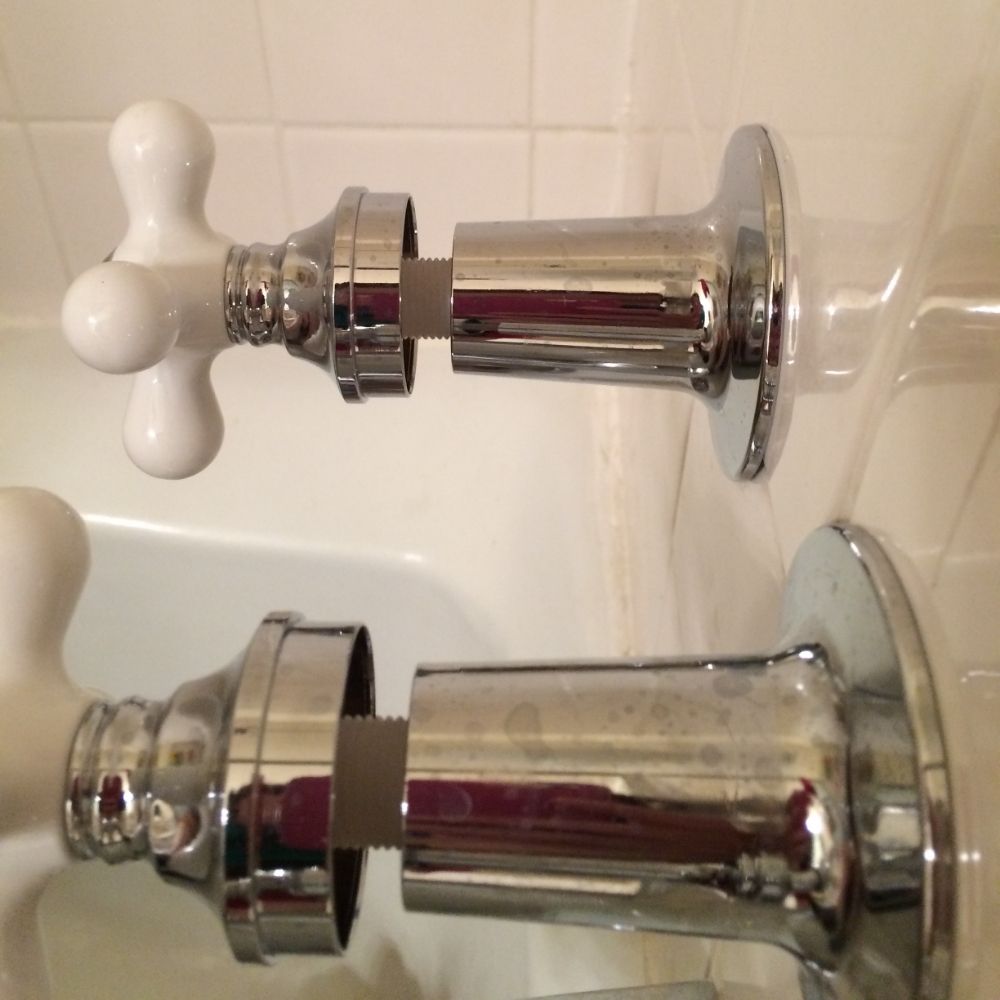
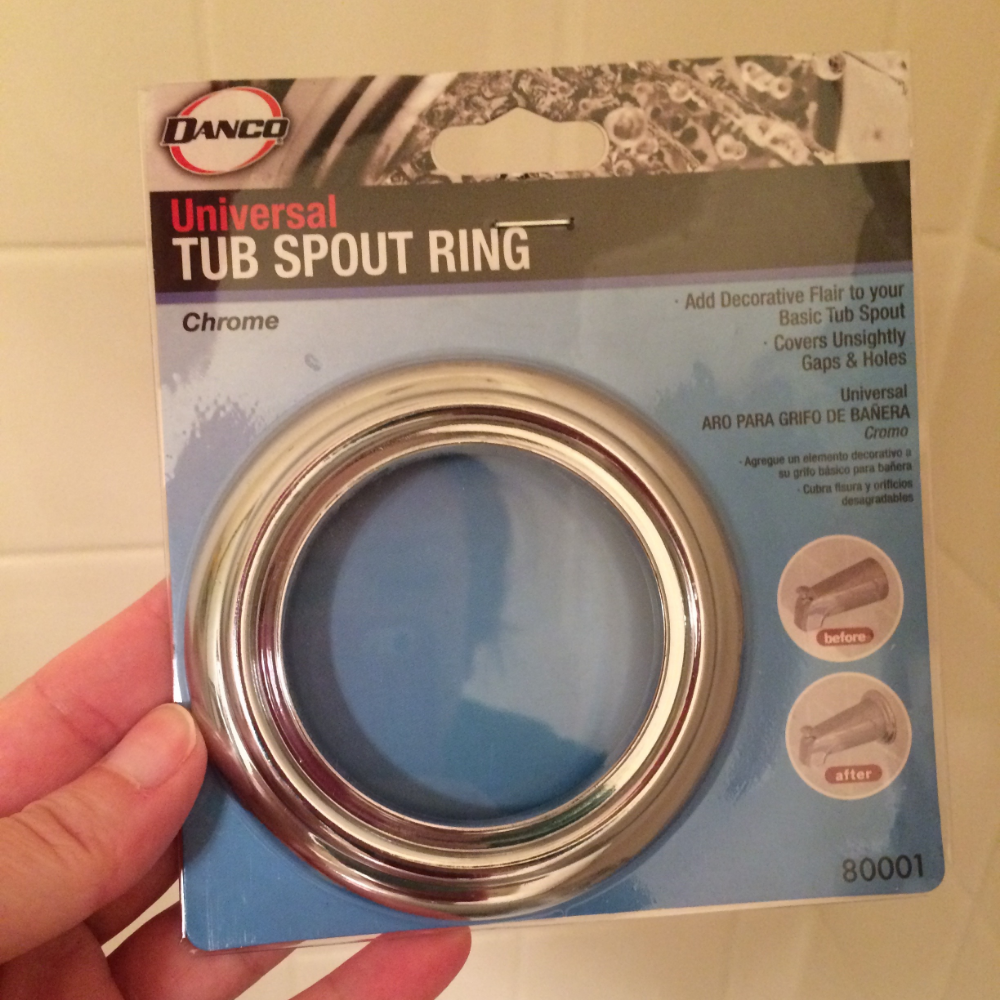
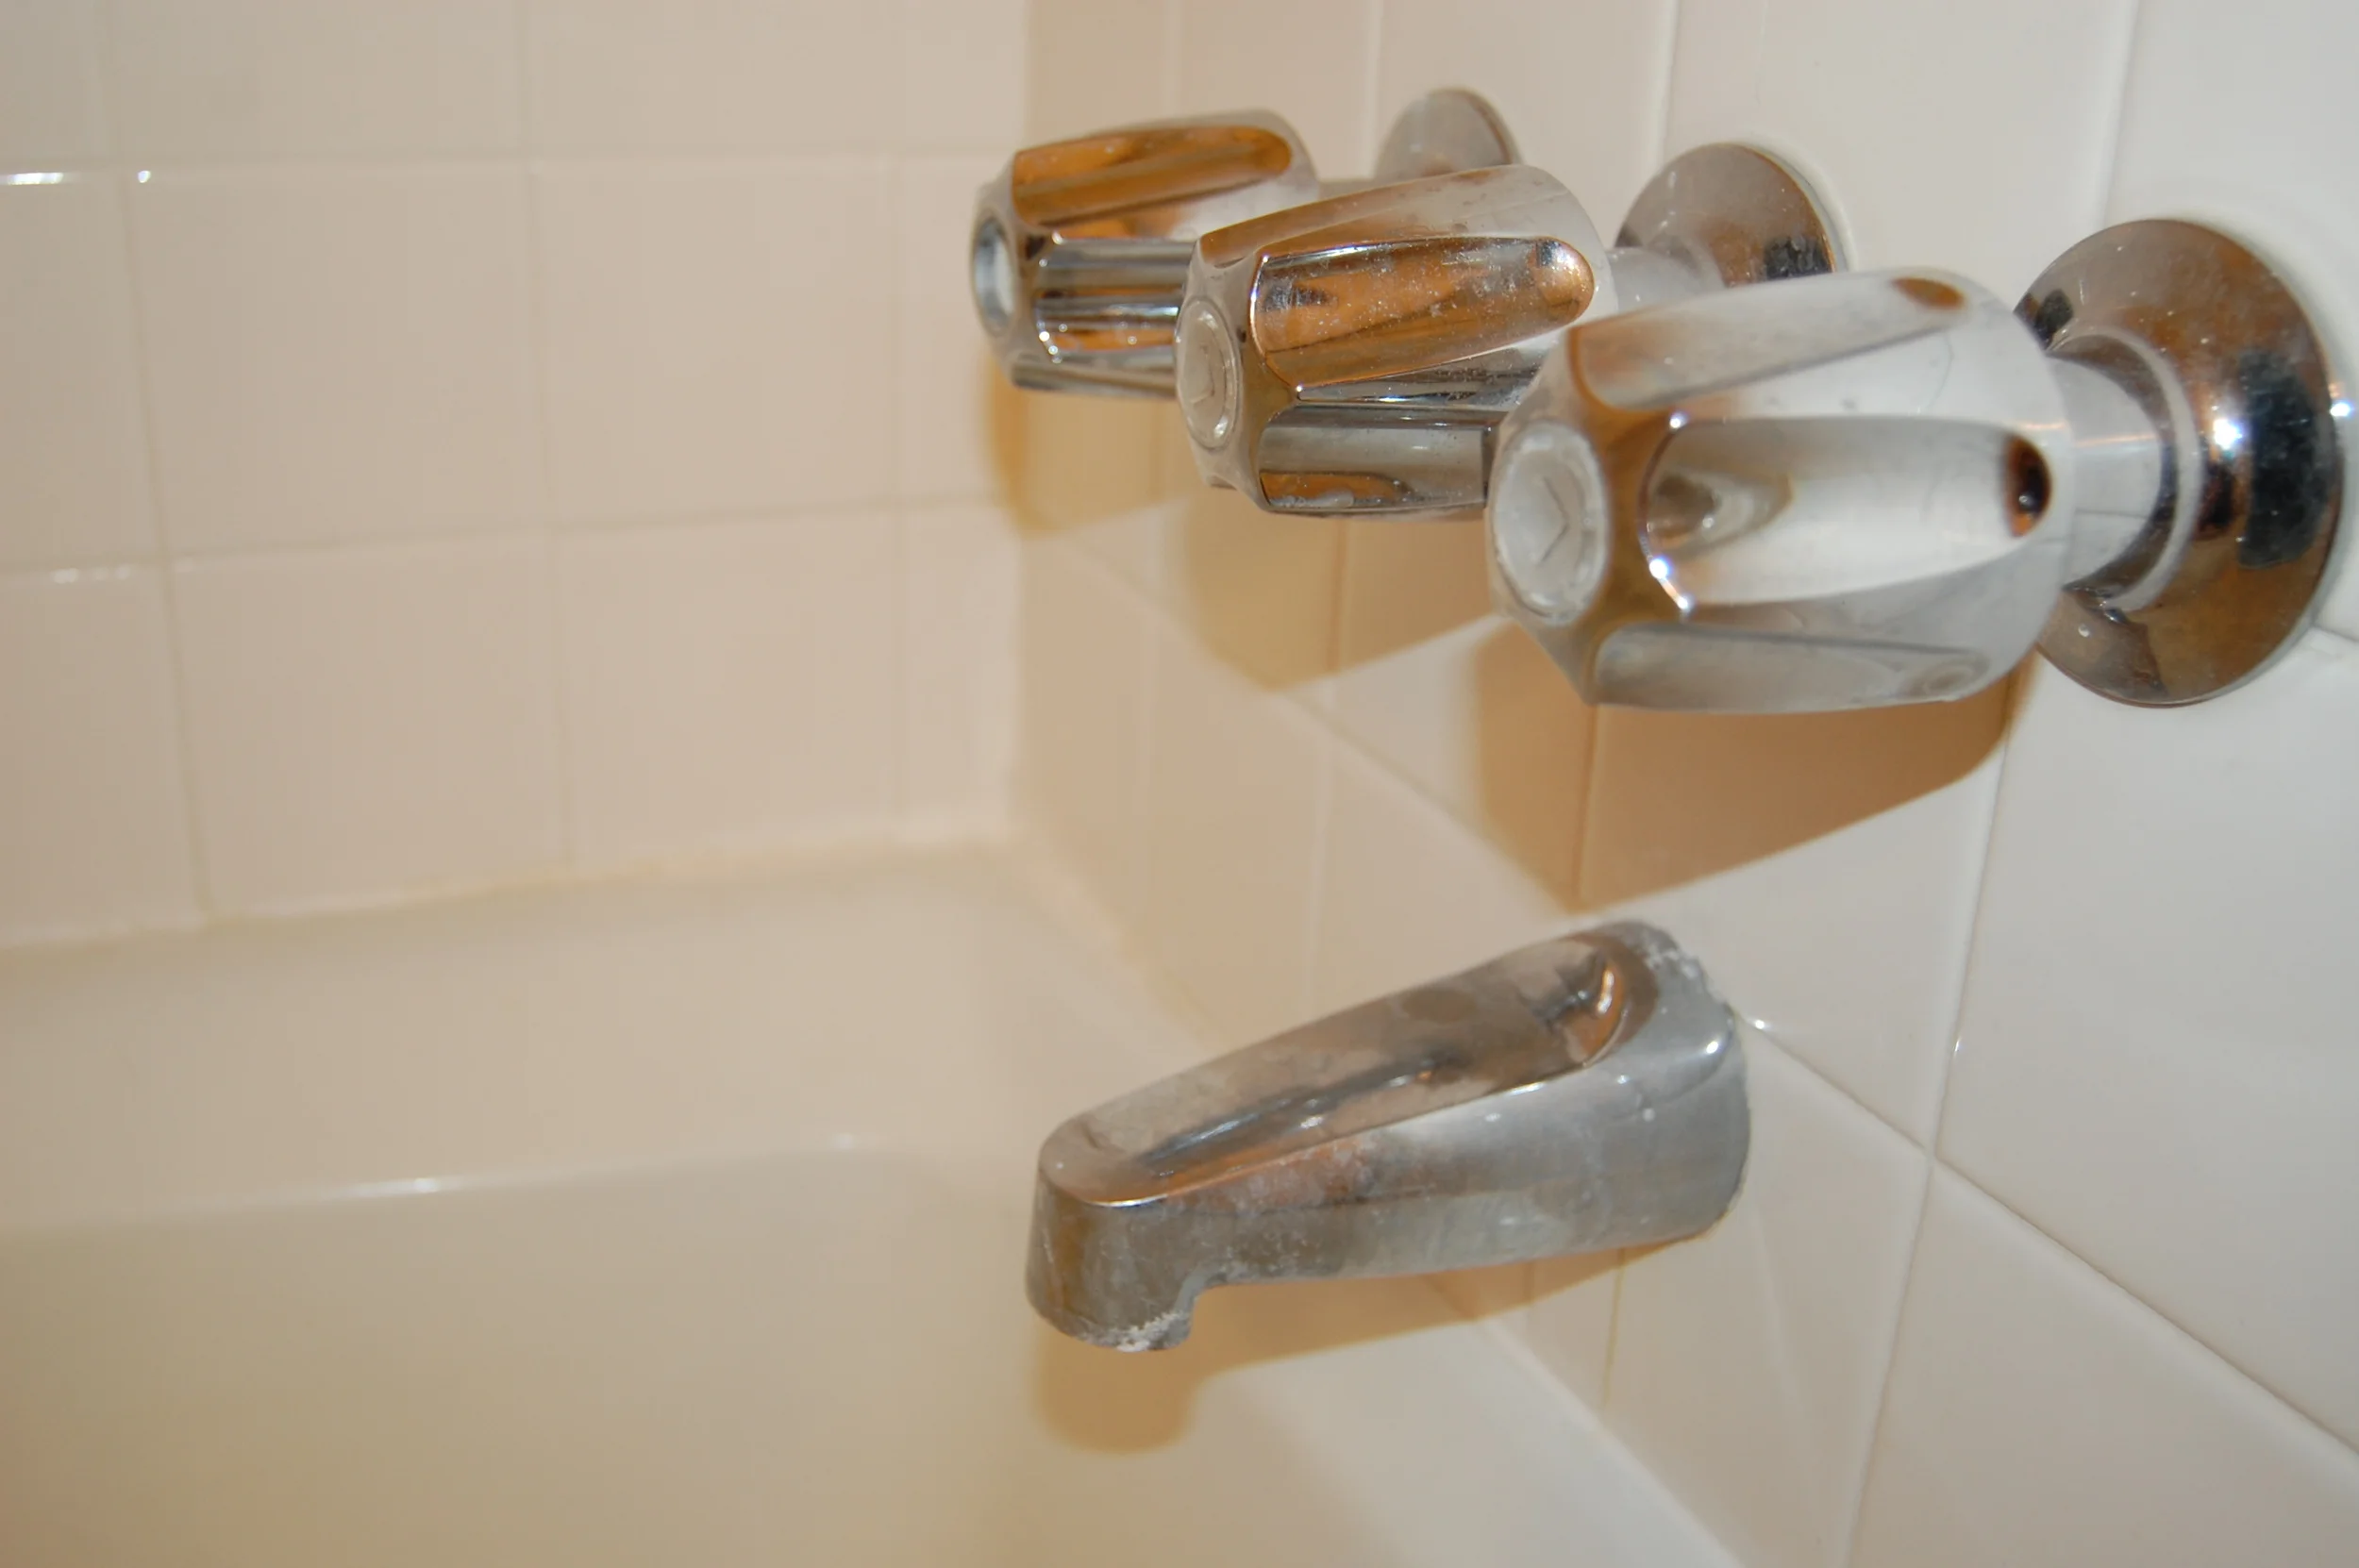
Firebeard decided to touch up the paint on the bathtub surround tiles after all, so we are staying out of the bathroom, and away from the paint fumes for a few days.  I thought in the meantime I would show you the inspiration our next project - The Coat Closet Makeover.  

At the end of this winter our tiny foyer adjacent coat closet looked like you would need a crow bar to cram one more coat into it.  It had become completely unusable, and coats had started to pile up on the floor not feet from the closet.  I began scouring Pinterest for a beautiful solution to my coat closet problem, as you do, and I found this;

Gorgeous Coat Closet Makeover from Classy Clutter.

Gorgeous Coat Closet Makeover from Classy Clutter.

This is a coat closet makeover from Classy Clutter, and I love EVERYTHING about it, from the little gold hooks to the minty paint color!  

The thing that first caught my eye was the lack of hangers.  Who really wants to take the time when they walk into their house and put down their stuff to take out a hanger to hang their coat?  Not me. Hooks are easy.  There is very little effort involved in hanging something on a hook,  and something that involves very little effort is exactly what I need at the end of a long day!  It is also pretty easy to assign each family member a hook, and by extension, see who has too many coats in the closet at a glance.

The classy clutter closet also had two rows of hooks.  The lower row of hooks is ideal for hanging purses and bags, something that my closet, with it's single clothes rod, was completely lacking and in desperate need of.  

Since initially finding the Classy Clutter closet maker on Pinterest I have found several other inspirational closet makeovers.
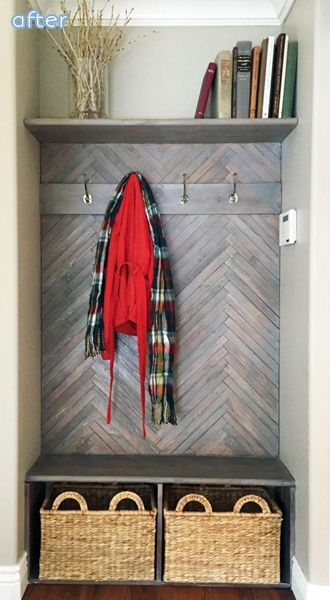
Row 1:

  1. Herringbone Mud Bench from The Rooster and the Hen.  I love the texture of the Herringbone wood, and the addition of seating is a nice touch.
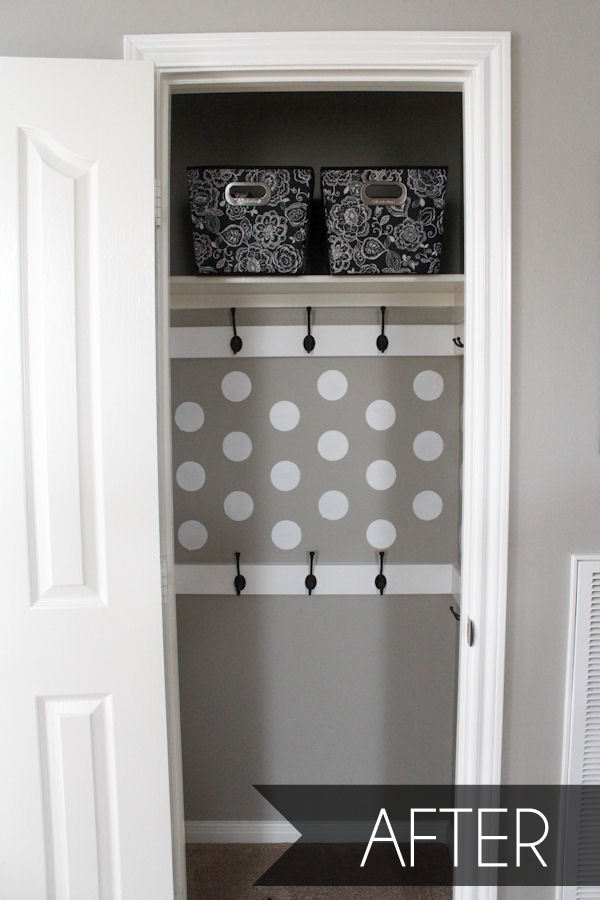
  2. Polka Dot Closet from Lil' Luna.  The shelving and two rows of hooks give this small closet a lot of room for storage, and the polka dots are really fun.
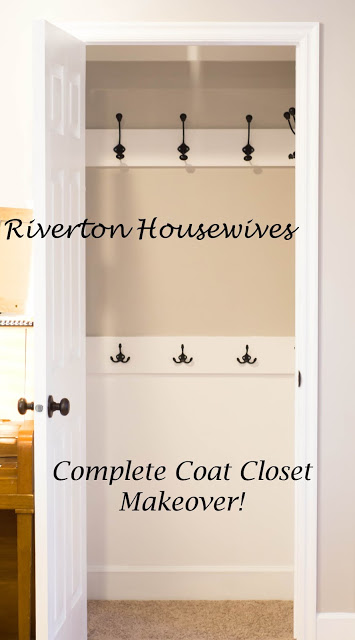
  3. Faux Wainscoting from The Real Housewives of Riverton.   Paint was used to great effect on this one.  I think that the white used below the 2nd row of hooks gives the impression of wainscoting.  Just a little bit of additional molding would complete the look.

Row 2:

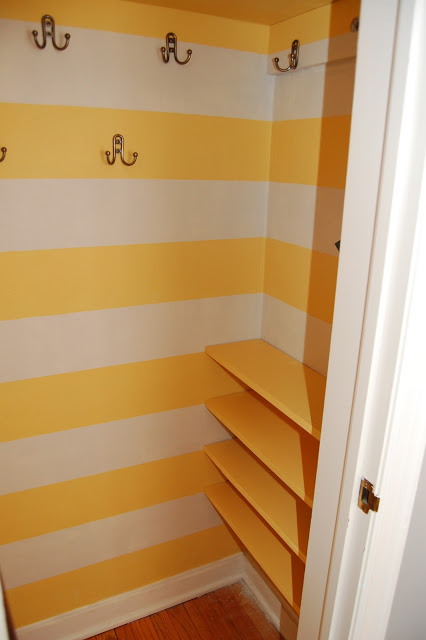
  1. Yellow Striped Closet from Away We Go.  I'm a big fan of the built-in shoe storage shelves in this one.
  2. Closet turned Mudroom original source unknown.  I found the pic of this closet turned mud room on the This Suburban Life blog.  If anyone knows the original source please let me know so it can be credited properly.  I LOVE the shoe storage on this one - it even has room for boots!
  3. Beautiful Storage Shelf from The House of Smiths.  This is by far the most innovative closet shelf I have seen for this type of application.  I love the cubbies for baskets filled with small items plus the upper shelf larger stuff.

We will not be doing much on our closet makeover until the Mini Bathroom Remodel is complete.  For now I will just be planning our idealized inspirational Frankenstein closet.  

If you have any ideas that you think might strike my fancy, please pass them along in the comments.

Worthwhile Tile Smile

I watched the Simpsons movie for the first time the other day.  It was ok.  I’m not sure if it just hasn’t held up that well over time, or if it wasn’t especially funny to begin with.  I think my favorite part was probably Homer “fixing” a sink hole in the yard by sticking baby Maggie in it, and the fact that “fix sinkhole” was on Homer’s to do list in the first place.  I will try not to spoil a nine year old movie, but suffice it to say that sticking the baby in the sinkhole did not fix it, and because The Simpsons is a cartoon where everything works out in the end, the expanding sinkhole actually benefited the Simpson family, rather than hurting it like it would in real life.  Oh, if only neglecting maintenance,  and a lack of foresight/follow through were as advantageous in real life as they are in the movies.

Hole left over from shower door removal.

Hole left over from shower door removal.

Cracked Tile Discovered under shower door support.

Cracked Tile Discovered under shower door support.

When we removed our sliding glass shower doors we were left with some holes in the tile where the shower doors had been screwed to the wall, and a piece of tile that may or may not have been broken before the shower doors were removed.  Even though we plan to completely remodel the bathroom in a few years, leaving the screw holes open and the tile cracked simply was not an option since water from the shower could seep through the holes destroying the drywall behind the tiles, and worse, the subfloor under the tub (ounce of prevention, pound of cure, etc).  It was clear we needed to fix the tile.  What was less clear was how to go about doing it. 

The obvious choice was bathtub appropriate caulk.  After all, it is designed specifically to waterproof the gaps between tile and other bathroom surfaces.  The problem was that, after the initial caulk removal marathon in the bathroom, I was not feeling very charitable toward caulk, also, a big glob of the stuff on the broken tile would look terrible.  So I headed to Home Depot, looking for another solution, and to my surprise found one.

JB WaterWeld is an epoxy putty designed to repair moist or underwater surfaces.  Better yet, it can be used on ceramic (like my tile) and many other slick surfaces.  It is also pretty cheap (about $4 for enough to rebuild an entire tile), pretty easy to work with (like a cross between drywall spackle and modeling clay), and cures in only an hour.    It is pretty much an ideal tile repair material in my opinion, but there is a catch.  It dries off white, so it may not match your tile, and like dry wall hole filler, it needs to be sanded if you want your patch to be smooth.  Fortunately for us we were already sanding our tile so that we could paint it, so the sanding wasn’t a problem, and we were painting the tile, so the color of the patch wasn’t an issue either.

As a side note, a lot of people use JB water weld to fix plumbing leaks, and a lot of people complain about its inability to fix pressurized plumbing leaks.  I didn’t use it to fix a pressurized leak, so I do not know if it works well for that application or not.  It worked wonderfully for my application, but I don’t think I would use it to permanently fix my plumbing – I would replace the leaking pipe, or call a plumber. 

One Amazon reviewer also mentioned that he used this stuff to fix his bridgework, and it did such a good job that he was able to “eat corn on the cob” ...  I don’t recommend this application either.

As a side, side note, some of the questions and answers for this product on Amazon are really funny.  My Favorite Question:  “bathtub”.  That’s right, simply “bathtub”.  The answers are the best.

To use JB WaterWeld;

  • Prepare the surface to be repaired by sanding (if possible), cleaning, and drying
  • Cut off a piece and squish it up for a bit (like sculpey clay), until it becomes soft. 
  • Stick it on the surface to be repaired, and kind of smoosh it in to all of the cracks and holes and things that need to be filled. 
  • Smooth it out a bit at this point so you don’t have to sand as much later (it cures pretty hard), just be sure all the cracks and holes you filled stay filled while you are smoothing it out.     
  • Let it dry/cure.  It should take about an hour.
  • Sand it smooth/level with the surrounding surfaces (if desired).
  • Paint or otherwise finish the surface (again, if desired).
JB WaterWeld Applied

JB WaterWeld Applied

After Sanding

After Sanding

We of course sanded and painted our patches, and when we were finished the holes left by the shower doors were nearly invisible, and it was even hard to tell the broken tile was ever broken.

After Painting - The repair is nearly invisible!

After Painting - The repair is nearly invisible!

All in all the easiest fix we have made to this bathroom so far, and I recommend JB WaterWeld without hesitation to fix your tile, but not your teeth.

(This post contains affiliate links, but I was not paid to review this product, I just like it).

Tile Time

Last time I told you about the self-induced nightmare of prepping our tub surround tile to be painted.  It was an activity that should have taken hours, but took us over a week.  We went so far beyond the manufacture’s recommendations for surface prep that by the end we were questioning our own sanity, and wondering if it was all worthwhile.

Near the End of our Tile Prep Nightmare.

Near the End of our Tile Prep Nightmare.

The painting portion of this project didn’t take that long, but it wasn’t a lot of fun.  With our Rust-oleum Tub and Tile Refinishing kit Firebeard was able to do 3 coats of paint on the tile during the course of several hours while I was at work, and I am still thanking him for saving me from this.  The paint smelled so badly and so strongly that when I got home I could smell it feet from our front door.  Even with windows open and fans on It was truly, overwhelmingly bad.  Firebeard had been wearing a pretty high quality respirator while painting all day, and was still feeling pretty sick from the fumes when I got home.  We actually left the house for several hours that evening to give the paint smell a bit more time to dissipate, and it was JUST bearable by the time we got home.  Fortunately The Boy and The Girl were on a sleepover, so they were not subjected to the worst of the smell, but it took an additional 2 days for the lingering paint smell to leave the house, and even now, about a week later, the bathroom still smells unpleasantly odd.

Per Firebeard the actual painting was not as easy as a typical painting project.  The epoxy paint dried quickly, so there was very little time to fix mistakes.  The paint also seemed to eat the foam paint brushes and rollers he was using, and a new one had to be used for each coat, or he risked pieces of foam being embedded in the paint.  Combine that with the brain killing fumes, and this was not one of his favorite projects.  However, even given all of the brilliance of hindsight, he is considering getting another kit and doing one more round of painting before we caulk because a few spots did not get as thoroughly covered as he would have liked.  I guess it couldn’t have been that bad if he is willing to do it again.

Before - Pink Tile

Before - Pink Tile

After - Bright White Tile

After - Bright White Tile

There is no denying that the overall look of the tile now is a tremendous improvement.  It looks clean and fresh, and surprisingly shinny.  It does have a slightly odd texture now though, a bit like orange peel texture but more subtle.  We also have a few spots that are a less perfect than others as is pretty typical when painting by hand rather than with a sprayer.  This doesn’t really bother me, but it is worth knowing if you decide to do it yourself.  The paint also perfectly covered the patched holes left behind after removing the sliding shower doors which was a big plus (I will tell you how I patched those next time).

Close up of the tile's new texture.

Close up of the tile's new texture.

One of the less perfect Spots.

One of the less perfect Spots.

So was all of the prep work worth it?  At this point it is hard to tell.  Bad prep work usually doesn’t become obvious until something has been used for a while and all of the paint suddenly starts peeling off, and good prep work usually goes unnoticed.  What I can say for sure is that we did not experience the peeling or puckering paint that some Amazon reviewers said they experienced.  So far our paint seems VERY securely attached, whether that is from our obsessive prep work or not, I don’t know.

Bottom Line, Knowing what we know now would we do it over again?

I think we probably would.  The improvement in the tile’s appearance was worth the effort we put in, but if we were going to do it again, I think we would put in less effort.    The instructions on the box are there for a reason.  They have been tested, and if they didn’t work they wouldn’t be on the box.  We went totally overboard on the prep work, making this project much harder than it should have been, and I think we have learned our lesson. 

In conclusion, painting the tile was worth it, follow the directions on the box, and for god’s sake ventilate, ventilate, ventilate. 

Tile doesn't sand

If you have ever watched Supernatural, you know that the beginning of every show starts with backstory.  So much happens in each show that missing a couple of shows would leave you completely lost.  The backstory provides the context for the current insanity and makes it seem like the logical progression of events rather than a complete plot twist.  I feel like this post deserves backstory, so that you will know what brought us to this point.  We got to the current insanity through a logical progression of events.

We started out just a few weeks ago with the dream of a quick bathroom refresh.  A little paint here, some accessories there, and voila, a brand new bathroom.  Sure we wanted to fix a few small things along the way and remove those disgusting shower doors, but those were quick projects that wouldn’t take any time at all, right? 

Wrong!  We were wrong.  So far everything has taken about twice as long as we expected it to.  Well that was until we tried to deal with the tub surround tiles that looked pink after painting the bathroom.  This project was supposed to take a day of work, and 3 days of dry time.  So far  it has already taken 2 weeks, and we are all feeling a bit crazed.

So, what brought us to this point?  Here is the back story;

Sickly Beige Tile.

Sickly Beige Tile.

Next to our swatch of Paper White paint, our tiles looked sickly beige.  While I am not a fan of sickly beige, I felt like it wouldn’t stand out, and I could pretend that they were just slightly off white and I could live with it until we were able to do a full bathroom remodel in a couple of years. 

Tile looks pink after painting.

Tile looks pink after painting.

Once the Paper White covered the entire wall the tile no longer looked sickly beige.... it looked pink.  I will admit, I had been hoping that the slightly cool Paper White would tone down the yellow in the tile a little bit, but it worked a little too well.  The yellow undertones in the tile were nearly eliminated, but the red undertones were accentuated. 

After about a day of trying to convince myself that the pink tile didn’t bother me (and failing miserably), I started looking for a solution.  I had a couple of options;

  • Living with the pink tile until we could do a complete remodel, the pink grating on my aesthetic sensibilities every time I walked by the bathroom.
  • Getting one of those drop in plastic bathtub surrounds (I would rather live with the pink tile)
  • Tiling the bathtub surround (I seriously considered this option, but it was so far out of the budget that this really wasn’t a viable possibility)
  • Painting the tile

Painting the tile is not something I would have EVER considered prior to this, but suddenly it was an option that seemed filled with possibly.  Since we had already removed all of the caulk there wouldn't be that much prep work.  It would only take a couple of days from start to finish.  I wouldn't have to spend a fortune on new tile, and I could get the white tile I had wanted in the first place.  I could have my cake and eat it too.  In retrospect, painting the tile was too good to be true, and I should have seen this as a warning sign from the beginning.  

We decided to go with the Rust-oleum Tub and Tile refinishing kit.  It is a 2 part epoxy acrylic paint that can be rolled on like standard wall paint, but should hold up well under high humidity.  It was only $25 on Amazon when we bought it, and it had pretty great reviews.  The only warning we repeatedly saw from the Amazon reviewers was that the tile needed to be well prepared.  "No problem," we thought.  The kit would be delivered in two days (thanks Prime!), and we would do the prep while we were waiting on the kit and dive right into the painting when it arrived.  

What did the prep entail you ask?

  1. Removing all of the caulk from the tile that would be painted
  2. Sanding the tile. 

We had this in the bag.  We had already removed the caulk - step one done.  All we had left to do was sand the tile.  The Amazon reviewers really stressed this part.  The most knowledgeable (sounding) among them recommended that the shine be removed from the tile so that the paint would be able to grip the tile.  This made perfect sense (its what you do when you refinish wood), so this is what we set out to do.  

Our tub spout just twisted off.

Our tub spout just twisted off.

About 40 years worth of hard water deposits.

About 40 years worth of hard water deposits.

First we had to remove our newly installed tub faucets, and the tub spout.  The tub spout just twisted off.  We were shocked to find what we think is nearly 40 years of hard water deposits.  It was pretty gross.  The good news is that when everything goes back on we will have a shiny new tub spout to match the new faucets.

We started sanding the tile with the 220 grit sandpaper that the kit recommended.  It didn't seem to do anything at all.

Then we switches to 60 grit (super course) sandpaper.  It made the tile shinier.  

I went to the web searching for a tile sanding solution and found Emery paper, a sandpaper made from silicon carbide.  We grabbed the only kind they had at Home Depot (which did not fit on any of our electric sanders) and went to town on the tile.  It worked, but sanding the tile by hand was maddenly slow.

After the belt sander.

After the belt sander.

Then finally one day while I was at work Firebeard took out the big guns - the belt sander.  While still at work I texted to ask how it was going, and the above picture was the response.  All of the flat tile surfaces had been throughly sanded and were ready to be painted, but the curved edges of the tiles were as shiny as ever.  

At this point we were starting to get a bit desperate, and I opted for some chemical warfare.  Muriatic acid is a fairly strong acid that when pretty heavily diluted is sometimes used as a hail Mary bathroom cleaner.  It is used heavily diluted and as a last resort because it has the tendency to remove the shine/finish from tile, porcelain, etc.  Fortunately this generally negative tendency of muriatic acid was exactly what we needed.  We strapped on the safety gear, and allowed the muriatic acid to eat as much of the remaining finish off the tiles as we dared (while keeping it off of everything else).

After this we did one last round of hand sanding, and then very through cleaning, and we were finally ready to paint.

Next time on, "This is taking significantly longer than we thought it would Mini Bathroom Remodeling Project,"  the painted tile.

(This post contains affiliate links.)

Painting and Magical Color Changing Tile

The last I left you we had just finished removing all of the caulk in our hall bathroom, scrubbing the left over grout and tile clean, and we were waiting for everything to dry completely before we applied the new caulk.  After doing everything we could to remove the insidious mold that grew up under and around the old caulk, we were not about to take any chances caulking over damp crevices, and determined that we would wait at least a day to let everything dry before applying the new caulk.   But not being ones to sit on our laurels watching grout dry, we decided to paint in the meantime.

We had already picked out a few front runners in the paint department that are consistent with the rest of the house’s updated color scheme, and had painted a few swatches on the walls.  The front runners were Edgebomb Gray by Benjamin Moore, Moonshine by Benjamin Moore, and Paper White by Benjamin Moore. 

As soon as it dried it became clear that Edgecomb Gray was not for us.  It looked brown rather than greige in our windowless bathroom, and that was exactly what we were trying to get away from.  So far this has been something of a theme in this under lit house of ours.  The pretty, warm inviting greiges I see all over Pinterest look dirty and muddy when I get them on my walls.  At least it makes picking a paint color a bit easier.

Moonshine and Paper White  were the final contenders, and deciding between the two of them was not easy.  Moonshine and Paper White are pretty similar.  They are both light neutral to slightly cool grays that look a bit silvery or shimmery and change color slightly depending on the lighting.  We liked them both, so we lived with the colors for a few days to see if one of them grew on us. 

I waffled back and forth, leaning more toward one, then more toward the other.  I looked at them during the day, at night, with the lights on, with the lights off, and stole quick glances at them every time I passed the door (as if I might catch the paint off guard while it was revealing its true nature).    I  was not really able to make up by mind until the shower curtain we ordered for the bathroom came in (I’m not showing it just yet – it’s a surprise, and it’s awesome).  When we held the shower curtain up to our paint swatches the choice became clear.  The Moonshine looked perfectly fine, but the Paper White really popped.  We decided to go with Paper White, which is a bit lighter and brighter than Moonshine and looked great with our new shower curtain. 

Money Saving Tip:

If you are planning a painting project and have an Ace Hardware nearby check to see if they are having one of their 2 for 1 paint sales before heading out to buy paint.  A couple of times a year, Ace Hardware has a paint sale in which they sell 2 gallons of paint for the cost of one gallon.  The brand and line of paint that is on sale generally changes each time, so if you are particular about the brand you paint with this may not be the sale for you, but if you are like me, and price trumps brand loyalty, it is a great way to get paint cheap – just make sure you buy enough to finish your project or are willing to pay full price if you run out.

We were lucky enough to buy the paint for this project during one of Ace Hardware’s 2 for 1 sales, so we got two gallons of BM Paper White color matched in Valspar Optimus for $40 .  This should be enough to finish this project, and another we have planned (stayed tuned).

The ceiling paint is BM Simply White color matched to BEHR Premium Plus Ceiling Paint.  It was leftover from painting the ceiling in our office and dining room.  I love this color for a ceiling because it is definitely white, without being stark white.  I feel like it makes the room feel a bit more welcoming than a true pure white.  

We hadn't realized just how yellow the ceiling was until we started painting it.  Just look at the before and after.  It is like night and day!  Next to the Simply White the old color looked like the teeth of a 3-pack-a-day smoker. The really troubling part is that we have no reason to suspect that the prior owner of 30+ years ever smoked in the house - we think they actually CHOOSE that color....   

So here is what it looked like after 2 coats of Paper white on the walls and 2 coats of Simply White on the ceiling.  The trim still needs to be painted and we need to do some touching up on both the walls and the ceiling.  So far I am very happy with the paint color we chose, but there is a problem.  The tile in the bathtub surround now looks pink!

Next time, figuring out what to do about the pink tile.

Mini Bathroom Remodel - DeCaulking

After removing the shower doors we were left with a much more open, inviting bathroom, and a crap ton of caulk that needed to be removed.  I think I need to start by emphasizing just how bad the caulk was in this bathroom.  I have only once ever seen caulk applied more poorly than it was in this bathroom (the worst I have seen is our Master Bathroom).  It looked as if a person that REALLY loved caulk, but had no idea how to apply it decided to try their hand at caulking in the bathroom by literally smearing it in the general vicinity of a corner.  But they didn't try just once, oh no.  It looked they they kept coming back to try again without removing the previously applied caulk.  In other words it was really bad.

Caulk Removal - Surprisingly Interesting

Caulk Removal - Surprisingly Interesting

Since we already had to remove the caulk left behind by the shower doors, we decided that it would be a good time to re caulk the entire bathroom the right way, and got to work removing the old caulk.

We started with layers and layers of peeling caulk.

We started with layers and layers of peeling caulk.

Removing caulk really isn't hard, you basically just scrape it off, but having the right tools can make the job even easier.  My tools of choice are a caulk removing tool, a scraper, a razor blade (in a holder) and caulk softening spray.

My caulk removing tools.

My caulk removing tools.

We started by removing most of the caulk on the flat surfaces with the scraper, then moved onto the corners using the caulk removing tool (it's strangely shaped blade is perfect for getting into the corners).  There was still a lot of caulk left after our first pass (see smeared caulk above), so we went back in with a razor.  

Scraping,

Scraping,

scraping,

scraping,

and more scraping.

and more scraping.

Since there were still a few stubborn pieces left we followed the razor blade up with the caulk softening spray.  The spray really didn't spray for me, so we painted it on with a cheap foam paint brush (which was pretty well disintegrated by the end), let it go to work, and then made another pass with a razor blade.  

Caulk Removed.  Tub Cleaned.  Looking Pretty Good.

Caulk Removed.  Tub Cleaned.  Looking Pretty Good.

The tile is looking pretty good following the caulk removal.  A good scrub down did wonders to remove any remaining residue,  and once it throughly dries we will be ready to re-caulk.

Happy Easter

 It has been a rainy Easter today here in the Big Bend.  We celebrated with out first ever egg hunt in our new house, our first ever indoor egg hunt, and our first ever game of find the chicken lego man (a game invented by The Boy).

I hope your family has also had a great Easter (or a great Sunday if you don't celebrate Easter).  If you have some interesting old or new Easter traditions, I would love to hear about them in the comments.


Mini Bathroom Remodel - Removing the Shower Doors

One of the things I was looking most forward to in this mini remodel was removing the shower doors attached to the bathtub.  You may not agree with me, but I think that framed shower doors are gross.  I’m ok with the frameless variety that are popular now, but 1980s framed sliding shower doors are just disgusting.  Here in warm humid Florida mold develops under the seals on the doors, under the handles, inside the tracks pretty much everywhere scrubbing is impossible.  There is no way to get them completely clean without completely disassembling them including the doors themselves, and dipping them in bleach.  I couldn’t wait to get the repulsive things out!

Before:  Ugly, gross, impossible to clean framed sliding shower doors.

Before:  Ugly, gross, impossible to clean framed sliding shower doors.

Framed sliding shower doors are actually surprisingly easy to remove.  It took us less than 5 minutes to completely remove the doors (although cleaning up the residue left by the doors took significantly longer).  Here is what we did:

Removing the First Door

Removing the First Door

First Firebeard grabbed the door on the outside of the bathtub and lifted it up out of its upper track.  Our door had a small clip holding the bottom of the door to the bottom track as well.  I was able to pop this out with a screwdriver while Firebeard held the door up.  Then we moved this door well out of the way so we could handle the next door.

Next Firebeard grabbed the second door and lifted it out of the upper track.  The upper track then lifted up on its own accord, and it was at this point that we realized that the upper track was being held on by gravity alone.  While Firebeard was still holding on to the second door I removed the upper track (so it didn’t fall on him and brain him), then quickly removed the clip holding the door onto the bottom rail.  I was a little too busy preventing injury to get a picture of this part.

Shower Doors and upper Track removed.  Bottom track and sides remain.

Shower Doors and upper Track removed.  Bottom track and sides remain.

We were left with the bottom track, which appeared to be caulked in place, and two side supports which were screwed in and caulked. 

Unscrewing the side supports.

Unscrewing the side supports.

Scoring the caulk on the side supports.

Scoring the caulk on the side supports.

We removed the side supports by scoring the copious amounts of caulk holding them in place with a razor and then unscrewing them.  The tops of the supports came away easily, but the bottom where the side supports met the bottom track required some additional scoring and a bit of twisting to pry them loose.

Scoring the caulk on the bottom track.

Scoring the caulk on the bottom track.

Removing the Bottom Track.  Gross.

Removing the Bottom Track.  Gross.

The bottom track was held on by caulk and an adhesive strip (under the track).  We scored the caulk on the side of the track to loosen it, then simply pulled it free from the adhesive strip.  Underneath was another confirmation of just how gross framed sliding shower doors really are.

Removal of shower doors complete.  Clean up from removal to come.

Removal of shower doors complete.  Clean up from removal to come.

Even with all of caulk and dirt and god knows what else left behind after removing the shower doors I was amazed by how much better the bathroom already looked.  

Total Cost of the Mini Bathroom Remodel Thus Far: Still $58.96

  • Faucet Kit:  $44.99
  • Stem Tool: $5
  • Tub Spout Rings:  3 at $2.99

Next time - Removing the Caulk Left Behind

Mini Bathroom Remodel - Leaky Faucets No More

The first stop on our journey to a beautiful “new” bathroom, is changing out the tub faucets that have been dripping for months and driving me nuts (but not nuts enough to do anything about).  The drip finally got bad enough that my conscience couldn’t let it go any longer, and we dropped some money on a tub faucet trim kit.  The kit we got was the Danco 39696 Trim kit with Cross-Arm Handles for $45 on Amazon.  I picked this one because the handles look a bit vintage, which is my favorite bathroom look, and it was significantly cheaper than buying all of the replacement parts piece by piece.

The Dance Tub/Shower Remodeling Kit.  Check out the before and after.  Tile magically transforms when the new faucets are installed!   

The Dance Tub/Shower Remodeling Kit.  Check out the before and after.  Tile magically transforms when the new faucets are installed!   


I want to first say that if your tub faucets are dripping you probably don’t need entirely new tub faucets, you probably only need the washer that sits at the back of the stem where the stem connects to the water line (which is MUCH cheaper than changing out the whole faucet).  Since our handles were ugly, our stems had seen better days, and our stem seats had been damaged from months of cranking down the handles to stop the leak, we decided to change out the whole assembly.

We started by turning off the water and removing the old handles, and stems.  The preexisting handles were hideous, 1970’s builder grade blocks of metal that I couldn’t wait to be rid of, so I was extremely happy about this part.  When we removed the stems we found that they were in better shape than we had expected, but we went ahead and replaced them anyway since we had the new parts.  I am glad we replaced them because the new ones are much smoother turning. 

Then we found out that we were missing a tool (don’t believe the box when it tells you everything you need is included).  The seat, which looks a bit like a thick washer with a funny shaped hole in it, and sits in the pipe within the wall, needs a special tool to be removed called a seat tool (Olive, one of the kid’s dolls helped illustrate it’s placement).  There was no seat tool included in the kit, and we had no seat tool, so Firebeard when on his first trip to Home Depot and bought one.  That is another $5 if you are keeping tabs.  Once we got the seat out and compared it to the new one we knew where our leak had come from.  It was in rough shape.

So we had gotten everything out, and it was time to start putting things back together again, starting with the shiny seat.  Then in went the stems, their weird plastic covers, the flanges that cover up everything that comes out of the wall, and finally the handles. 

Giant Gap Between Flange and Handle.

Giant Gap Between Flange and Handle.

But wait, there is a problem.  There is a space between the flanges and the handle where the stem is visible.  Not a good look!  At first we thought we had done something wrong, so we took everything apart, and meticulously followed the directions when we put things back together.  Still a gap.  We took everything apart one more time and put everything back together while willing the length of the stem shorter.  That didn't work either.

You would think that all of the parts in the kit would fit together, but they don't.  So we made our second trip to Home Depot trying to find parts that would work.  We bought the longest flanges available ($7 a piece) in the hope that they would cover the ridiculously long (and more expensive to replace) stems.  There was still a gap.

Miracle Solution - Tub Spout Ring.

Miracle Solution - Tub Spout Ring.

So Firebeard made one last trek to Home Depot in a desperate attempt to find something that would fix the problem before we capitulated and exchanged the kit for a much more expensive faucet set.  He came back with tub spout rings, which are tub spout decorations that just happen to fit our flanges perfectly. 

Tub Spout Rings Installed.

Tub Spout Rings Installed.

 They raised the flanges the perfect amount the fill the gap between the flange and the handle and cover the stems.  At just $2.99 a piece they were the perfect budget saving solution.

After!

After!

The only problem we have with them now, is that they make the rest of the tub look pretty poor in comparison.

Total Cost of the Mini Bathroom Remodel Thus Far: $58.96


Seattle and the Dinosaur

Last week I went to Seattle for a conference and Fire Beard tagged along (he had just finished the bar exam and needed a break).  Even though I didn't really have nearly enough time to explore the city we had a great time, got to see some of the iconic Seattle sites, and now want to go back to see the rest.  

Before we left The Boy gave us one of his Lego dinosaurs to keep us company during the trip.  We carried the dinosaur everywhere we went and took pictures of it exploring the city with us.  He went to the Space Needle, on the monorail, to the Pike Place Market, and to the first Starbucks.  

At the first Starbucks we discovered the “You are Here” mug series, and picked up souvenir mugs for the kids (they actually asked for mugs - even kids know that Seattle is the coffee mecca).  The Girl got the Seattle mug, and The Boy got the Washington mug.

When we got home the kids got their mugs, and the dinosaur was returned to The Boy.  After we explained how much the dinosaur enjoyed Seattle and showed him some of the pictures from our trip, The Boy decided that the dinosaur missed Seattle, and made the dinosaur a home in the Seattle mug.

DSC_0013.jpg

That lasted for a few days, until the Lego Space Needle that we had ordered during the trip as a present for The Boy finally showed up.  Now the dinosaur is trying to claim a new home - the Space Needle.

Happy Saint Patrick's Day

It’s Saint Patrick’s Day!  Here in the US that mostly means wearing green, pinching people that are not wearing green, and drinking!  If you are lucky enough to live in an area with an active Irish community, it can also be a great time to learn more about Irish Cultural Heritage.

Here in the Tallahassee/Big Bend Area we are lucky to have a small but active Irish community.  Every year they put on a Saint Patrick’s Day Parade and Festival.  This year the parade was a lot of fun.  Even The Boy, who generally hates the large crowds and loud noises inherent in parades, had a great time.  That is probably because the Saint Patrick’s Day parade is a rather more intimate affair than most parades.  The Saint Patrick’s Day parade is not a big parade by any means.  There are not a lot of people in the actual parade, and there are not huge crowds attending.  From beginning to end the parade took less than 5 minutes to pass by us, and took at most 30 minutes to make the entire 0.6 mile circuit around Lake Ella.  The people in the parade that hand out candy and necklaces to the kids were able to literally hand out candy and necklaces to the kids rather than throwing it in the general direction of the kids in the crowd, and everyone was very friendly.  Generally my kids want to go back home as soon as a parade is over, so I was pleasantly surprised when they asked to stay longer.  We made our own circuit around the lake before we left, exploring the stands and booths set up for the festival along the way.

But today is Saint Patrick’s Day, which requires some celebration.  If you are staring a pint of green beer in the face, and feeling a bit green yourself, I would like to offer an alternative; The Grasshopper.  The Grasshopper is a mint chocolate flavored, green colored cocktail, that probably originated in New Orleans. It tastes a bit like melted mint chocolate chip ice-cream, and is really good!

The Grass Hopper

Ingredients

  • Creme de Menthe
  • Creme de Cacao
  • Half and Half, Single Creme, or Light Cream

Directions

  • Combine equal parts Creme de Menthe, Creme de Cacao, and the cream of your choice in a cocktail shaker
  • Fill the shaker with Ice
  • Shake the combined ingredients and ice until the outside of the shaker becomes frosty
  • Fill Martini Glasses with the drink, straining out the ice 
  • Garnish with Mint Leaves (Chocolate Mint is preferred if available)


Hall Bathroom Mini Remodel - The Plan

I would like to introduce you to my hallway/kids bathroom.  Since we moved into our new house, almost a year ago now, we have barely touched this room (other than to clean it, and you know...use it).  While it is perfectly functional, it is also extremely boring.

The Before Picture

The Before Picture

When I started feeling bad after Christmas we took a bit of a break from our big remodeling projects.  Even though I am feeling better now, I’m not quite ready to jump back into the heavy work – enter the bathroom mini remodel, also known as, how much can paint really do? 

Before - From the other Side

Before - From the other Side

My vision for the bathroom is to make it a mostly grown up space with a few fun kid friendly touches, that will grow with our children.  We will be fixing some problem areas, painting, adding some storage, and accessorizing in a fun, big kid sea creature theme.  No flooring will be replaced, no walls will be changed or removed.  All of the major features of the room will stay more or less intact.  This is basically a face lift, and I am really excited to see just how much difference it can make.

So what is the plan?

  • Change out the leaky tub handles
  • Remove the sliding glass doors and replace with a fun themed shower curtain
  • Re-caulk the tub and tile (it really is that bad)
  • Color the tub and floor grout since it does not look clean regardless of how much  I scrub it
  • Paint the walls, ceiling, and trim
  • Update the vanity with paint, shaker style molding, and new hardware (and possibly a faux finished countertop)
  • Add some shelving above the toilet and next to the sink
  • Change out the mirror
  • Add some finishing touches, like towel hooks, pictures, etc
  • And now that I have seen the pictures for this post I think improving the lighting may be in order as well

How long will all of this take?  Well since most of our time to work consists of weekends and the evenings after the kids go to bed, it will probably take a while even though this is only a mini remodel.  Oh well, such is life.  I hope you enjoy the journey with us!

Tallahassee / Big Bend Community Calendar

Around mid December last year in the midst of many family friendly holiday actives, I began lamenting that similar activities did not happen more often the rest of the year.   The Tallahassee / Big Bend Area of Florida where I live is a great place for College students and young adults without children to find fun things to do (there are numerous events, bars, clubs, and shows catering specifically to them), but if you are a young to middle age adult with babies or school age children it can be hard to find things to do.

I decided that my New Year's resolution would be to find more community activities that my family could participate it, and enjoy the community I live in more.  Then soon after Christmas I started feeling poorly and promptly forgot about my resolution.  Now 2 months, many doctors visits, and the miracles of modern medicine later, I am feeling much better, and am ready to start my resolution.  

I began by trying to find actives for my own family to participate in.  I wanted to find things that looked fun or educational, didn't cost an arm and a leg, and were not being held on a school night.

As I found things to do, I realized that other families were probably struggling with the same problem, and decided to post what I found online in the hope that other families could benefit as well.

All the events that I find will be posted on the new Community Calendar page linked to from the Gerwerken Crafts Main Page.  So far there are two events, The Saint Patrick's Day Parade and Festival being held this weekend, and the North Florida Veg Fest being held next weekend.  You can see additional details on the calendar page.

If you know of an event that you would like to see on the calendar please tell me about it, but keep and mind that I am not listing all community events, just those that fit my criteria.  So, what does it take for an event to be on the calendar?

  • It must be either an event it would be appropriate to take a school aged or younger child to, or a date night event.
  • It can't be held on a school night.
  • It needs to cost no more than $20 for my family of 4 to attend (I might occasionally bump that up to $50 if something really amazing is happening.
  • It has to be something I would take my family to (I know, this one is really subjective, but I hope you like my choices).


On an unrelated note, you might notice a few changes to the Gerwerken Crafts website now, and in the near future.  I was hoping to finish them all prior to the calendar going live, but decided that getting this weekend's event out was more important.

Playa is a lake again!

We have a Lake Again!

We have a Lake Again!

About 2 months ago I told you how our neighborhood lake had dried up, leaving us with a playa, or dry lake bed.  The playa wasn't bad, the kids enjoyed playing on it, but we missed our lake.

Then about a week ago it started raining.  It rained for 3 days and 3 nights (thanks hurricane season), and at the end we had a lake again.

Kayakers!

Kayakers!

Then as we were driving by on Saturday, I saw something I didn't think I would ever see in this lake, Kayakers!  I actually jumped out of the car to take these with my phone before they got too far away to see (sorry they are not the highest quality).  

So far the lake only has a couple of feet of water, but we should be getting some more water later this week.  Hopefully soon, the lake will be back to it's former glory.

We have Floors in the Office!

Office to Do List:

  • Remove old gross Carpet and Carpet Pad - Check
  • Pull out the 12 Million Staples that were used to install the old carpet - Check
  • Tear down old cat hairy window treatment and Discover Missing Piece of Crown Molding - Check and Check
  • Remove base boards - Check
  • Remove piece of crown molding next to missing molding - Check
  • Scrap/Strip/Sand Peeling Paint from Molding - Check
  • Patch holes and Prime patches - Check
  • Prep Ceiling and Walls for paint - Check
  • Paint Ceiling and Walls - Done
  • Install Flooring - Done
  • Sand and repaint Base Boards
  • Reinstall Baseboards
  • Install quarter round molding
  • Reinstall Crown Molding with the addition of Missing Piece
  • Finish Painting All Molding
  • Make Pretty!


The last I left you in our home remodel saga, we had just finished preparing to paint the office, and now not only has the office been painted, we have floors.  Glorious floors that are neither covered in cat hair, or possessing an odd smell!  Is it weird that this makes me feel like a kid at Christmas time?

The flooring is glue together tongue and groove that does not click together.  We installed it completely on our own, and it was our first time installing this type of floor.  We had read or watched every single tutorial on the subject we could find before we started and read the full manufactures directions, even so, when we first started installing it, we started questioning the sanity of doing it ourselves.  By the time we finished (DAYS later) it had become easier, we we had become faster, and now the idea of doing the next room doesn't seem so bad.  I think I may go into the detail of installing it a bit when we do the next room and share some of the mistakes we made and the solutions we found.

Now that the floors are in, I feel like we have rounded a serious corner in our office remodel and we are finally starting to see the light at the end of the tunnel.  The walls and ceiling have been painted, and the floors are installed.  It is looking like a room again.

Ok, I will admit that there is still plenty of work to do, but it feels like I am almost there.  I feel motivated to hurry up and finish up the rest of the tasks on my list, so I can start to move furniture in!


From Lake to Playa in one Season

When we moved into our new neighborhood in April we were excited about the lake.  It was a big beautiful lake that stretched into the distance in a rather mysterious way, making it hard to tell just how big it was.  I made it a point to drive by it on the way to and from work, because it made me smile whenever I saw it.  And after dinner we would walk down to it to watch the birds. At the time the rain fed lake overflowed it bounds, creating a little creek that wound around the neighborhood.  Ducklings were born, tadpoles turned into tiny frogs, and we looked forward to a long summer enjoying the lake.

Then the wet Spring turned into a dry summer, and the lake began to shrink.  It is not strange for shallow lakes here to lose some of their water to evaporation in the heat, and we have a large lake nearby that drains periodically when the local aquafir is running a bit low, so we were not that worried.  After all, summer is hurricane season, surely we would soon have a big storm that would rain for days filling our little lake back up.

More birds came enjoying the shallow water and easy access to snails.  We even got some rare birds for the area like spoonbills.  It was still beautiful in its diminished state, and the birds made up for the lack of water.

Now it is almost fall,  Hurricane season will be over soon, and our lake is empty.  I continued to drive by to and from work, and we continued to walk down after dinner, but the snails and the birds are all gone, except for the occasional vulture.  The weeds are several feet tall in some areas, and where they do not grow the soil is dry and cracked like a desert.  Our neighbors seem unconcerned.  It has, as they point out, been a very dry summer.  We still have hope that our lake will fill back up, but if it doesn't, we will still have a nice playa to play in.

Former formal living room turned office

I promised pictures of our new house when we moved in months ago, and I did not follow through.  I had forgotten just how long it takes to move in, and when you are doing some redecorating/remodeling on top of that, it takes even longer.  So my house has been looking a bit post apocalyptic, and I haven't been super keen on showing that off.  However, I've realized that is part of the process.  The house is going to look worse before it looks better, and it is a tad misleading to show the before and after and not the days/weeks/months of work that it took to get to the after, and say, "It was easy, you can do it!"  So, without further ado, the office/craft room/guest space; a work in progress.

Former Formal Dining Room

Former Formal Dining Room

Our office is the former owner's formal dining room, which went nicely with their formal living room (to be seen later).  We are not that formal, and an office is a much more useful space for my family than a formal living space would be, so the former formal living room will be our very large dining room, and the former formal dining room will make a nice cozy office.

Office in the Making: To the Left

Office in the Making: To the Left

Office in the Making: To the Right

Office in the Making: To the Right

Carpet and baseboards have been removed, bad paint has been stripped, holes have been patched, and priming is complete.  We are finally just about ready to begin painting.  It has taken us a really long time to get to this point.  Why?  This...

And This...

Peeling Paint.  LAYERS of Peeling paint.

Being a good little worker that doesn't cut corners, I stripped the paint.  And stripped the paint.  And stripped the paint.  And stripped the paint.  

About 7 layers of paint (and many hours) later I was left with this:

And I realized that I had been an idiot, and learned a lesson.  I have no intention of staining that door, and the door is nothing special.  I simply need to make sure that my new paint adheres correctly.  So from now on, I will not strip when sanding will do, and I will not sand when liquid sanding will do, and I will not spend more time and money repairing an object than it would cost to simply replace it.


Next time painting, and figuring out what to do about this;

Mysteriously Missing Crown Moulding 

Mysteriously Missing Crown Moulding 

End of Summer

At the beginning of the summer as the temperature rises, the native Floridians prepare to hibernate in their climate controlled dens for the summer.Knowing that going out in such high temperatures can cause severe burns, incite violence, and completely stop the brain from functioning, the native Floridians turn down the air conditioner, pull the blinds closed, and prepare to avoid the sun as much as possible for the next several months. 

As fall approaches the Floridan begins to stir.Since the temperature does not change in their climate controlled dens, it is not clear what lets the Floridan know that fall is approaching.Perhaps they can tell based on subtle signs, such as the the snow birds returning from their annual migration, or the proliferation of pumpkin spiced everything.What we do know, is that the Floridians emerge from their caves every year on labor day weekend.If that that time the Floridian begins to sweat, it is said that summer will last another 6 weeks, but if the Floridian doesn’t sweat, legend says that Fall will come early.
beginning of fall


We had a high of only 81 F today, and we are forecasted to have a day this week with a low in the 50s.  That is unprecedented.  I don't remember the last time it felt cool outside before October....ever.  It is amazing.  I'm actually sitting outside today writing this.  

My kids even willingly went outside to play today.  I think that may be the first time they have willingly gone outside to play without water involved since we moved into this house in April.   We decided to put up a temporary play area for them out of a sun sail and table and chairs to encourage them to go out a bit more, and so far it is working!

We originally got the sun sail from Ikea to block out the horrible light of the day star, but began to melt during our original attempt to put it up, so it has been in the hall closet ever since.  It made a great little lean to type structure for the kids to play under.  

If you have any suggestions for outdoor activities that won't cost an arm and a leg, that big kids would like, please leave a note in the comments.  I would love to hear your suggestions!

New Chicks!

We just got a bunch of new baby chicks!  We are pretty sure they are a mix of red sex links and barred rocks.  They should all be pullets (girls), but I guess we will find out what they are over time.

The little dots on their heads are to tell them apart.  Don't worry, it won't hurt them.

Arn't they adorable!