The Bathroom Reveal

The blog has been a bit neglected lately since I don’t have a lot of spare time, and I have been spending most of the time I do have on the podcast (which is getting better and better each week – check it out!).  It hit me the other day that I had never officially revealed how the bathroom looks now that we are finished with our mini remodel.  Let's remedy that now. 

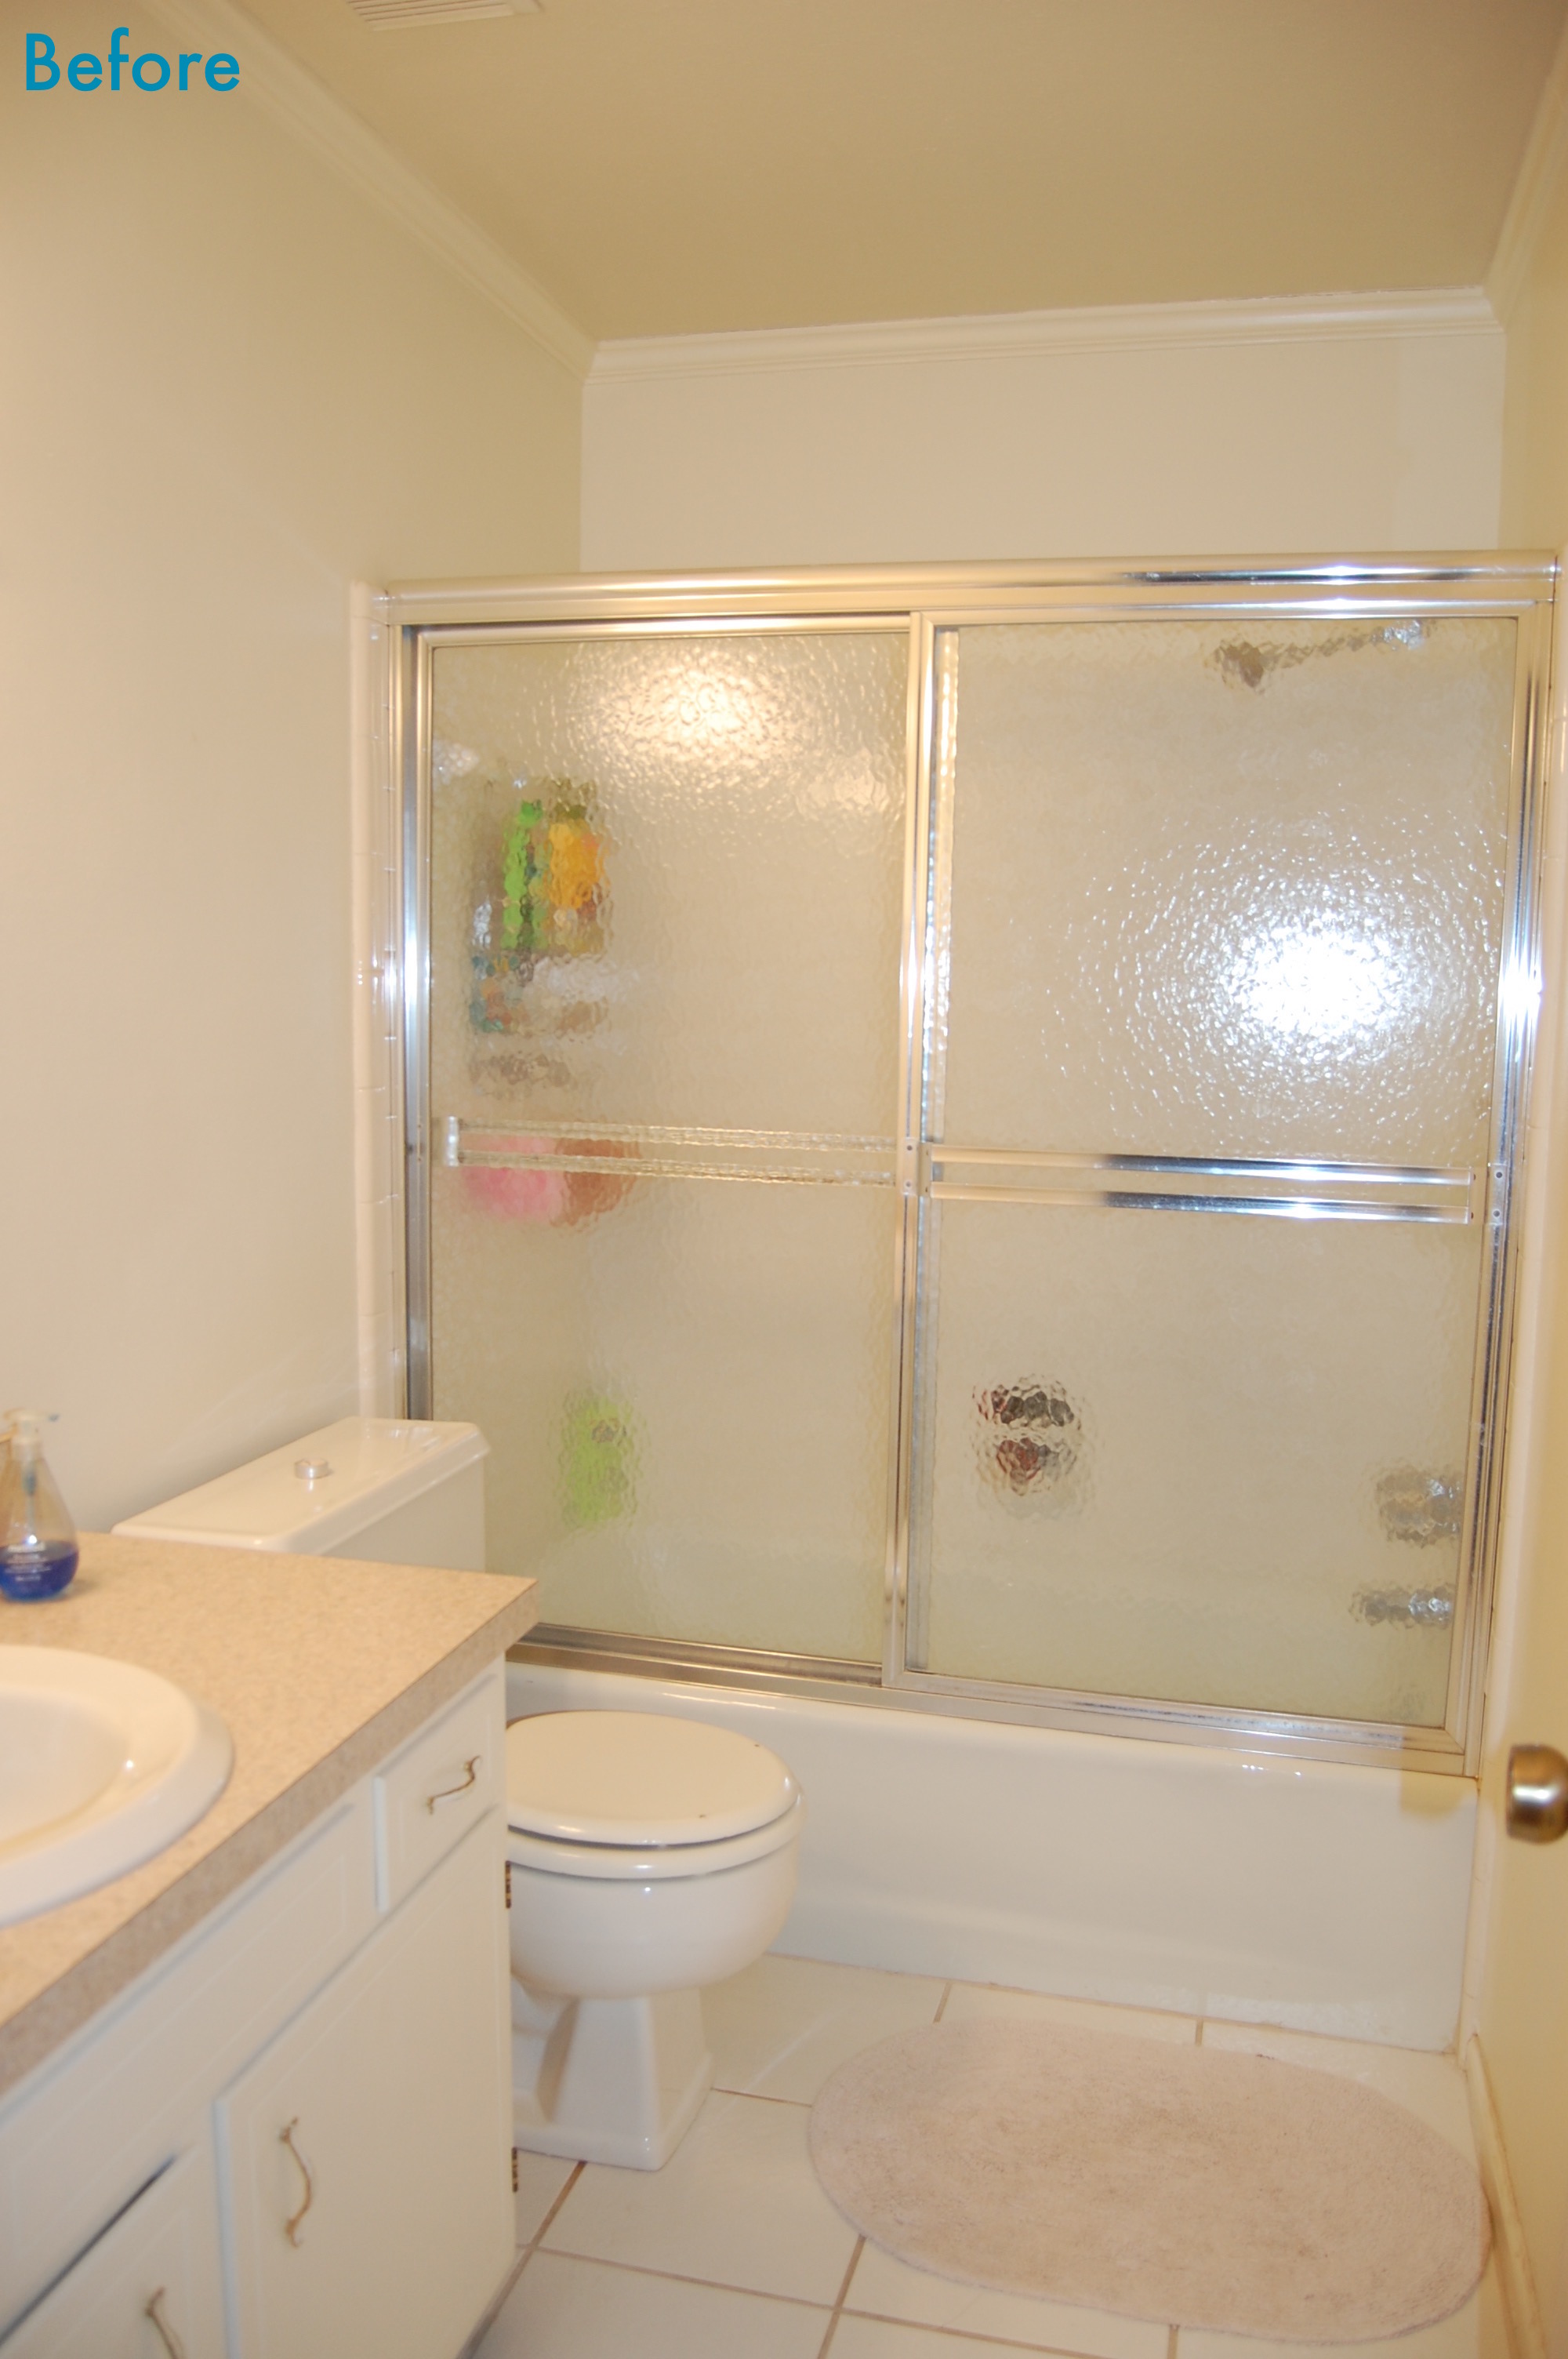
Before I reveal how good it looks now, I want to remind you how it looked when we started.  Our house was built in 1977, and while it had been well maintained, maintenance was about all that had been done to it.  The late 70’s and early 80’s were still alive and well in our home.  The hall bathroom was a 1970’s builder’s special – basic, beige, and boring.  It was serviceable, there was nothing really “wrong” with it, but it felt dingy no matter how much you scrubbed it and the atmosphere was far from relaxing.

After the shower doors were removed.

After the shower doors were removed.

We started the bathroom’s transformation, with removing the stuff that couldn’t be salvaged.  The Shower doors were the first to go.  It felt SOOO good to get those out – they were gross, and no amount of bleach and scrubbing would get the parts under the door seals clean!  Next we removed all of the caulk ….. the ridiculously bad, hideous caulk.  It was really terrible.  It was like they had a bad caulk, and decided to cover it up with more bad caulk – repeatedly.  It looked like an incredibly cheap hack job.  If we had done nothing in the bathroom but replacing the bad caulk, it still would have been a huge improvement in the appearance of the whole bathroom. 

Significantly Cleaner Looking after painting.

Significantly Cleaner Looking after painting.

Next we decided to cool things down a bit.  We painted the walls in BM Paper White, a cool, almost white grey, and the trim in BM Simply White.  This left the tiles in the bathtub surround looking distinctly pink.  Since new tile was not in the budget, we painted the tile using Rust-oleum tub and tile paint.  I admit the tile looked great, but if I had it to do again I don't think I would paint the tile, I just don't think it will be very durable.  

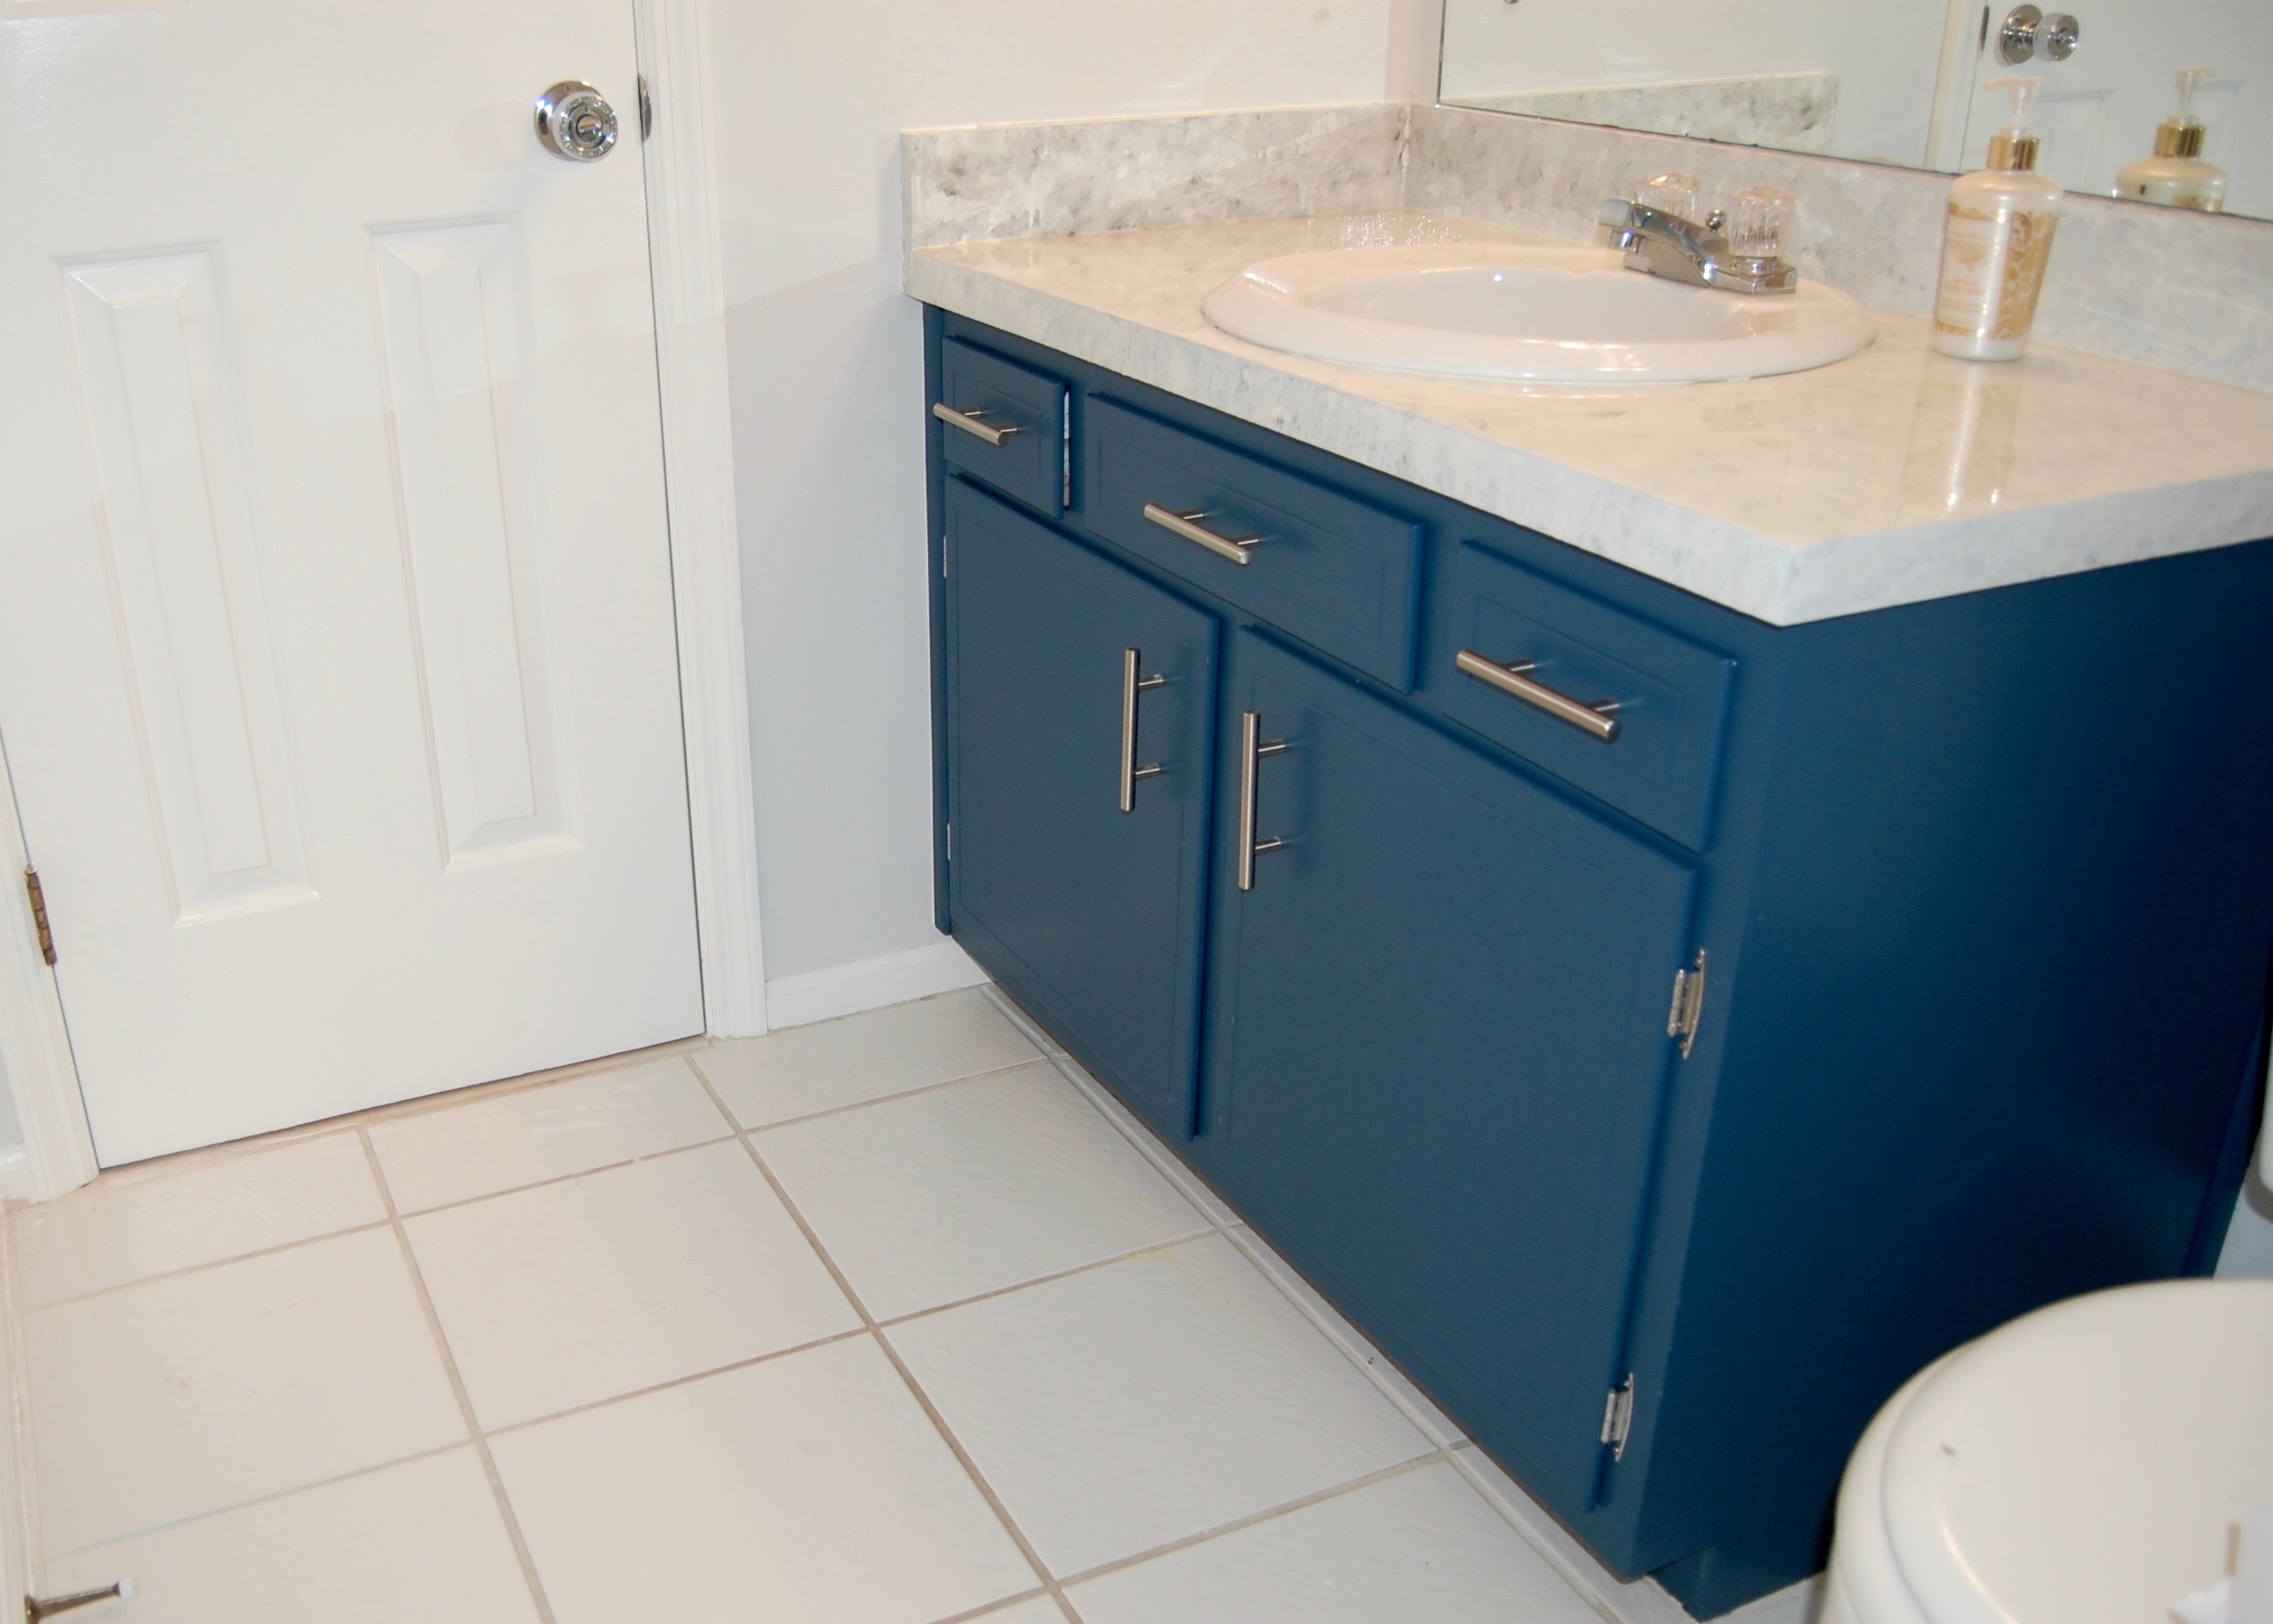
The bathroom cabinet after a coat of paint, new hardware, and a refinished countertop.

The bathroom cabinet after a coat of paint, new hardware, and a refinished countertop.

Cabinet interior after paint and new flooring.

Cabinet interior after paint and new flooring.

Next, we completely refinished the cabinet, inside and out.  It received a new paint job, and hardware.  The countertop was also refinished.

Floor Tile:  Before decades of dirt, after nearly new!

Floor Tile:  Before decades of dirt, after nearly new!

We even made the tile look nearly new by refreshing the grout.

While there are still a few things we would love to update as time and budget allow (like the mirror), the end result of this mini makeover was even better than we expected.  The bathroom looks fresh and clean, and it has a bit of personality now.  Something that was really lacking previously.

The beautiful Danica Odyssey shower curtain, that was the inspiration for the entire bathroom transformation.  I still love it and think it was a great choice.  It really makes the bathroom feel like a kid friendly space, without being a kid's space.

DSC_0203.jpg

To finish off the look I added a neon pothos in an aqua orchid pot, and some beautiful photos of the ocean.  The photos were given to Firebeard and I by the photographer, Joe Boris, for our wedding, and they are beautiful.  If you are looking for a photographer in the Atlanta area he is your man.  He does everything from lifestyle photography to corporate photography, and his work is impeccable.  

I think the most shocking thing about these before and after pictures is that one of the few things we didn't change in this bathroom was the lighting.  Initially we had fully intended to change out the lighting, because the bathroom just seemed SOO yellow when we started the makeover, but once we removed the yellowy beige paint from the walls and ceiling the room transformed.  Without yellow reflecting everywhere the room suddenly seemed bright, white, and cool.  It was an amazing visual transformation that we really didn't expect.  

To see all of the details of the bathroom transformation, including our many trials and tribulations, you can find them all here.

Stay turned for additional mini remodels!

Completed Cabinet

I hope everyone had a wonderful July 4th, whether you celebrate American Independence or not.  I am happy to say that in my house we took a little break from the home remodeling projects and actually did a bit of relaxing.  We decided to stick with tradition this year, and did all of our normal 4th of July activities.  First was dinner - burgers/veggie burgers.  I make a cake that the kids refused to eat.  Then we moved on to the annual Nerf war, which, as dictated by tradition, only ends when the losing child begins to cry.  Finally the combined blood sacrifice to the mosquitoes (lest they suck out our souls), and fireworks.  It all ended at about 10pm with all of us literally dripping sweat (Florida), and smelling strongly of exploding gunpowder.  Good times.

I actually felt good about relaxing this 4th of July rather than guilty for slacking off because we are nearly at the finishing line in our mini bathroom remodel.  Today I finally get to reveal the last of the big items in the remodel, the bathroom cabinet. 

Before: Dated, dreary, and dirty looking

Before: Dated, dreary, and dirty looking

Now:  Brighter, and whiter yet more colorful

Now:  Brighter, and whiter yet more colorful

The bathroom cabinet has been nearly complete for quite a while, the only thing that was stopping us from completing it was the installation of a tip out drawer in the place of the cabinet’s false drawer front.  This sounds easy enough, but it was a complete nightmare.  I will go into the tilt out drawer a bit more next time, but for now, bask in the pretty completed cabinet.   

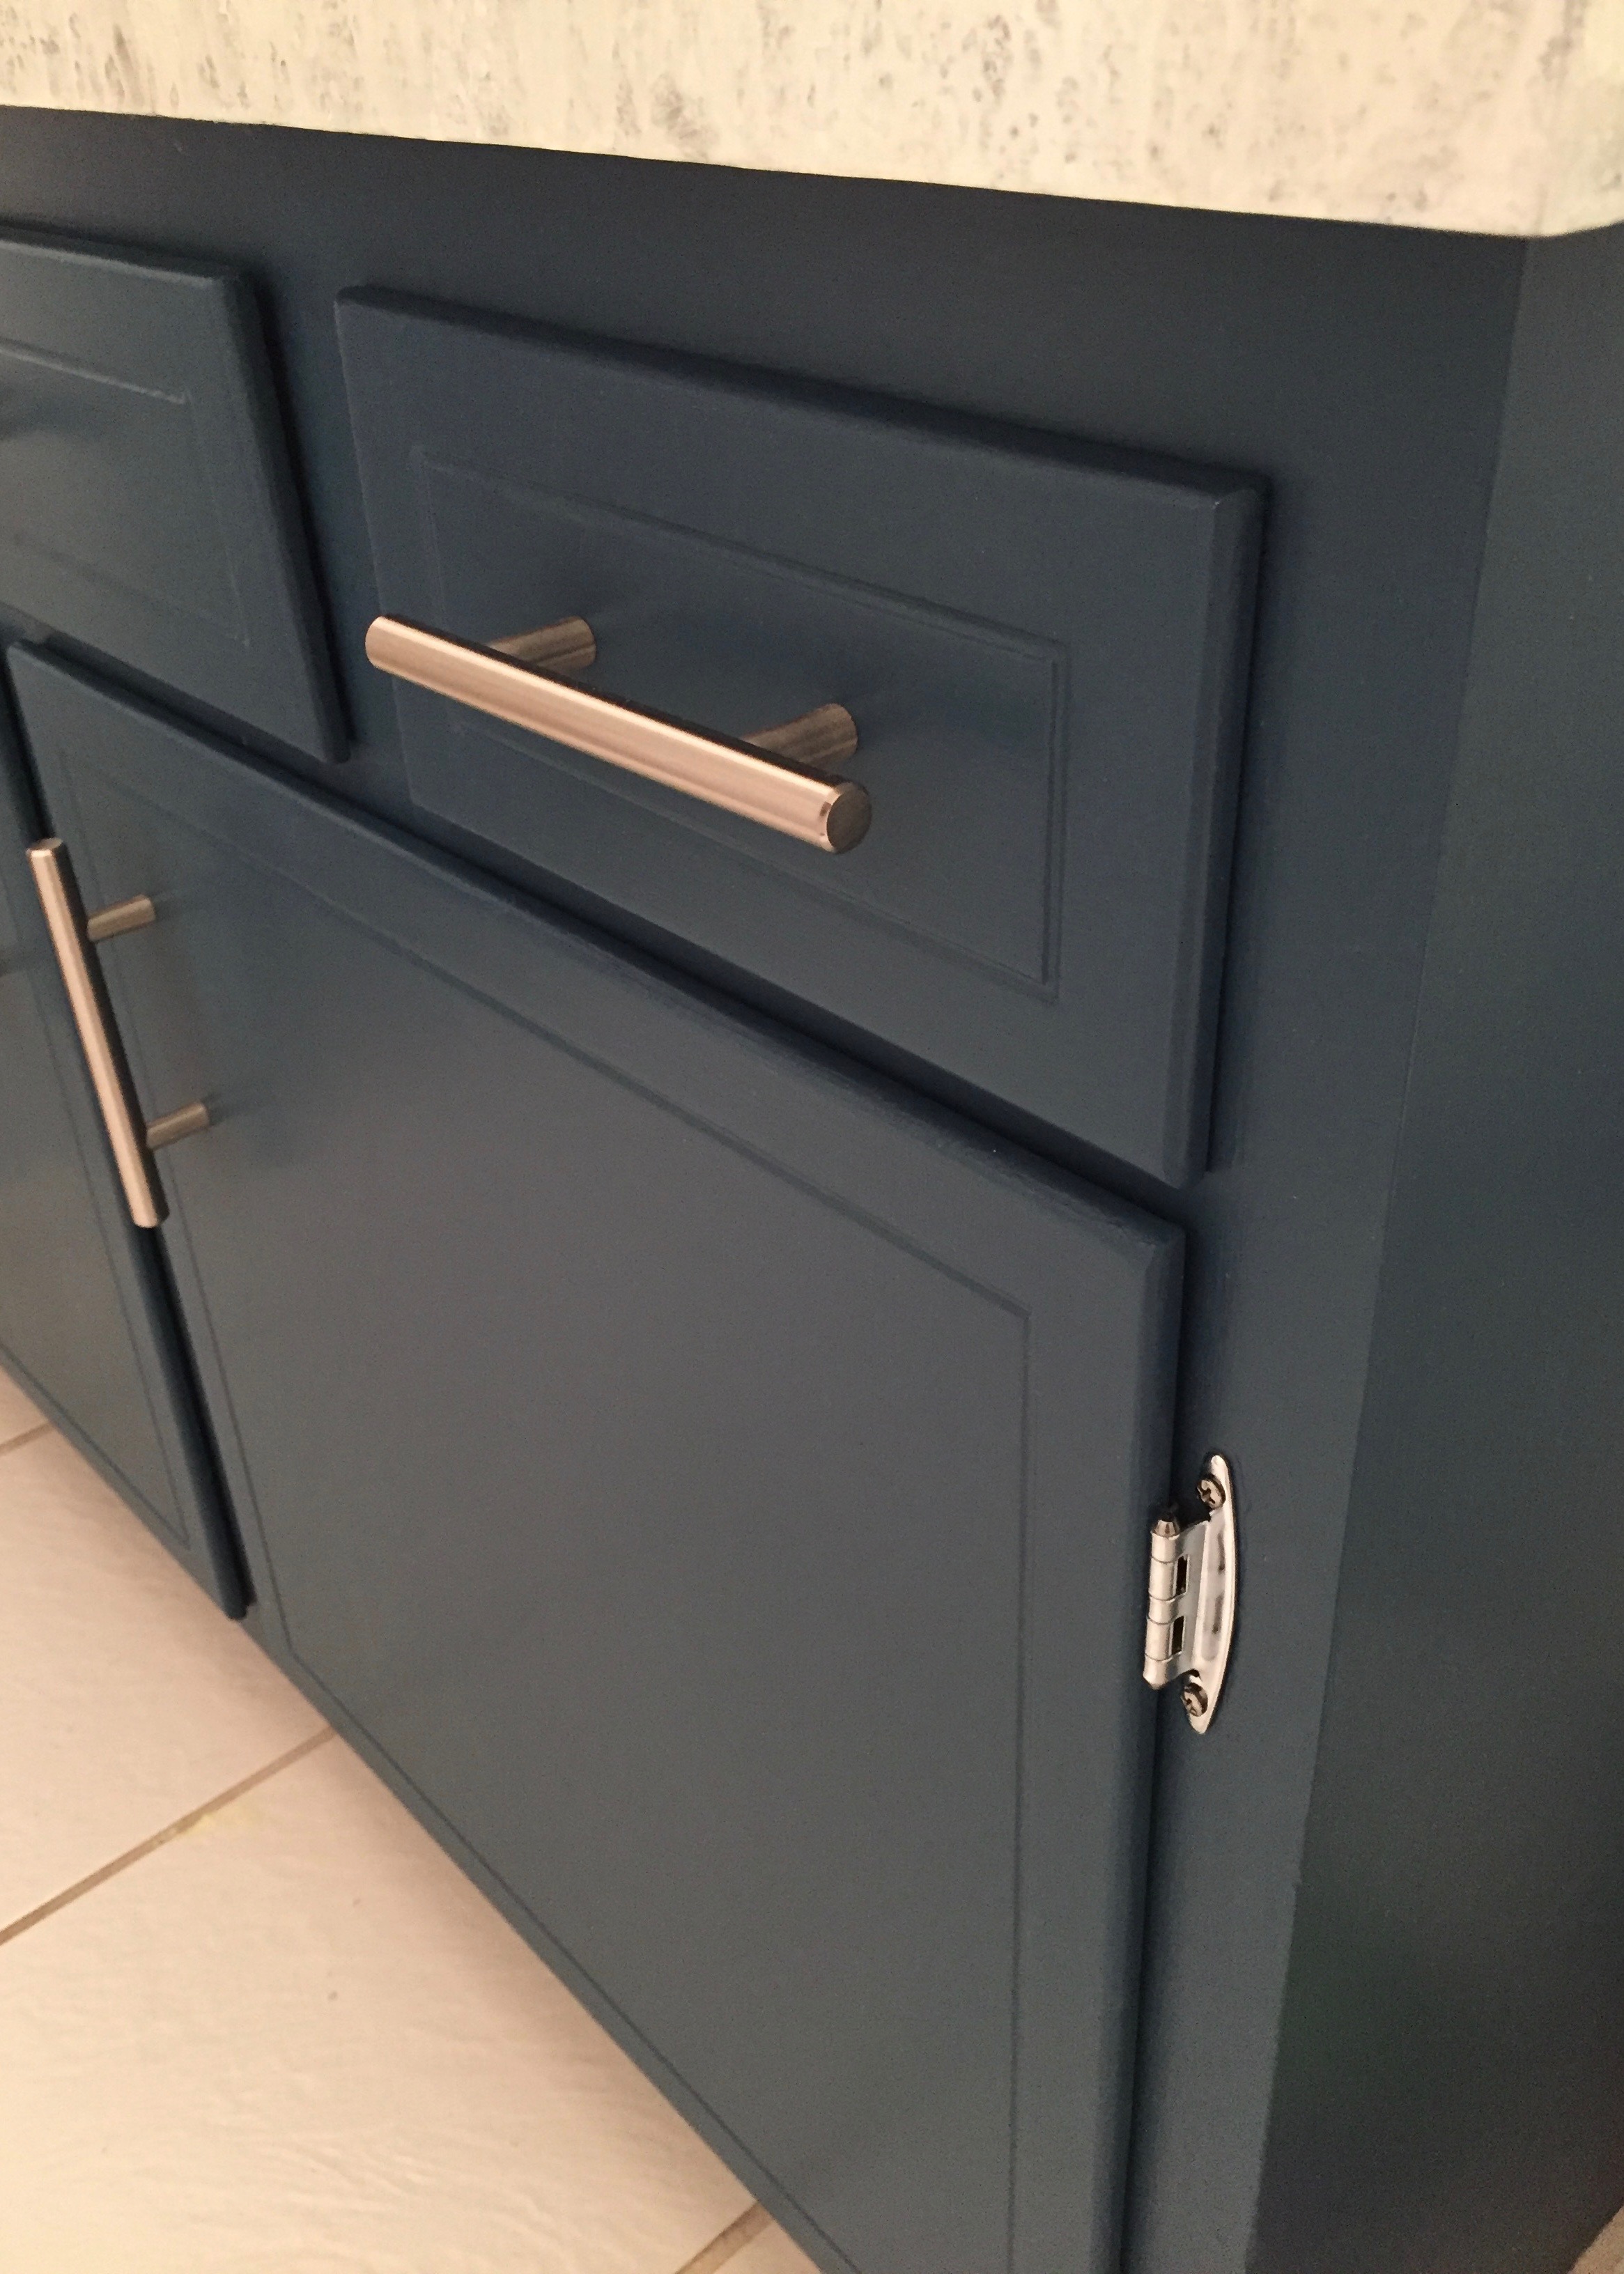
The color is Everglade Green by Clark + Kensington, color matched to Valspar’s Interior Satin wall and trim.  We wanted to match the dark blue of the shower curtain and actually took the curtain to several stores before we found Everglade Green.  Initially wasn’t completely sure of the color (while it was the closest I could find it still wasn't a perfect match) so I just got a small tester can.  I ended up painting the entire cabinet with just the tester (total cost $4).  I may eventually polyurethane over the paint if it starts to wear a little too fast, but for now it is holding up pretty well.

We also changed out all of the cabinet’s hardware.  The old stuff was just a bit too frumpy for our sleek new look.  The hinges are super basic chrome hinges from home depot similar to these.  They were about $1.50 each, or $6 for entire cabinet.  The European Steel Bar Style handles, by Franklin Brass were another Amazon steel.  We got 10 for $16.99, about a $1.70 each (as of this writing they are currently $26.00 for 10, or $2.60 each).  I am pretty happy with the quality of these and would definitely get them again, however, they were not as shiny as I expected them to be.

Total exterior transformation cost $18.50, not too shabby.


This post contains affiliate links, all opinions are my own.

Worthwhile Tile Smile

I watched the Simpsons movie for the first time the other day.  It was ok.  I’m not sure if it just hasn’t held up that well over time, or if it wasn’t especially funny to begin with.  I think my favorite part was probably Homer “fixing” a sink hole in the yard by sticking baby Maggie in it, and the fact that “fix sinkhole” was on Homer’s to do list in the first place.  I will try not to spoil a nine year old movie, but suffice it to say that sticking the baby in the sinkhole did not fix it, and because The Simpsons is a cartoon where everything works out in the end, the expanding sinkhole actually benefited the Simpson family, rather than hurting it like it would in real life.  Oh, if only neglecting maintenance,  and a lack of foresight/follow through were as advantageous in real life as they are in the movies.

Hole left over from shower door removal.

Hole left over from shower door removal.

Cracked Tile Discovered under shower door support.

Cracked Tile Discovered under shower door support.

When we removed our sliding glass shower doors we were left with some holes in the tile where the shower doors had been screwed to the wall, and a piece of tile that may or may not have been broken before the shower doors were removed.  Even though we plan to completely remodel the bathroom in a few years, leaving the screw holes open and the tile cracked simply was not an option since water from the shower could seep through the holes destroying the drywall behind the tiles, and worse, the subfloor under the tub (ounce of prevention, pound of cure, etc).  It was clear we needed to fix the tile.  What was less clear was how to go about doing it. 

The obvious choice was bathtub appropriate caulk.  After all, it is designed specifically to waterproof the gaps between tile and other bathroom surfaces.  The problem was that, after the initial caulk removal marathon in the bathroom, I was not feeling very charitable toward caulk, also, a big glob of the stuff on the broken tile would look terrible.  So I headed to Home Depot, looking for another solution, and to my surprise found one.

JB WaterWeld is an epoxy putty designed to repair moist or underwater surfaces.  Better yet, it can be used on ceramic (like my tile) and many other slick surfaces.  It is also pretty cheap (about $4 for enough to rebuild an entire tile), pretty easy to work with (like a cross between drywall spackle and modeling clay), and cures in only an hour.    It is pretty much an ideal tile repair material in my opinion, but there is a catch.  It dries off white, so it may not match your tile, and like dry wall hole filler, it needs to be sanded if you want your patch to be smooth.  Fortunately for us we were already sanding our tile so that we could paint it, so the sanding wasn’t a problem, and we were painting the tile, so the color of the patch wasn’t an issue either.

As a side note, a lot of people use JB water weld to fix plumbing leaks, and a lot of people complain about its inability to fix pressurized plumbing leaks.  I didn’t use it to fix a pressurized leak, so I do not know if it works well for that application or not.  It worked wonderfully for my application, but I don’t think I would use it to permanently fix my plumbing – I would replace the leaking pipe, or call a plumber. 

One Amazon reviewer also mentioned that he used this stuff to fix his bridgework, and it did such a good job that he was able to “eat corn on the cob” ...  I don’t recommend this application either.

As a side, side note, some of the questions and answers for this product on Amazon are really funny.  My Favorite Question:  “bathtub”.  That’s right, simply “bathtub”.  The answers are the best.

To use JB WaterWeld;

  • Prepare the surface to be repaired by sanding (if possible), cleaning, and drying
  • Cut off a piece and squish it up for a bit (like sculpey clay), until it becomes soft. 
  • Stick it on the surface to be repaired, and kind of smoosh it in to all of the cracks and holes and things that need to be filled. 
  • Smooth it out a bit at this point so you don’t have to sand as much later (it cures pretty hard), just be sure all the cracks and holes you filled stay filled while you are smoothing it out.     
  • Let it dry/cure.  It should take about an hour.
  • Sand it smooth/level with the surrounding surfaces (if desired).
  • Paint or otherwise finish the surface (again, if desired).
JB WaterWeld Applied

JB WaterWeld Applied

After Sanding

After Sanding

We of course sanded and painted our patches, and when we were finished the holes left by the shower doors were nearly invisible, and it was even hard to tell the broken tile was ever broken.

After Painting - The repair is nearly invisible!

After Painting - The repair is nearly invisible!

All in all the easiest fix we have made to this bathroom so far, and I recommend JB WaterWeld without hesitation to fix your tile, but not your teeth.

(This post contains affiliate links, but I was not paid to review this product, I just like it).

Tile Time

Last time I told you about the self-induced nightmare of prepping our tub surround tile to be painted.  It was an activity that should have taken hours, but took us over a week.  We went so far beyond the manufacture’s recommendations for surface prep that by the end we were questioning our own sanity, and wondering if it was all worthwhile.

Near the End of our Tile Prep Nightmare.

Near the End of our Tile Prep Nightmare.

The painting portion of this project didn’t take that long, but it wasn’t a lot of fun.  With our Rust-oleum Tub and Tile Refinishing kit Firebeard was able to do 3 coats of paint on the tile during the course of several hours while I was at work, and I am still thanking him for saving me from this.  The paint smelled so badly and so strongly that when I got home I could smell it feet from our front door.  Even with windows open and fans on It was truly, overwhelmingly bad.  Firebeard had been wearing a pretty high quality respirator while painting all day, and was still feeling pretty sick from the fumes when I got home.  We actually left the house for several hours that evening to give the paint smell a bit more time to dissipate, and it was JUST bearable by the time we got home.  Fortunately The Boy and The Girl were on a sleepover, so they were not subjected to the worst of the smell, but it took an additional 2 days for the lingering paint smell to leave the house, and even now, about a week later, the bathroom still smells unpleasantly odd.

Per Firebeard the actual painting was not as easy as a typical painting project.  The epoxy paint dried quickly, so there was very little time to fix mistakes.  The paint also seemed to eat the foam paint brushes and rollers he was using, and a new one had to be used for each coat, or he risked pieces of foam being embedded in the paint.  Combine that with the brain killing fumes, and this was not one of his favorite projects.  However, even given all of the brilliance of hindsight, he is considering getting another kit and doing one more round of painting before we caulk because a few spots did not get as thoroughly covered as he would have liked.  I guess it couldn’t have been that bad if he is willing to do it again.

Before - Pink Tile

Before - Pink Tile

After - Bright White Tile

After - Bright White Tile

There is no denying that the overall look of the tile now is a tremendous improvement.  It looks clean and fresh, and surprisingly shinny.  It does have a slightly odd texture now though, a bit like orange peel texture but more subtle.  We also have a few spots that are a less perfect than others as is pretty typical when painting by hand rather than with a sprayer.  This doesn’t really bother me, but it is worth knowing if you decide to do it yourself.  The paint also perfectly covered the patched holes left behind after removing the sliding shower doors which was a big plus (I will tell you how I patched those next time).

Close up of the tile's new texture.

Close up of the tile's new texture.

One of the less perfect Spots.

One of the less perfect Spots.

So was all of the prep work worth it?  At this point it is hard to tell.  Bad prep work usually doesn’t become obvious until something has been used for a while and all of the paint suddenly starts peeling off, and good prep work usually goes unnoticed.  What I can say for sure is that we did not experience the peeling or puckering paint that some Amazon reviewers said they experienced.  So far our paint seems VERY securely attached, whether that is from our obsessive prep work or not, I don’t know.

Bottom Line, Knowing what we know now would we do it over again?

I think we probably would.  The improvement in the tile’s appearance was worth the effort we put in, but if we were going to do it again, I think we would put in less effort.    The instructions on the box are there for a reason.  They have been tested, and if they didn’t work they wouldn’t be on the box.  We went totally overboard on the prep work, making this project much harder than it should have been, and I think we have learned our lesson. 

In conclusion, painting the tile was worth it, follow the directions on the box, and for god’s sake ventilate, ventilate, ventilate. 

Painting and Magical Color Changing Tile

The last I left you we had just finished removing all of the caulk in our hall bathroom, scrubbing the left over grout and tile clean, and we were waiting for everything to dry completely before we applied the new caulk.  After doing everything we could to remove the insidious mold that grew up under and around the old caulk, we were not about to take any chances caulking over damp crevices, and determined that we would wait at least a day to let everything dry before applying the new caulk.   But not being ones to sit on our laurels watching grout dry, we decided to paint in the meantime.

We had already picked out a few front runners in the paint department that are consistent with the rest of the house’s updated color scheme, and had painted a few swatches on the walls.  The front runners were Edgebomb Gray by Benjamin Moore, Moonshine by Benjamin Moore, and Paper White by Benjamin Moore. 

As soon as it dried it became clear that Edgecomb Gray was not for us.  It looked brown rather than greige in our windowless bathroom, and that was exactly what we were trying to get away from.  So far this has been something of a theme in this under lit house of ours.  The pretty, warm inviting greiges I see all over Pinterest look dirty and muddy when I get them on my walls.  At least it makes picking a paint color a bit easier.

Moonshine and Paper White  were the final contenders, and deciding between the two of them was not easy.  Moonshine and Paper White are pretty similar.  They are both light neutral to slightly cool grays that look a bit silvery or shimmery and change color slightly depending on the lighting.  We liked them both, so we lived with the colors for a few days to see if one of them grew on us. 

I waffled back and forth, leaning more toward one, then more toward the other.  I looked at them during the day, at night, with the lights on, with the lights off, and stole quick glances at them every time I passed the door (as if I might catch the paint off guard while it was revealing its true nature).    I  was not really able to make up by mind until the shower curtain we ordered for the bathroom came in (I’m not showing it just yet – it’s a surprise, and it’s awesome).  When we held the shower curtain up to our paint swatches the choice became clear.  The Moonshine looked perfectly fine, but the Paper White really popped.  We decided to go with Paper White, which is a bit lighter and brighter than Moonshine and looked great with our new shower curtain. 

Money Saving Tip:

If you are planning a painting project and have an Ace Hardware nearby check to see if they are having one of their 2 for 1 paint sales before heading out to buy paint.  A couple of times a year, Ace Hardware has a paint sale in which they sell 2 gallons of paint for the cost of one gallon.  The brand and line of paint that is on sale generally changes each time, so if you are particular about the brand you paint with this may not be the sale for you, but if you are like me, and price trumps brand loyalty, it is a great way to get paint cheap – just make sure you buy enough to finish your project or are willing to pay full price if you run out.

We were lucky enough to buy the paint for this project during one of Ace Hardware’s 2 for 1 sales, so we got two gallons of BM Paper White color matched in Valspar Optimus for $40 .  This should be enough to finish this project, and another we have planned (stayed tuned).

The ceiling paint is BM Simply White color matched to BEHR Premium Plus Ceiling Paint.  It was leftover from painting the ceiling in our office and dining room.  I love this color for a ceiling because it is definitely white, without being stark white.  I feel like it makes the room feel a bit more welcoming than a true pure white.  

We hadn't realized just how yellow the ceiling was until we started painting it.  Just look at the before and after.  It is like night and day!  Next to the Simply White the old color looked like the teeth of a 3-pack-a-day smoker. The really troubling part is that we have no reason to suspect that the prior owner of 30+ years ever smoked in the house - we think they actually CHOOSE that color....   

So here is what it looked like after 2 coats of Paper white on the walls and 2 coats of Simply White on the ceiling.  The trim still needs to be painted and we need to do some touching up on both the walls and the ceiling.  So far I am very happy with the paint color we chose, but there is a problem.  The tile in the bathtub surround now looks pink!

Next time, figuring out what to do about the pink tile.