The Power of Less - Refrigerator

I have heard before that the clutter in your fridge is predictive of the clutter in your home. If that is the case, then my home was headed for a mess. While I regularly throw out old leftovers or spoiled veggies, I deep clean my fridge only rarely. This time it was past due for a good scrubbing. It was gross!

In this de-cluttering, I removed everything that could be removed. Everything was scrubbed with soap and water. Then only what was still in date and regularly used was returned to the fridge. Hopefully I'll get to the freezer soon too.

20130205-131500.jpg

Chicken Coop

We used to let our chickens free range, but then last year nearly all of them were killed by predators. After that we didn't feel comfortable letting the remaining chickens roam the yard, and we cooped them. They hated it. Our coop had been designed with free range chickens in mind. It was really only set up to house the chickens at night or during very bad weather. Chickens that are free to roam most of the time really don't have need of a lot of space inside the coop. When it became necessary to coop our chickens nearly all of the time, it quickly became apparent that our coop was not up to the task.

My Father in Law, who is very good at thinking outside the box (or coop), come up with the solution, and here is the results.

20130205-125055.jpg

He enclosed a portion of the exiting poll barn using a combination of chicken wire, metal siding, and salvaged doors and windows. He also connected a 40 foot by 3 foot run to the side accessible by chicken sized sliding door. Since the barn was already wired and plumbed, he also added a fan and heat lamp that can be turned on as needed, and an automatic waterer.

20130205-125649.jpg

My favorite part is the people sized double entry doors, which allow easy access to the coop, but not easy escape.

20130205-130053.jpg

Here are a few more pics of the cool new coop.

20130205-125937.jpg

20130205-125946.jpg

The Power of Less - Entry Way Storage

20130128-133658.jpg Today's post is a bit different than those earlier in the week, in which I simply removed things from a space. Today, I have repurposed a pre existing object to better fit the needs of my family.

This armoire started as a cheap, prefab computer hutch, about 10 years ago. I honestly never though it would last this long but it has. Two or three years ago I decided to make it beautiful again, and transformed it into the green and black beauty you see today. Then I promptly stuffed it full of linens and let is sit next to my front door.

Now the linens are gone, regulated to another closet, the trash, or a charity, and in their place, are the odds and ins that are necessary, and typically in the way.

20130128-133622.jpg

As a result of this little project, I was also able to clean out the junk drawer in my kitchen. It had previously held the flashlights, candles, batteries, and light bulbs and was stuffed to the gills. Now I can get to these items much more easily, and my Tupperware has a place to stay.

20130201-110136.jpg

The Power of Less - Entry Way

This weekend I cleaned and organized the entry to my house, not by buying lots of little boxes and bins to put all of my stuff, or a new expensive piece of furniture that housed everything perfectly, but by getting rid of things. This week I will show you how cleaning and removing "stuff" alone can transform a space. We will start today with the front door.

20130128-082659.jpg

The debris was thrown in the trash, the pots were emptied of their contents and stored with the rest of the pots. My father in law and daughter used a at home version of a pressure washer to clean the side of the house and side walk. Total cost, $0, 1 hour.

20130128-083013.jpg

Deculttering Kitchen Drawers

20130123-220612.jpgI like empty surfaces. Empty to the point of barren minimalism. They are free from visual clutter and easy to clean. So, if you were to come to my house on a good day, my kitchen counters would look something like this;

20130123-093004.jpg But lurking below those clutter free countertops is a dirty little secret;

20130123-093109.jpg

20130123-093118.jpg Terribly cluttered kitchen drawers!

I couldn't take it anymore. Let the culling begin!

I started by taking everything out of the drawers and placing it on the countertop, grouping like with like the best I could. This is the contents of only two drawers;

20130123-093436.jpg

There were 3 can openers, 5 basting brushes, 4 ladles, 2 whisks, at least 8 mixing spoons, and a large assortment of mismatched silverware, and a toothbrush, to name but a few. I culled the trash, the duplicates, and the unused. When I was done, this is what did not renter the drawers;

20130123-220549.jpg

I'm pretty happy with the results.

Jewelry Organization

Since I started working full time, the clothing I wear on a regular basis has changed quite a bit. While at home I could spend the day in yoga pants and free of makeup, but at work it is different. At work I need to look somewhat professional. I need to wear clothes that fit, and makeup, and accessories. Dressing professionally, especially accessorizing, does not come naturally to me. Jewelry is especially difficult for me. As I have struggled to find an accessory that matched my outfit every morning, I realized that trying to dig through a jumble of jewelry wasn't really helping me, and I began searching for a better way - that also didn't cost an arm and a leg.

Jewelry boxes were out since I don't have enough counter space to house one. I needed something that utilized wall space. I found several wall mounted jewelry armoires that were lovely, but they were also pricy. So instead, I took my inspiration from some of the DIY versions I spotted on Pinterest. The problem with most of these was the lack of storage for stud type earrings. So I improvised. Here is the result;

20130123-091800.jpg

To make it, I used a cork board that I already had, and had already painted blue, some push pins, a small embroidery hoop, cheese cloth, and some ribbon. Since I already had everything on hand, the cost was $0. Using a ruler I spaced the push pins 1 inch from the sides of the frame, and 1 inch apart.

20130123-091215.jpg I placed several layers of cheese cloth in the embroidery hoop, and cut off the excess. Then I mounted the hoop to the board with a length of ribbon and some pins, which allowed the back to be easily accessed.

I am pretty happy with the result. It easily holds my meager jewelry collection, and keeps it easily accessible when I need it.

20130123-092005.jpg

Routine

20130115-125840.jpg (A lady bug out during lunch today.)

Yesterday was Fire Beard's first day back at school. I was home sick. I know I probably had one of the many stomach bugs that seem to be going around, but the thought of him away from home for yet another semester, also makes me feel ill.

Today I am back to my normal, husband-less routine, and I thought I would share it with you. Unlike most craft bloggers I currently work full time away from the house, like many of you probably do. While my routine probably isn't very different from anyone else's , I think my routine might give those of you who are trying to squeeze in crafting time some insight into how I do it.

A typical work day;

5:30 am - My alarm goes off, trying to get me to work out. I used to work out every other morning, and will probably start back soon. 6:00 am - I finally drag myself out of bed. My clothes are already laid out, ironed and ready to go from the night before. By the time I finish getting dressed, hair and make up, my coffee (also set up the night before) is finished brewing. This is also about the time my kids get up and start their chores, feeding the pets. Breakfast generally consists of a baked egg,oatmeal, or bagel. A load of laundry and/or dishes is changed out, then the kids are snuggled a bit before their grandma comes to get them from next door. 7:15 I grab my lunch (also made the night before), coffee, and bag, then I'm out the door. 8:00 Work 12:00 My lunch time varies, but it's generally around noon. I usually head off to my favorite shady picnic table and eat, read, knit, or blog. I find this time of day very therapeutic. 1:00 Back to work 5:00 My nearly 1 hour commute begins. I know it could be worse, but I live in a fairly small town. 6:00 Home, dinner, homework, time with the kids. 7:00 The bedtime routine begins. The kids clean up after themselves, take showers, get dressed, and brush teeth. While the oldest is in the shower I get ready for the next day, making my lunch, ironing clothes, and making my coffee. Then bedtime stories, and prayers. 8:30 The kids are asleep. I finish cleaning what needs to be cleaned (generally not too much since I try to clean as I go), then it's my time. I generally pick my craft, or lack of craft by the mood I'm in. Whatever sewing project is in progress if I'm feeling industrious, knitting or spinning if I need to relax, or nothing if I'm really exhausted. I try to have a project ready to pick up and go. 10:30 Bedtime.

Culling Christmas

Yesterday was the 12th and final day of Christmas, and the day I took down my christmas decorations. To me, nothing symbolizes the end of the holiday season, and the start of the new year quite like taking down the Christmas decorations. It feels like wiping the slate clean, beginning anew, and a great time to initiate new and better habits. While I, like many people, want to eat healthy and exercise more in 2013, what I want to do more than anything else is reduce the physical and mental clutter in my life. I started this year, by eliminating some of the clutter in my christmas decor.

20130107-131435.jpg 
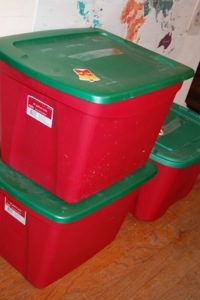
When my husband and I first got married we had virtually no christmas decorations. I made some bows for the doors, and bought a box of miniature ball shaped christmas ornaments for our 1 foot tall tree. Our collection of Christmas decorations has grown since then, and on this, our 8th married christmas, I lugged out of the garage 4 large storage containers of decorations, 1 small storage container of christmas decorations, a wreath box, and 2 small artificial christmas trees (a larger artificial tree stayed in the garage).

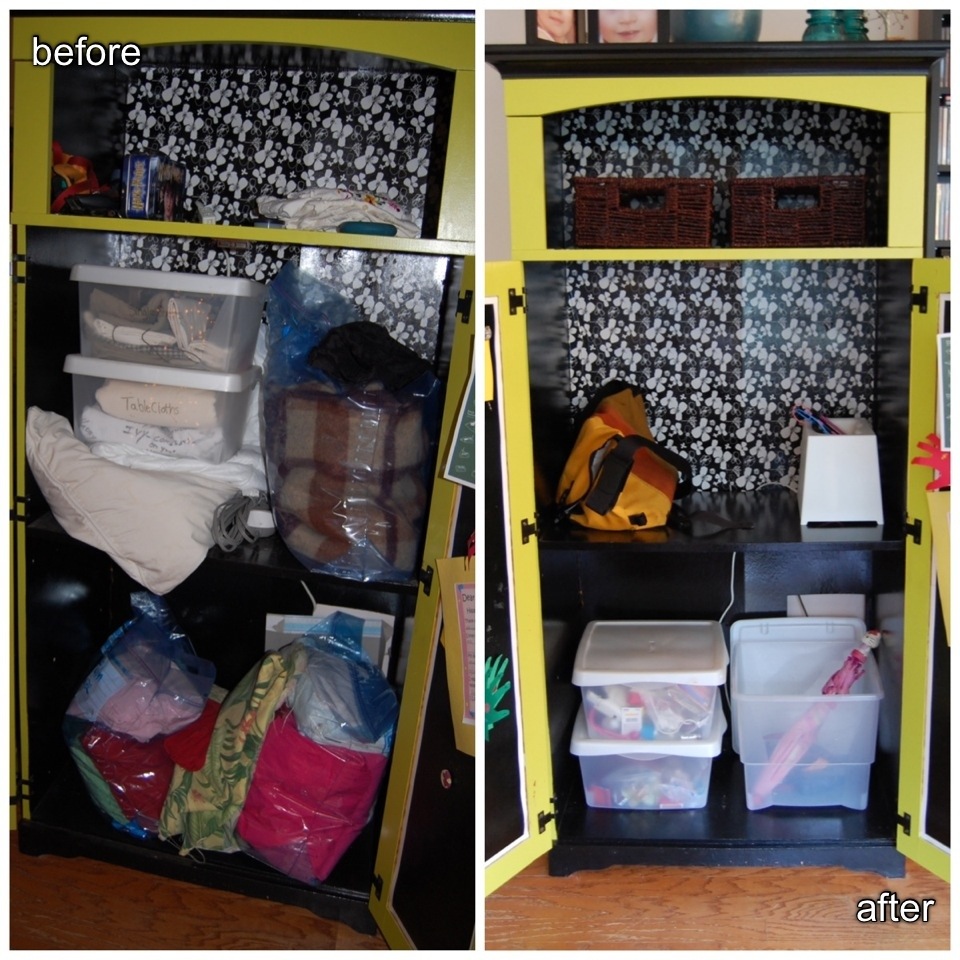
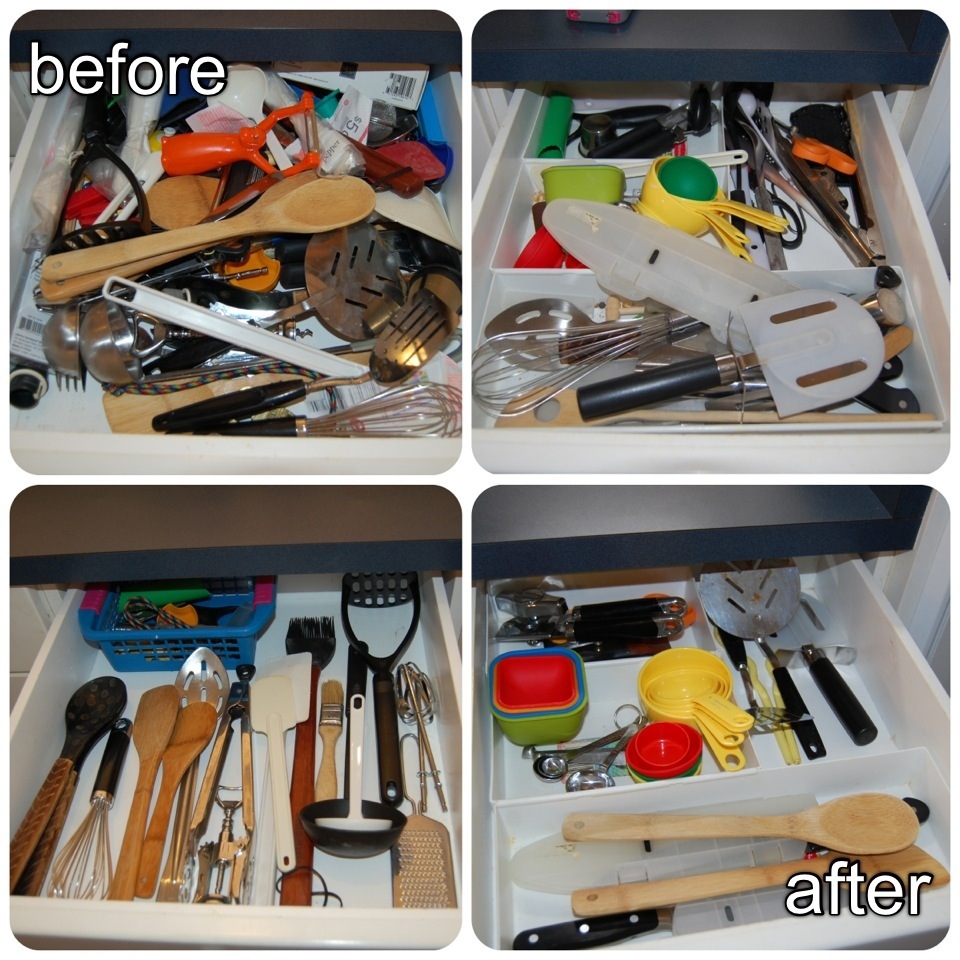
A few years ago I began to realize that not all of the decorations came out of all of the boxes every year, so I started removing those that were never used from our collection. The problem is that we continued to receive more decorations every year, and the net result was still addition to the collection, rather than subtraction. This year I was far more radical in my culling and I am proud to say that 1 large store box, 1 small storage box, and a large artificial christmas tree will not be making their way back into my garage this year!

20130107-131532.jpg

This is how I did it; First I eliminated all of those decorations that were never used, and I didn't really care for. These were often those decorations given to me at the beginning of my marriage by friends or relatives that knew I had few christmas decorations. These were generally cast offs from their own collections, given to help me start my own.

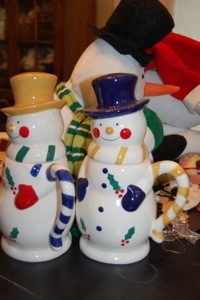
Next, I eliminated those decorations that I liked, but were not used either because they didn't match the rest of my decor, or I never had occasion to use them. For instance, my family rarely drinks tea, so a tea pot shaped like a gingerbread house, while adorable, was not a useful part of my collection.

Next, I eliminated those decorations that were unused, but had been hanging around since childhood. These were some of the ornaments I had made in elementary school that were not special, and I had no attachment to, they were simply there, because they had always been there.

Last, I took a hard look at the remaining decorations. Everything that didn't make me smile or feel warm and fuzzy inside, Everything that didn't have meaning and purpose, was then eliminated.

I was left boxes full of objects that I have for a reason, they are special, meaningful, useful, and beautiful, and I know I will be happy to see the contents of these boxes next year!

Gift Giving Lessons

This holiday season, like most holiday seasons, I ended up with many gifts I loved, and I few I'm not so keen on. I also gave a few gifts that the recipients were not so keen on (kids don't keep these things to themselves). In an effort to avoid poor gift giving decisions next year, I am cataloguing the lessons learned this gift giving season for future reference.

20130104-131009.jpg

Lesson 1: Unless you are a professional fashion designer or stylist, and know the size and style of the person you are buying for, don't buy clothing. It is inevitably the wrong size, style, color, or fit. If you need to give clothing, accessories in neutrals are safest. You can't really go wrong with a pair of black gloves and a matching cozy hat.

Lesson2: Sometimes the things they like the most, are not the things they ask for. Firebeard's grandparents gave my daughter a magic kit. She had never previously expressed an interest in magic, but she has played with almost nothing else ever since.

Lesson3: Getting what they ask for doesn't guarantee they will like their present. My daughter asked for a diary for Christmas, so I got her a really cool one, with great reviews on amazon. She hated it. She didn't want a cool diary, she wanted a pad of paper.

Lesson 4: Even kids appreciate digital gifts. My son has played with the "barefoot atlas" app the good doctor gave him for hours at a time.

Lesson 5: If you are at a loss for what to give, a luxurious, yet practical gift, like fancy soaps or shaving cream, will almost always be appreciated. I became very ill Christmas evening. Laying on the couch under a stack of blankets and cuddling a heating pad, the only gift I was thinking about was the thick cuddly pair of socks I had received earlier in the day.

Lesson 6: Giving nothing is better than giving something unwanted.

The Newest Babies

Less than a month ago tragedy struck. My sister in law's dog escaped its confinement and killed 3 of our chickens. They were our sweetest, most trusting, and best laying hens, and also my children's favorites (of course). We decided to do what we could to help them live on. Fire beard bought an incubator, gathered 12 of their eggs, and we crossed our fingers.

About 21 days later we had 7 new babies.

20120908-192047.jpg

20120908-192209.jpg

The Big Girls

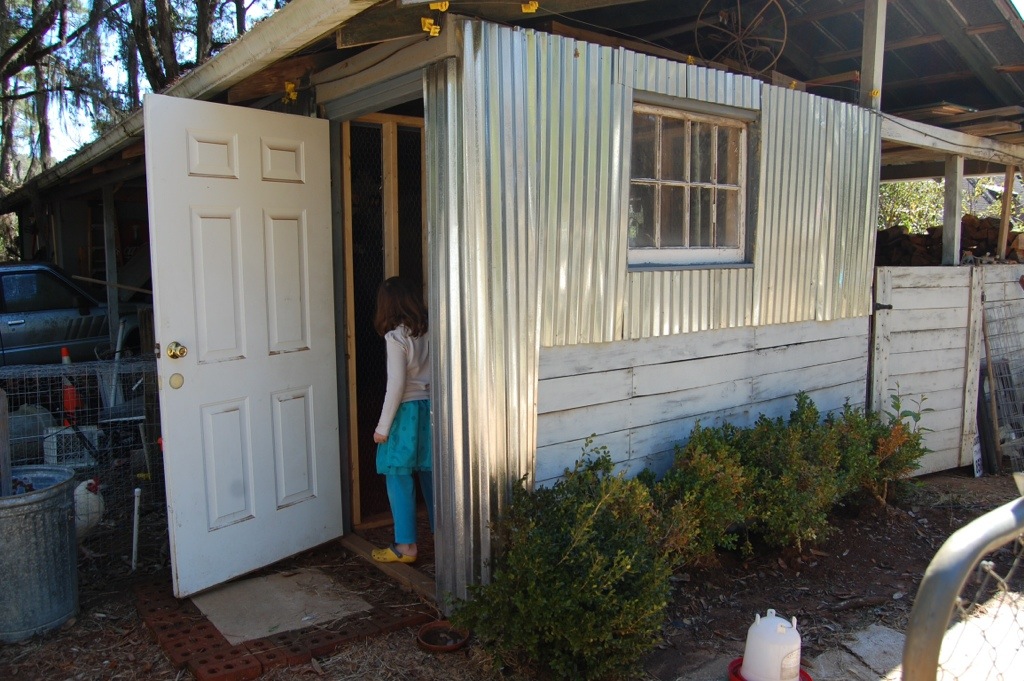
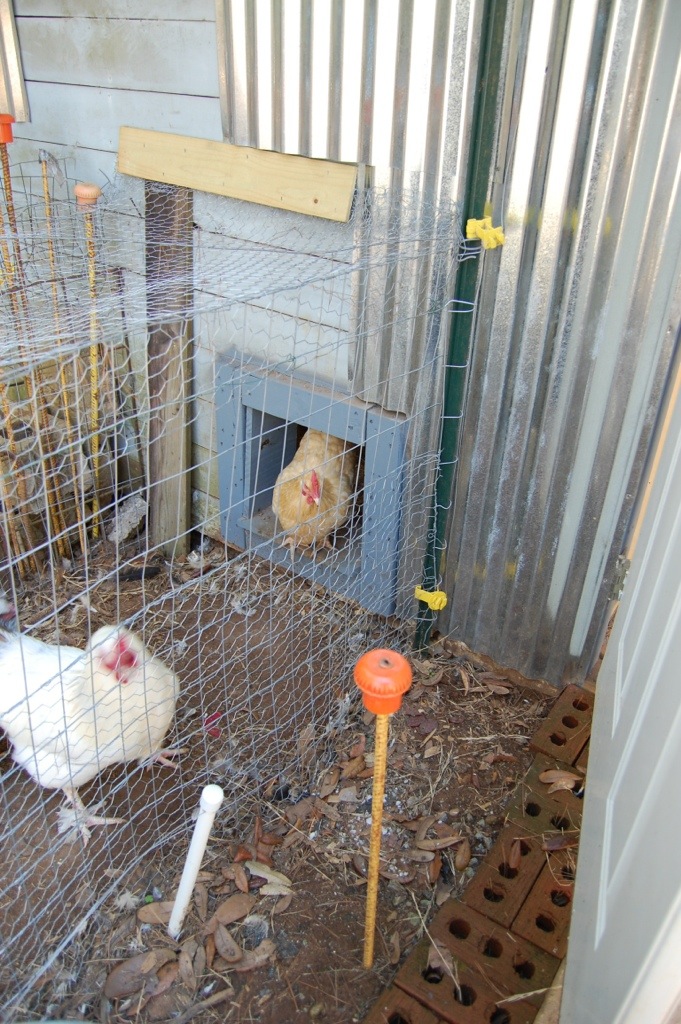
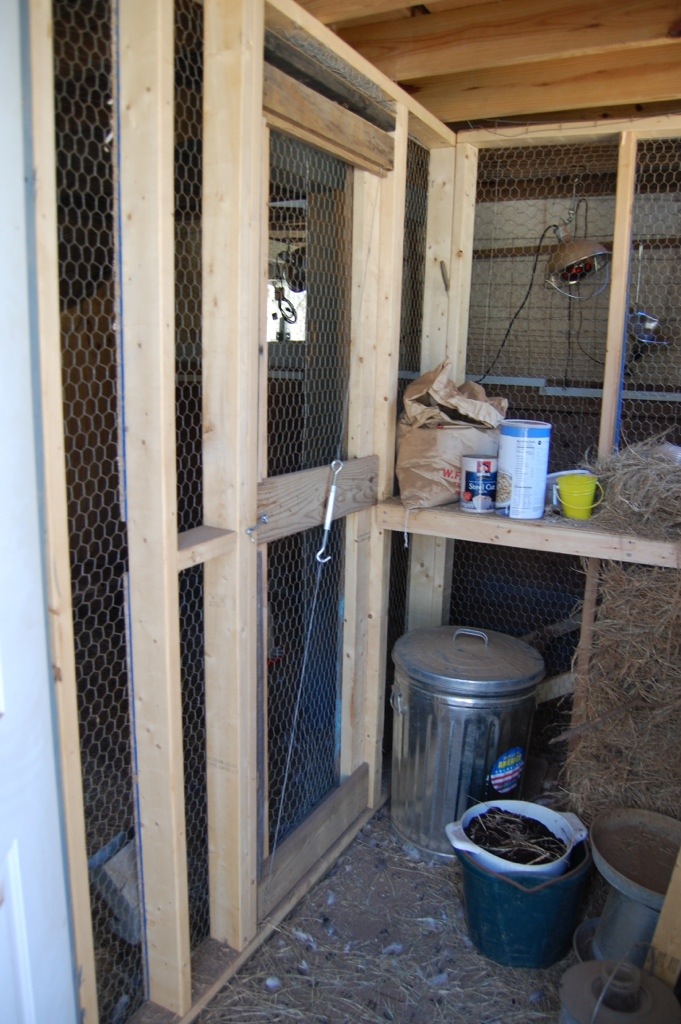
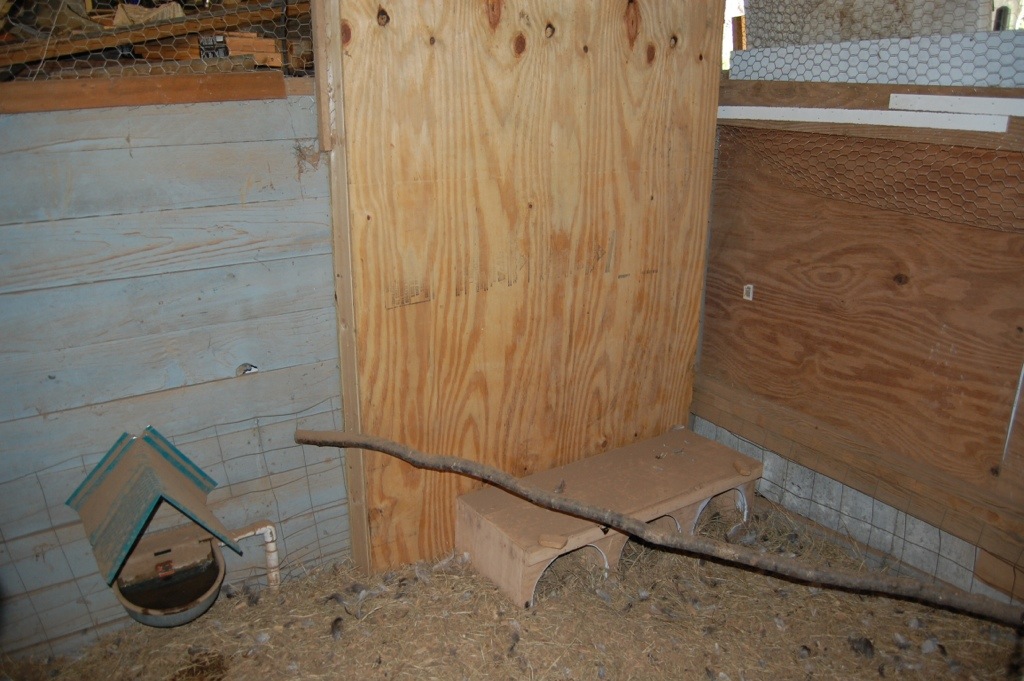
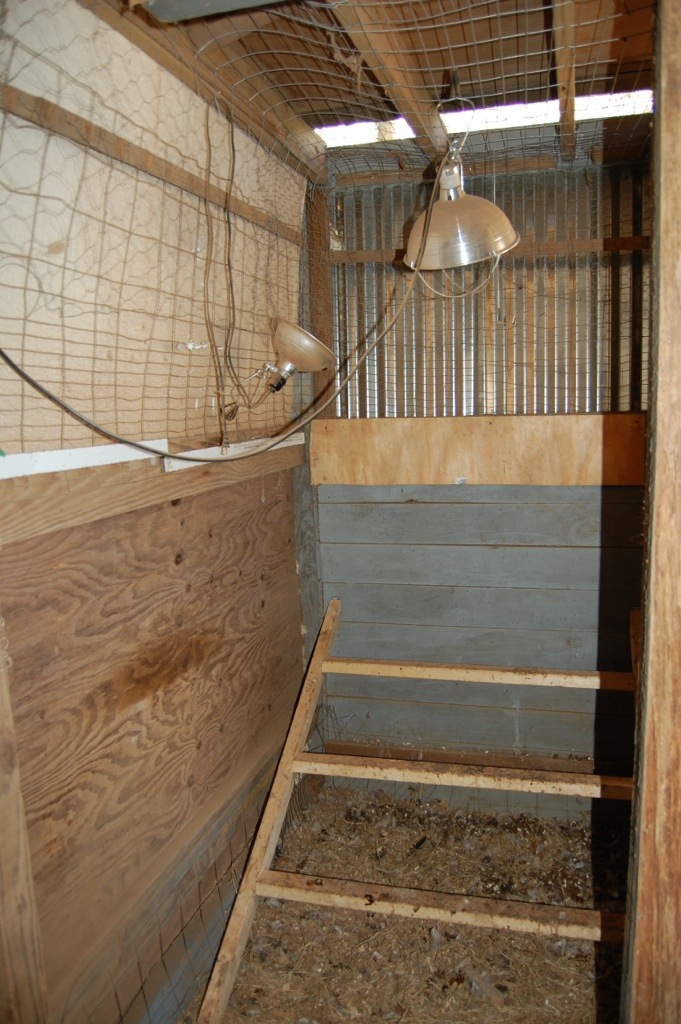
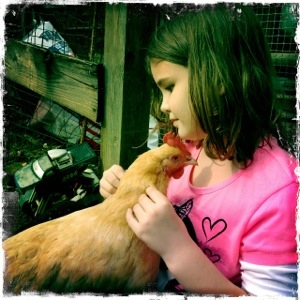
After yesterday's pic of the babies in their brooder box, I thought I would share a pic of the big girls (and boy) in their coop. As you can probably tell, the girl's coop, does not look like a standard coop.  For one thing, it is 4 feet off of the ground, and for another, it is almost completely open.  There is a rhyme in our reason however.  We live in Florida, where it is very hot and very humid most of the year.  Chickens tend to dislike very hot and moist environments, and suffer in those conditions.  As a result, we decided to make a coop that would allow for maximum air flow reducing both heat and humidity.  The reason the coop is 4 feet off the ground is that we have several large predators in the area, such a coyotes.  We needed to keep the chickens far off the ground in their open coop.  You may have also noticed that there does not appear to be a way for the chickens to get in to or out of the coop.  Rest assured there is a way for them to come and go.  The rope going from floor to ceiling in the coop is attached to a retractable ramp that extends down during the day, and is pulled up at night, and becomes part of the floor of the coop.

The coop does have a few problems that we hope to correct this year.  The biggest problem is that wind driven rain can easily infiltrate the coop, soaking the bedding material.  We hope to add some sort of shutter that can be closed to protect against driven rain.  We are also planning to enclose the bottom of the coop, so they have more room when they have to stay inside during the day.

The girls that were our babies just moved into the big coop, and are adjusting to their new surroundings.  I promise there are several water bottles from them to pick from, but they all like this one.

Martha (an Americana named after Martha Washington), is having the hardest time adjusting - some of the big girls can be bullies.  She gets plenty of cuddles to make up for it though.

Our Newest Family Members

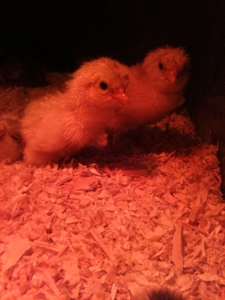
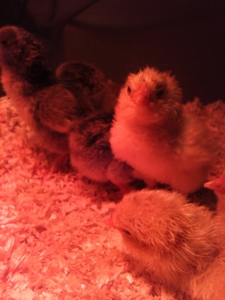
On Easter Sunday, the Easter bunny left more than just eggs in our yard, he also left two adorable baby chicks.  The kids found them in a basket with a note from the Easter bunny, asking the kids to give his chicks a good home.

They are growing faster than any other chicks we have had, perhaps because there are only two chicks sharing feed.  Above is a pics on the little girls in their brooder box (basically a wooden box with a heat lamp on top) yesterday, already looking pretty grown up.

As you can see, they are very well loved.

FO - Twinkle Twinkle Little Socks

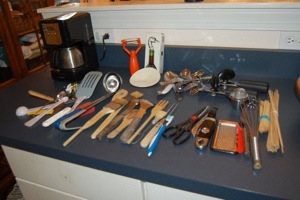
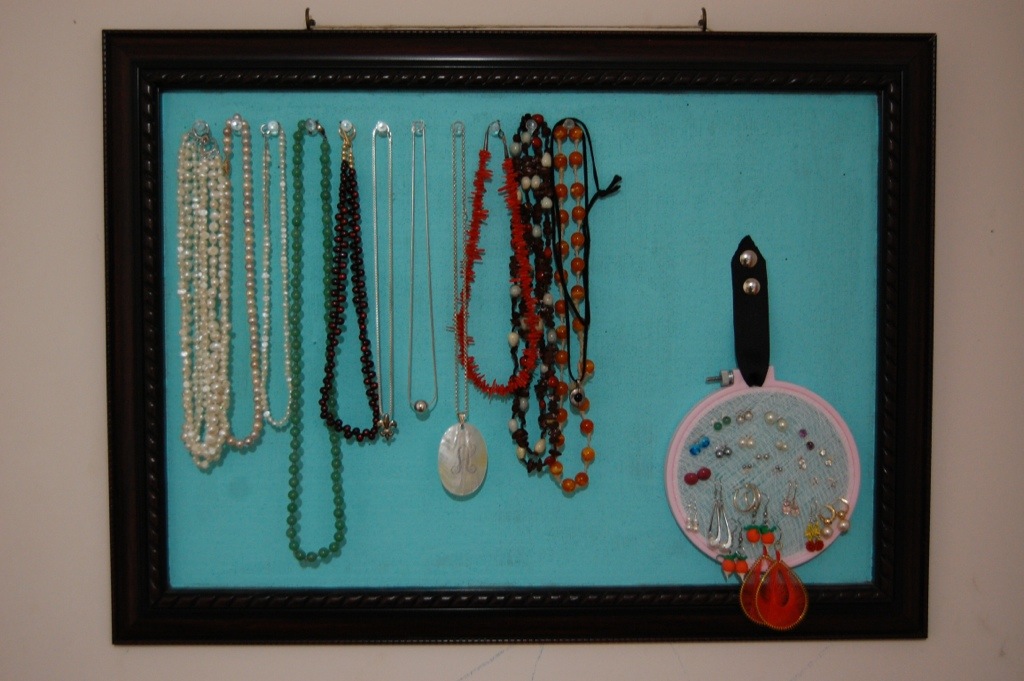
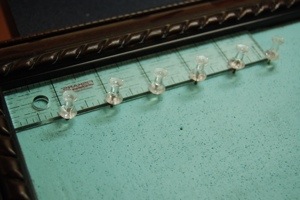
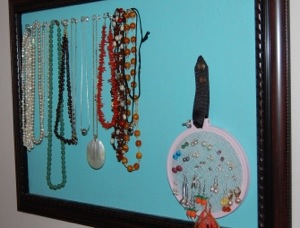
As I stated in a previous post, I have actually had more time to craft since I started working full time than I had prior to working full time, due to a period during my working hours my coworkers foolishly refer to as lunch time.  I have more accurately dubbed this hour during my day craft time, and have used it to great advantage.  One of the projects I have been able to complete during this time is the Twinkle Twinkle Little Socks Pattern by Aimee Skeers.   I really enjoyed knitting this pattern (which is especially surprising because I tend not to enjoy knitting socks).  The open lace work was easy enough to be fun, but difficult enough to keep my interest, and the heel (a mixture of short row, and heel flap) was brilliant.  I love the finished object - they are beautiful, fit very well, and are cozy warm.  Now for the details;

Sewing - Picking the Correct Pattern Size

I have been asked a lot recently to teach classes in sewing (usually whenever someone finds out that most of my clothing is hand sewn, rather than store bought).  I would love to be able to do just that, but I simply don’t have the time.  Most of my sewing is done at night, or during spare moments on the weekends.  I have no idea how I could squeeze a class into the mix, but I decided to try anyway – at least in bit and pieces.  I have decided to create several online tutorials at my leisure (Ha!), starting with the basics, and working toward a perfectly fitted pattern.

Choosing the appropriate pattern size

If you buy clothes off the rack, it is relatively easy to find the best size, you just try on all of the sizes that might fit, and pick the best one.  When you are sewing your clothes, it is a bit more difficult to find the correct size; after all, you can’t try the pattern on before you sew it.  On the other hand, sewing your own clothes can give you a perfect fit, rather than the fit that is just close enough.  The problem is; which pattern size should you choose?


Ready to wear clothing, and most sewing patterns are made based on an average, ideal person.  She is a size 8, about 20 years old, 5’6” (1.67 meters), and a B cup.  As I am sure you know, very few people fit this “average.”  Most of us are shorter, or taller, younger or older, larger or smaller, or several different sizes.  So which size should you pick?

Here is the rule of thumb;

Pants – Measure at your widest point below your waist, and above your legs, and choose the pattern size with the corresponding hip size.  If you are between sizes, choose the smaller size (Unless the style of the garment is very closely fitted.   Most styles have enough ease, or extra room, to fit people who are between sizes; however, very closely fitted garments have minimal ease).

  •  Why?  It is relatively easy to adjust the width of the waist, and legs of pants, but the curve at the seat of the pants is a bit tricky to adjust.  Picking the full hip measurement usually allows for the easiest adjustment.

Skirts –

  • A-line, and other styles that are closely fitted at the waist, and then rapidly increase in size skimming the hips, should be chosen based on the waist measurement.
    •  Why?  Since the waist is the only part of this style that is closely fitted, picking the size that fits the waist allows for the least pattern modification.
  • Straight skirts and other styles that are fitted through the waist and hips should be chosen based on the hip measurement.  Chose the pattern size in which the hip size corresponds to the measure of your widest point below your waist (this measurement may be at your hips or thighs).
    • Why?  The waist in this type of skirt usually has easily adjustable darts at the waistline.

Blouses and Dresses – Measure your full bust, and your upper bust (wrap the tape measure around your chest under your arms, but above your breasts).  Now subtract the upper bust measurement from the full bust measurement.

  • If the difference is 2 inches (5 cm) or less (you are likely an A or B cup) choose the pattern size with the bust measurement corresponding to your full bust measurement.  Congrats, you probably don’t have major bust revisions ahead, since most patterns are designed for b up breasts!
  • If the difference is greater than 2 inches (you are likely a C cup or larger), chose the pattern size with the bust measurement corresponding to your full bust measurement.
    • Why?  While the bust adjustment isn’t easy, it isn’t nearly as complicated as sizing down shoulders that are too big.  If you were to pick the size corresponding to your full bust measurement, the bust would fit, but the shoulders (and often everything else) would be too large

I am currently working on a dress for myself, and I have been focusing on the fitting issues inherent in dresses recently.  Since they are on my mind, I will likely post next about bust adjustments.  Till then, find a simple dress or bodice pattern, and find your size.  I am working on the Truffle dress, by Colette Patterns from their new book, “The Colette Sewing Handbook”.  It is a wonderful pattern for perfecting fit, and I highly recommend it.

Red Hills Horse Trials, and Burst Mode

A few weekends ago the girl and I attended Red Hills Horse Trials, and international horse riding event.  We were able to sit close to the water obstacle on the cross country course, and I took full advantage of the burst mode on my camera.

Burst mode allows me to take several photos in quick succession by simply holding down the shutter button.  It is wonderful for taking action shots when you don't have a good idea when the cool stuff is going to take place.  For instance; it allowed me to take the following picture in which both of the horse's feet are off the ground.  Sure I could have taken it without burst mode - but I would have needed to be very lucky.

There is a good chance that your own digital camera has a burst mode, check your settings and try it out.

In other news, the girl loves horses and had a great time.  She got to ride 2 horses;

and she got an amazing horse face painting.


I don't know how common horse trials are, especially one's of this caliber, but I would defiantly recommend attending one if you are able as it was great fun!

Double Yolker

Have you ever found a double yolked egg in a commercial box of eggs?  I would be a bit surprised if you had, as they are not very common.  However, there are a few things that would increase your odds of finding a double yolker, one is the age of the chicken laying the eggs.  Young chickens are more likely to lay a double yolk egg than older chickens.  Very large eggs laid by young chickens are also more likely to be double yolkers than standard size eggs.    So, when one of my young chickens laid a very large egg, knew what I had on my hands - a double yolker.

In the above picture the two blue/green eggs were laid by my young chickens, and the brown egg was laid by an older chicken.  The brown egg is about the size of a commercial large egg, the smaller blue/green is about the size of a medium commercial egg.  The large blue/green egg in the upper left would not fit in a standard egg carton.

This is what I found when I cracked the egg - two yolks as predicted. Probability in action.

If you would like to learn more about the statistically probabilities associated with double yolked eggs, check out "More or Less" from BBC radio 4.  It really is interesting...really!

Dragon Cake

I forgot one of the best cakes (Thanks for reminding me Gadabout Knitter)! The dragon cake that my MIL and SisIL made my son for his 2nd birthday.  So here it is....

The wings and fire are made of fruit leather - pretty clever I thought.

The party was Mighty Knights themed, and the dragon cake wasn't the only dragon at the party.

I created the "fabricy"part of the costumes for the human and animal guests, firebeard made the wooden shields.

Highly accurate armor, don't you think?

Food Craft - Cakes

While I pride myself on my ability to master nearly any craft I really set my mind to, I have not yet mastered food craft.  More specifically, I have not masted the art of making food beautiful (although I can decorate a mean cookie).  I simply don't have the love of food craft that makes it's mastery possible.  My MIL however, makes beautiful food, and I have been extremely negligent in sharing with you all the the beautiful cakes she makes for my kids on their birthdays, but no longer.  Today I will share her beautiful cakes. Most recently, she made my son a Top Gear Cake for his 5th birthday, representing his favorite Top Gear Challenge - killing a Toyota.  The cake depicts that Toyota perched on the top of a building, right before the building is demolished.  (By the way, Top Gear is a British car show that tests the merits of cars in a variety of wacky scenarios).  In this picture, my son had already removed the Toyota from the top of the tower because it was afraid it would be hurt.

Here is the truck on top of the tower block, waiting to be demolished.

My daughter wanted a simple dinosaur cake for her 6th birthday.

My son's 4th birthday was a lego party, so my MIL made a giant lego with a sheet cake and cupcakes.

For my son's 3rd birthday, my MIL made an incredible monster truck cake, complete with jumbo doughnut wheels.

I have also made a few cakes that made the cut, and I am including in this post.  The first of which is a Halloween themed cake I created for my daughter's birthday.

My favorite part is the tiny peanut butter skulls.

My daughter also had a reptile themed party where I made an ice cream turtle, and a snake cake.


All of this talk about cake has inspired me to go eat lunch, I hope you have been inspired too.