The Small Shoulder Adjustment
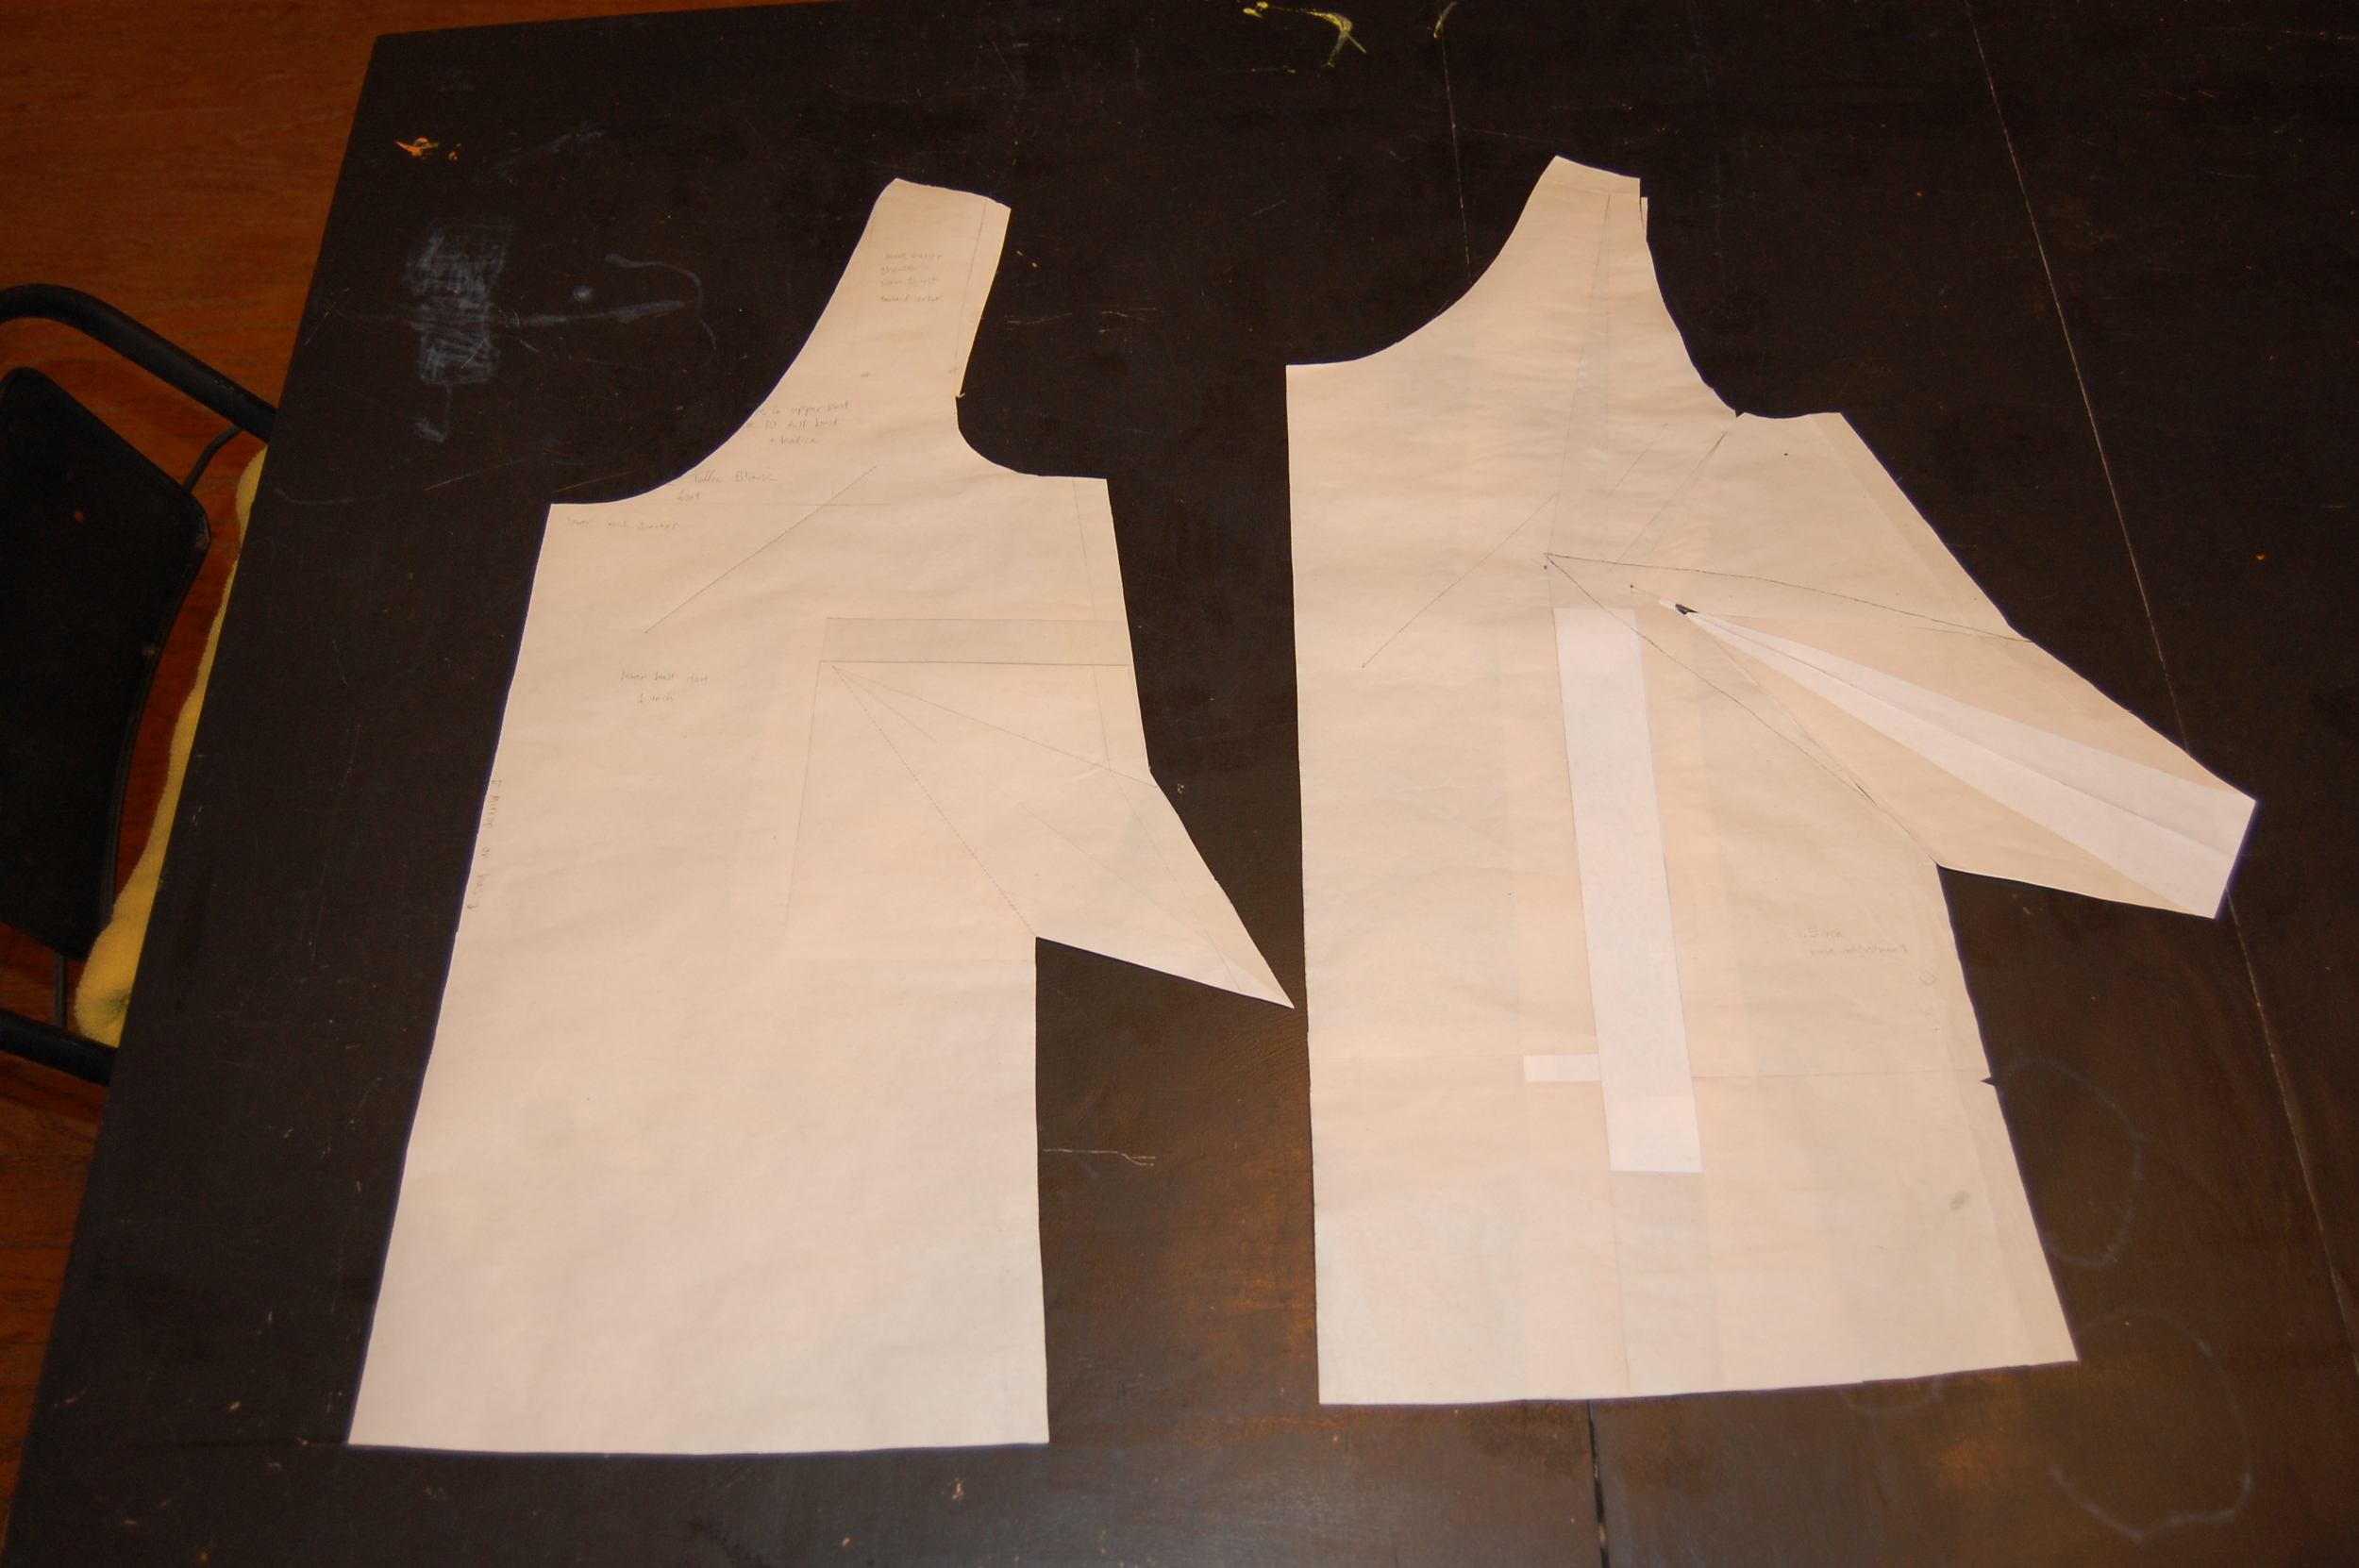
As I said in my previous post, while working on the Taffy blouse from Colette Patterns I became a bit disenchanted with the Full Bust Adjustment, and decided to try the small shoulder adjustment instead. It worked beautifully, and now I am ready to share with you the method and the results. I began by copying the front and back bodice pieces that corresponded to my full bust measurement. On the copy I also traced the upper portion of the pattern size corresponding to my high bust measurement. At the bottom of the armscye, I blended the smaller shoulder into the larger side seam. This new line was my new armscye.

If the length of the new armscye was more than 1.5 inches bigger than the sleeve, then the sleeve cap would have to be adjusted to compensate for the new size of the armsyce as well. Fortunately, that was not the case with this sleeve cap, and no adjustments had to be made. Frankly the idea of adjusting the sleeve cap of this bizarrely shaped sleeve is the stuff of nightmares, and I thanked God that it didn't have to be adjusted.

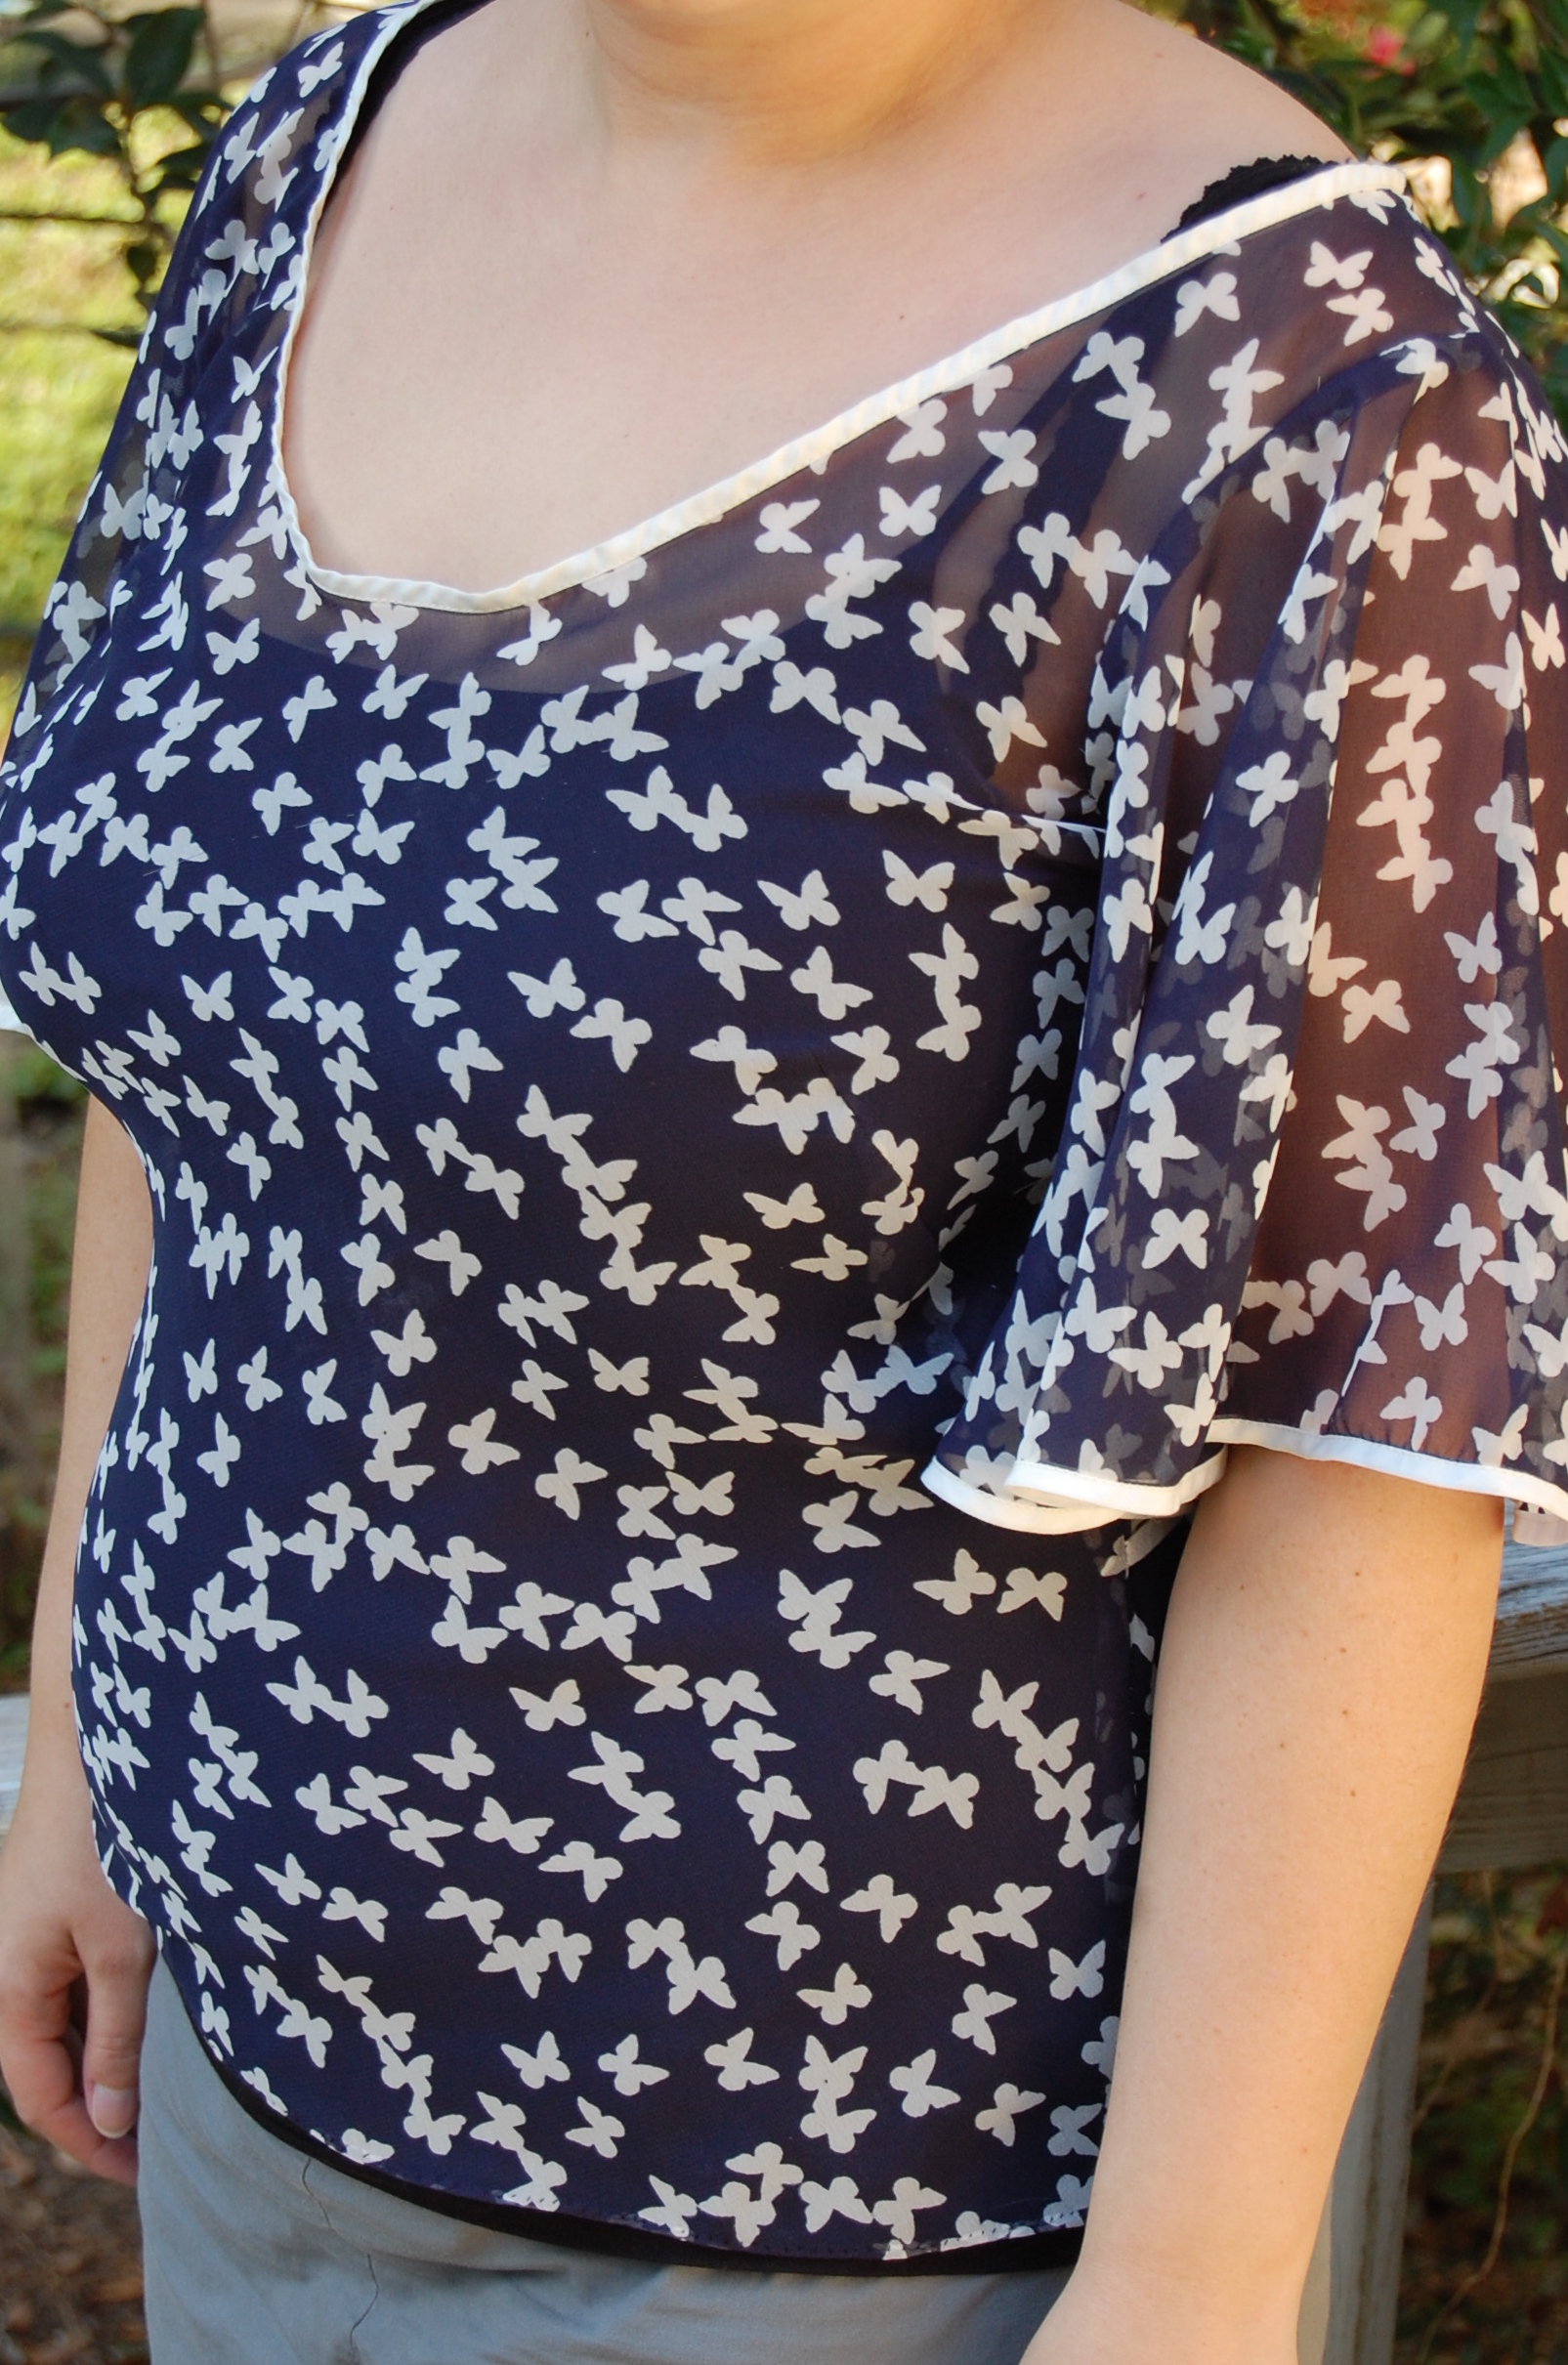
The initial tissue fitting indicated that I was pretty close to a great fit, and a muslin indicated that it was nearly perfect. Here is the result.

dsc_0198

dsc_0198

I think that a comparison of the FBA adjustment and the small shoulder adjustment makes the difference in fit pretty apparent. The armsyce is really distorted after the large FBA, but looks pretty normal after the small shoulder adjustment.

dsc_0201

dsc_0201

Like nearly all pattern adjustments the small shoulder adjustment can be done in more than one way. My way, is simply that, my way. It is not necessarily the best way, or the "correct" way, but it is what worked for me, and I will continue using it, until I find something that works better.

Full Bust Adjustment vs. Small Shoulder Adjustment

Most sewing patterns base the measurements of their sizes on an imaginary ideal person. Her bust is a B cup, her full bust measurement is equal to her hip measurement, and her waist is 10 inches smaller than her full bust or hip. It is usually recommended that those sewers whose bust is larger than a b cup adjust their pattern using a full bust adjustment to accommodate their larger busts. For those people whose busts are larger than a B cup, and their full busts are larger than their hips, I highly recommend this adjustment. But what about those, like me, whose busts are larger than a B cup, but the same size as their hips? For many of these people (including me), a full bust adjustment would have to be followed by a full hip adjustment for the garment to fit the entire body.

I have, as generally recommended, adjusted the bust and then the hip, with mediocre results. After hours of pains taking adjustments, I usually end up with a mangled pattern that is more tape than paper, and the proportions always seem a bit off even through my bust and hip are proportionate. I decided there had to be a better way, and began experimenting with small shoulder adjustments instead.

The problem for those with cup sizes larger than B (and nothing else is larger), is that, if the pattern size is determined by the full bust measurement, the garment will be too large in every place but the bust. What I realized, is that my hips and waist are proportionate to my full bust measurement. The only part of my body that is small in relation to my full bust is my shoulders. So, why should I pick a pattern size based on my upper bust (basically my shoulders) and adjust everywhere else, when I can pick the size based on my full bust, and only adjust the shoulders?

I believe the reason the full bust adjustment is generally recommended is that it is considered easier than the small shoulder adjustment. After all, the small shoulder adjustment involves the armscye, and adjusting the armscye is scary for most.

After doing an FBA and making a muslin I was not happy. The blouse hung strangely, still didn't fit that well. I decided to start over and do the small shoulder adjustment instead. After making the muslin using this new adjustment, I knew I was on to something. I did a few more tweaks, the made the final garment.

I am pretty happy with the results (although I would adjust it a bit more if I made it again), and I am using this technique again in the garment I am currently making. Details to follow.