New Ikea Favorites
/The new 2017 Ikea catalog is out and as always there are a few gems hidden among the plastic bins (who am I kidding - I love Ikea). Here is a sample of a few of my new Ikea favorites. Bonus: They are all under $30.
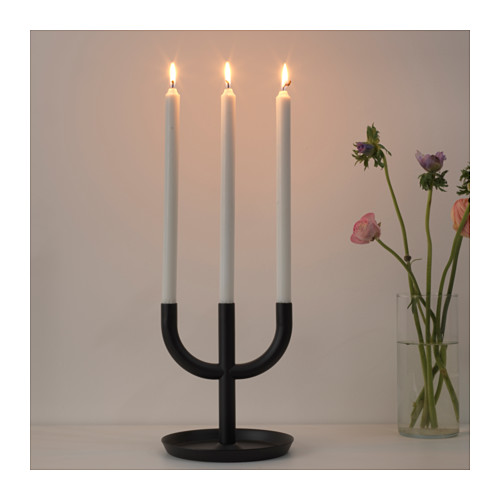
Enighet Candlestick - $12.99
The Enighet Candlestick is beautiful, simple, and classic. It would look great on a table by itself, but also lends itself to decoration. The bottom tray would be a great place to arrange a few holiday decorations.

Harliga Glass Dome with base - $9.99 (Multiple Sizes Available)
We are planning a Harry Potter themed party for the Girl's birthday this year. The Harliga Glass dome would be perfect for a spooky specimen in a potions display, and at $9.99 a piece, I might actually be able to afford presents after paying for the decor.

Viktigt Carafe with glass - $14.99
When I saw the Viktigt Carafe I immediately thought "nightstand water dispenser". I think it would be especially nice in a guest bedroom.

Gladom Tray Table - $29.99
It is a table, it is a tray, it is perfect for the small seating arrangement on my front porch. I love that it is not only a great size for a side table, it can also be used to easily bring stuff into and out of the house like snacks or drinks. Also, I am a sucker for multiple purpose furniture.
Have you spotted a new favorite in the Ikea catalog? Let me know about it in the comments.


