Adding a Pop of Color

Despite my love of a clean, refined white room I could never have a completely white room in my own house (even if I didn't have kids, and a dog tracking dirt in the house).  While white rooms can feel beautiful and serene, they too often feel drab and cold.  Colorful rooms on the other hand feel energetic and warm, but too colorful rooms can feel overwhelming and claustrophobic.  In my own house I like to marry the clean look of a white room with eclectic pieces and pops of color that give a room energy and personality.

Adding Color to the edge of a door  - inspiration from Apartment Therapy

Adding Color to the edge of a door  - inspiration from Apartment Therapy

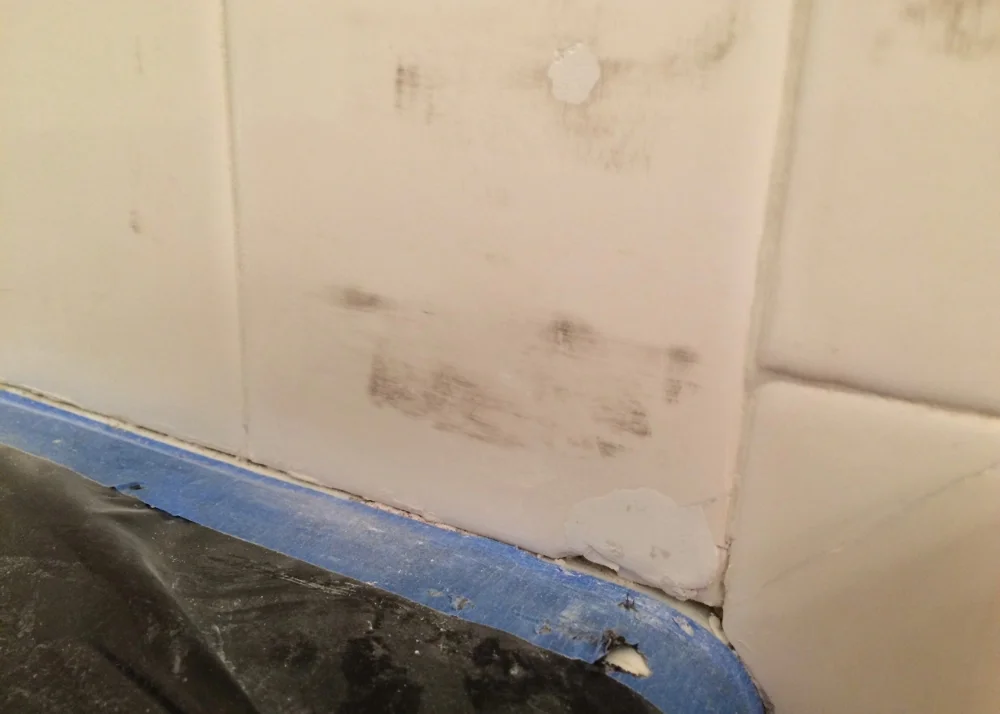
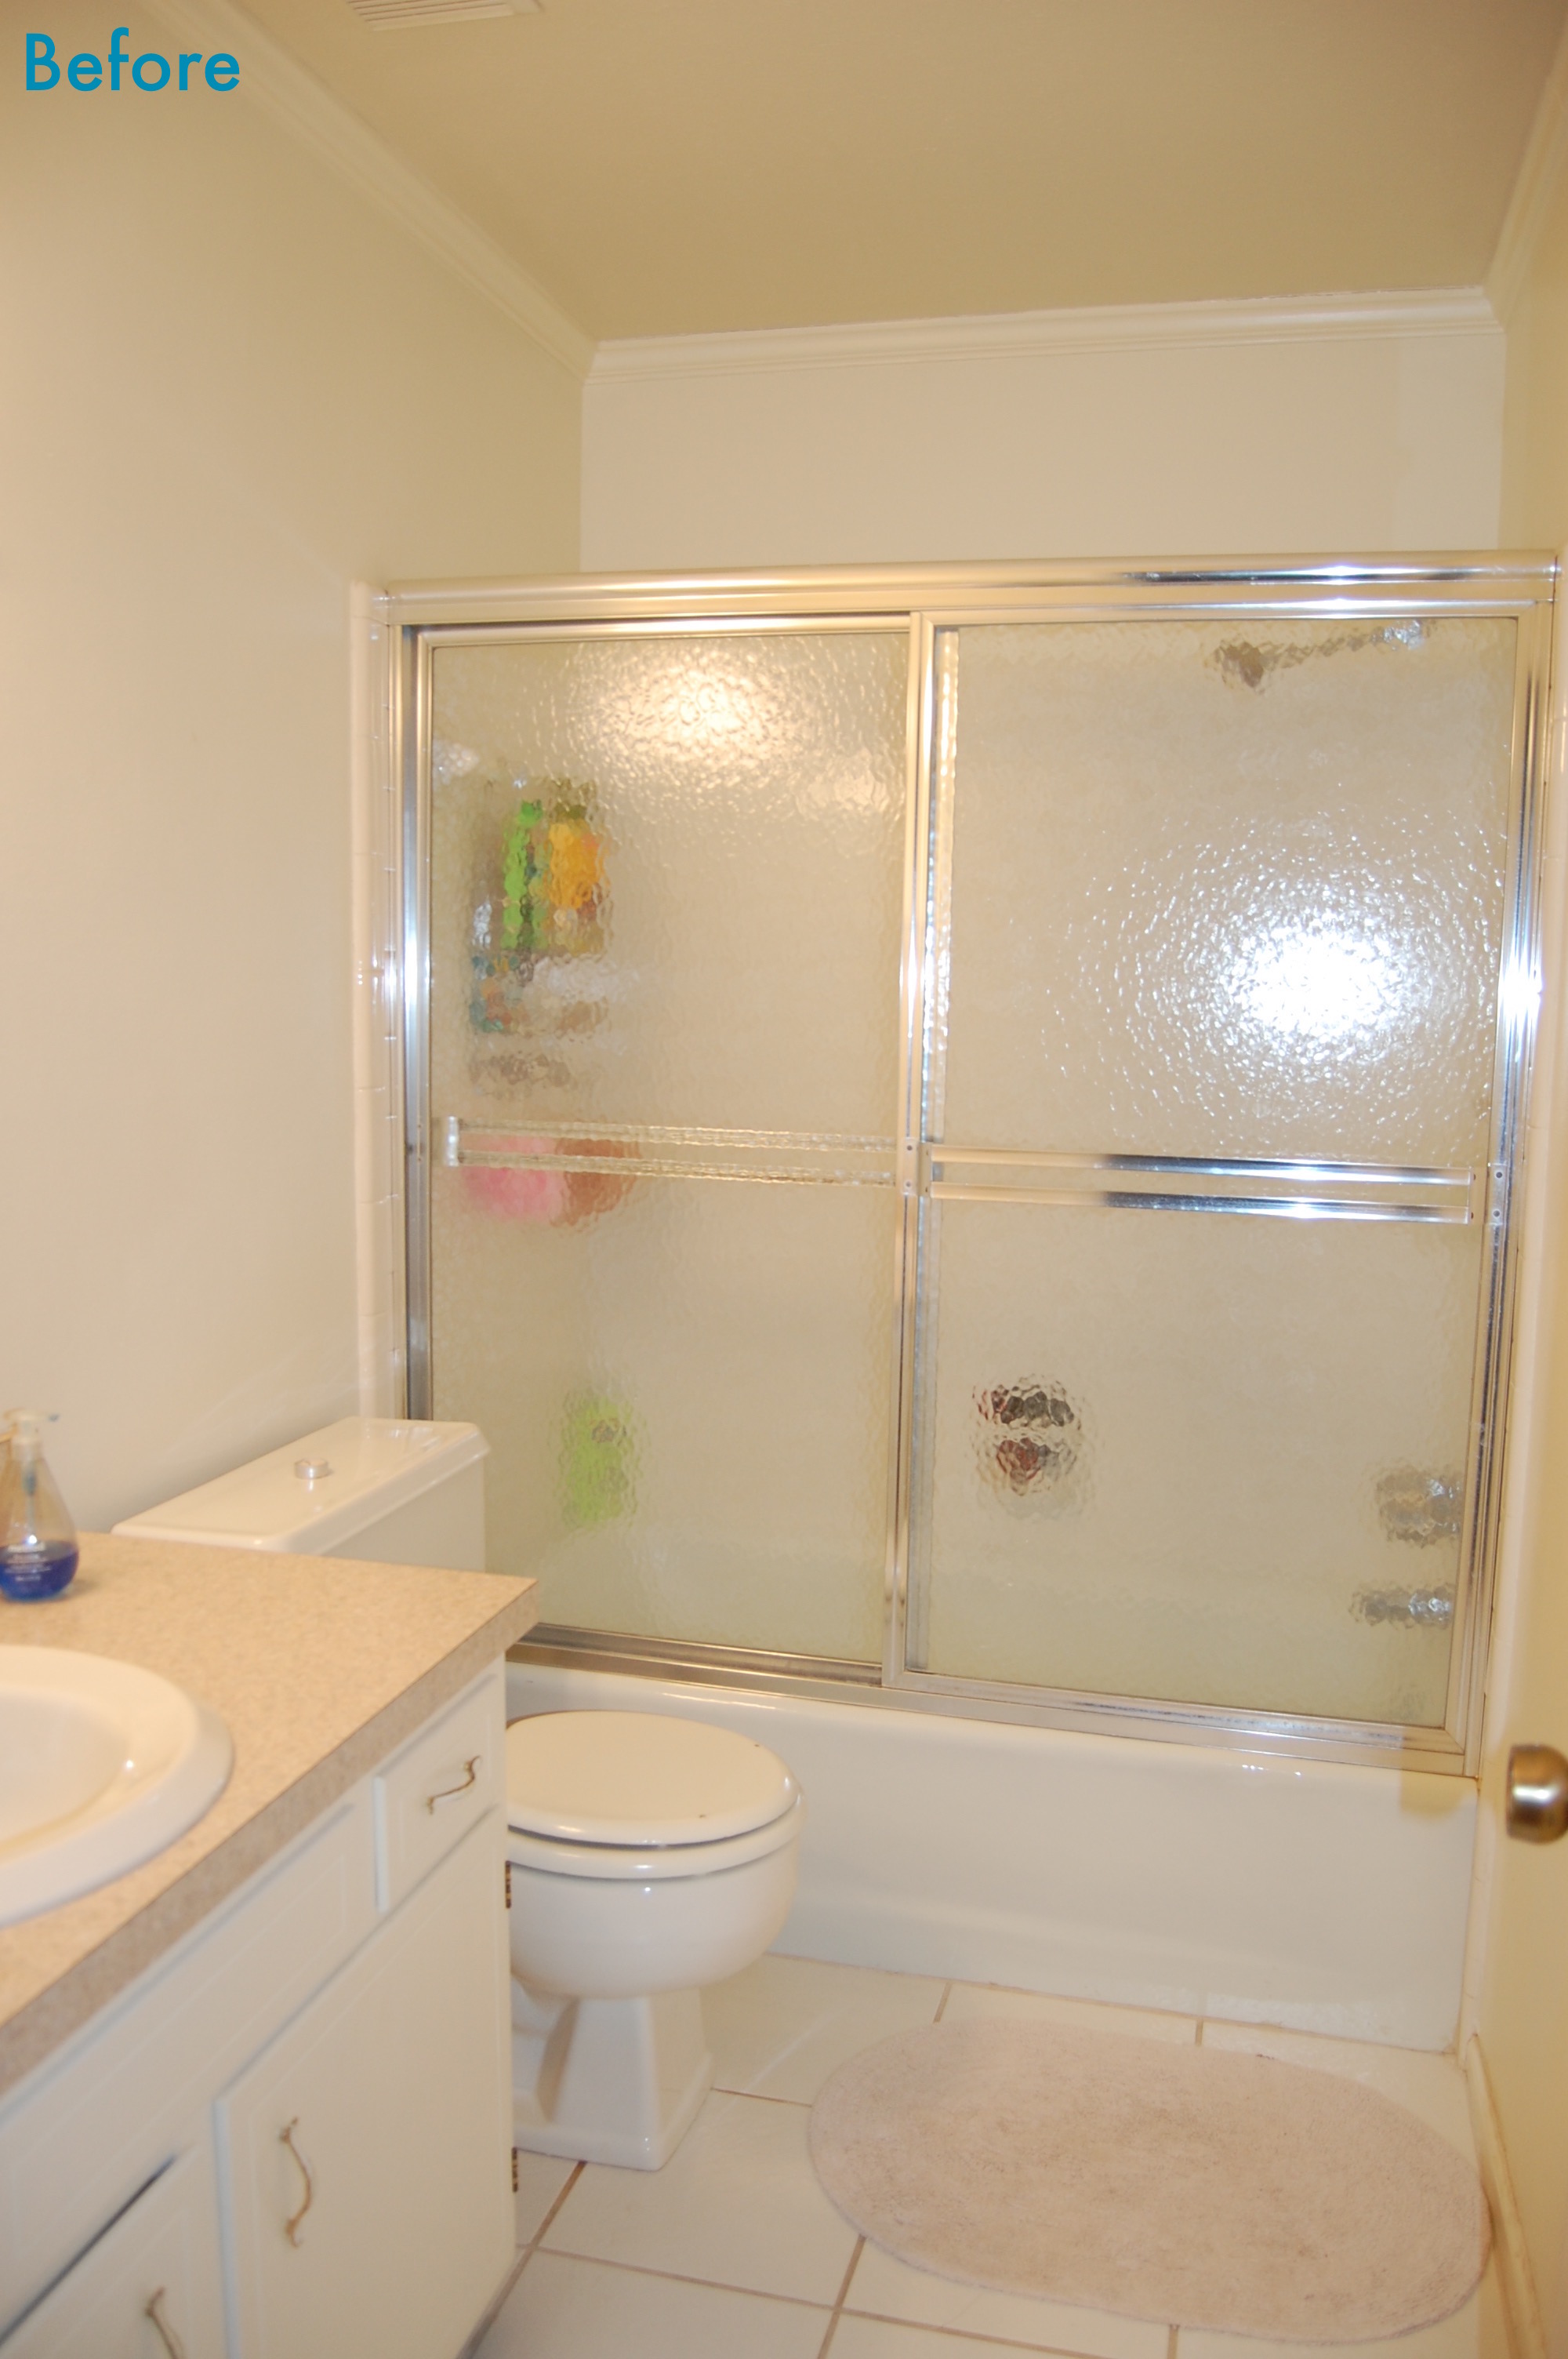
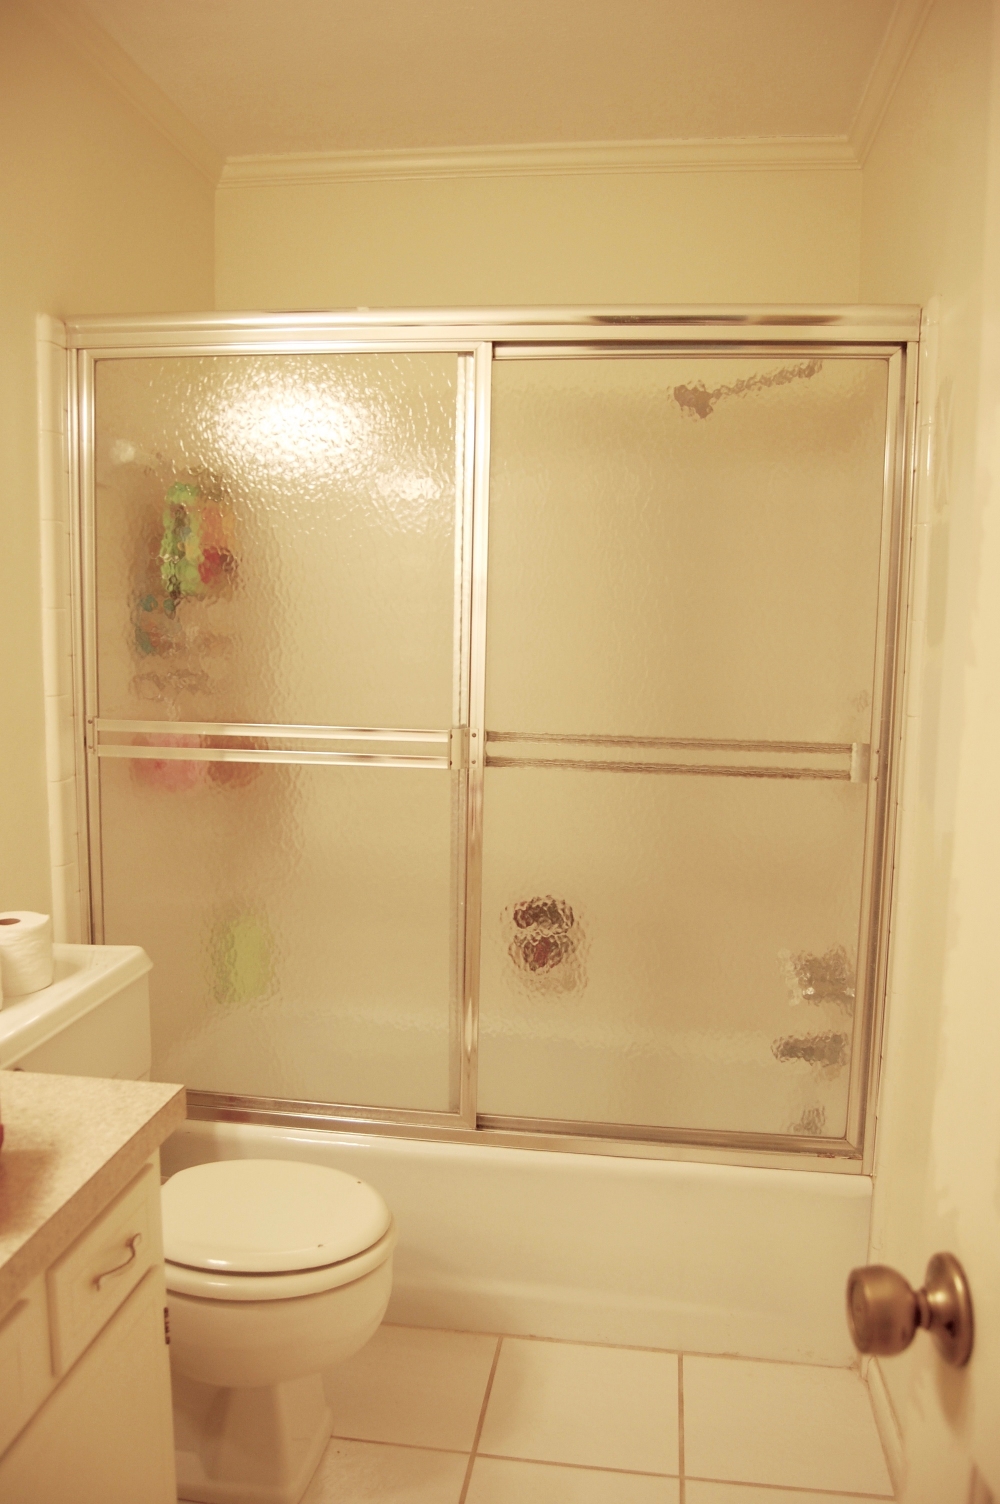
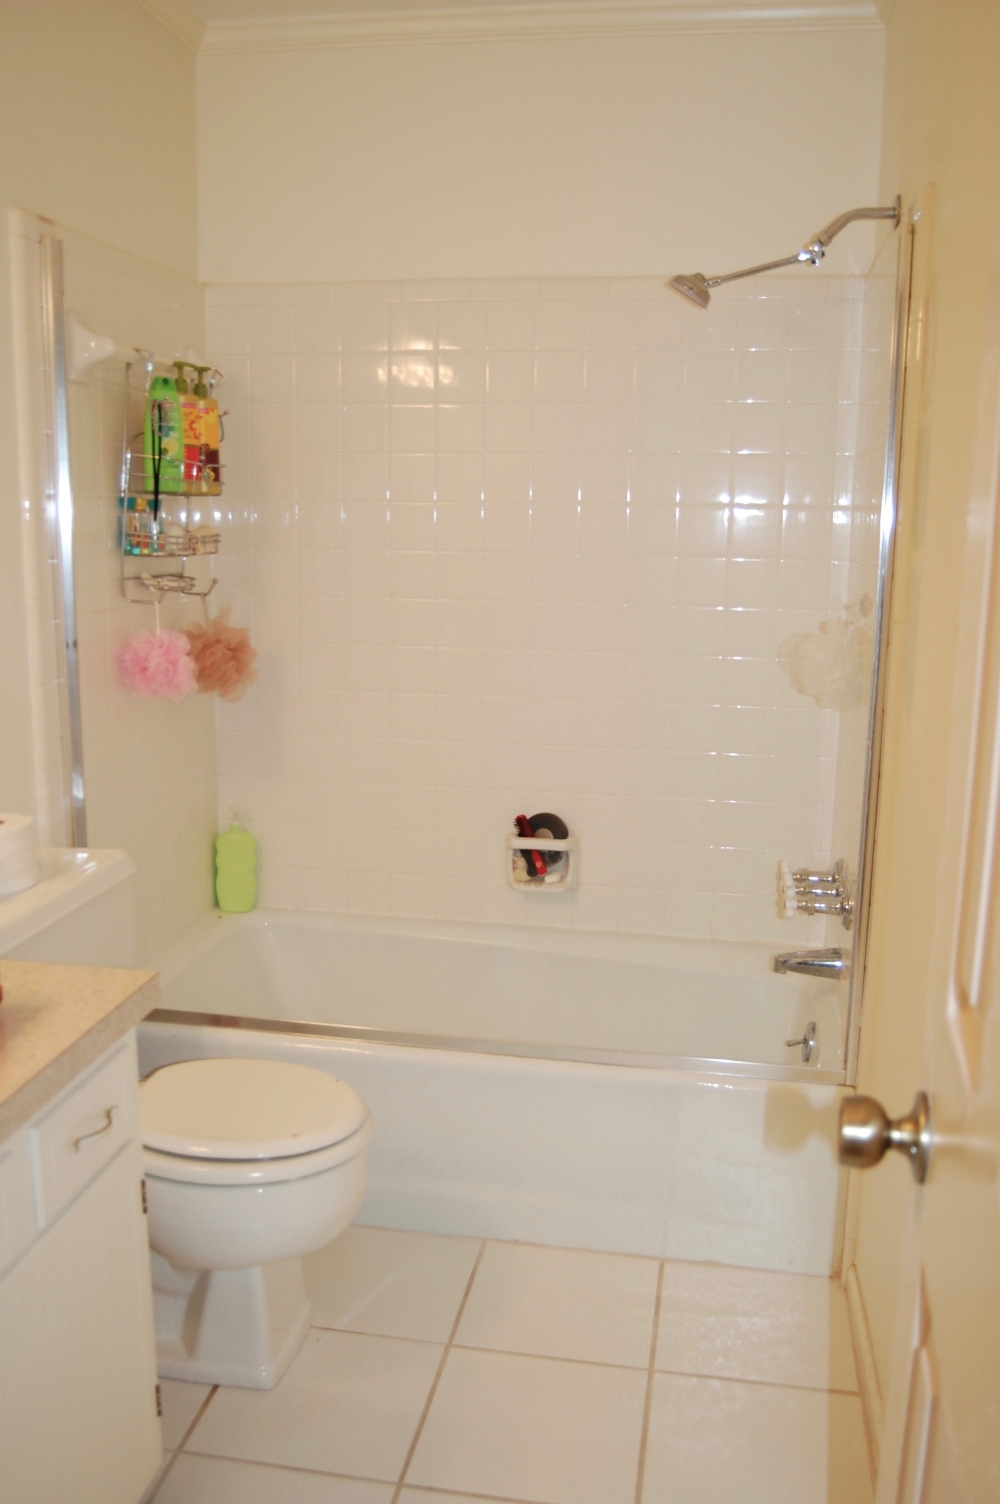
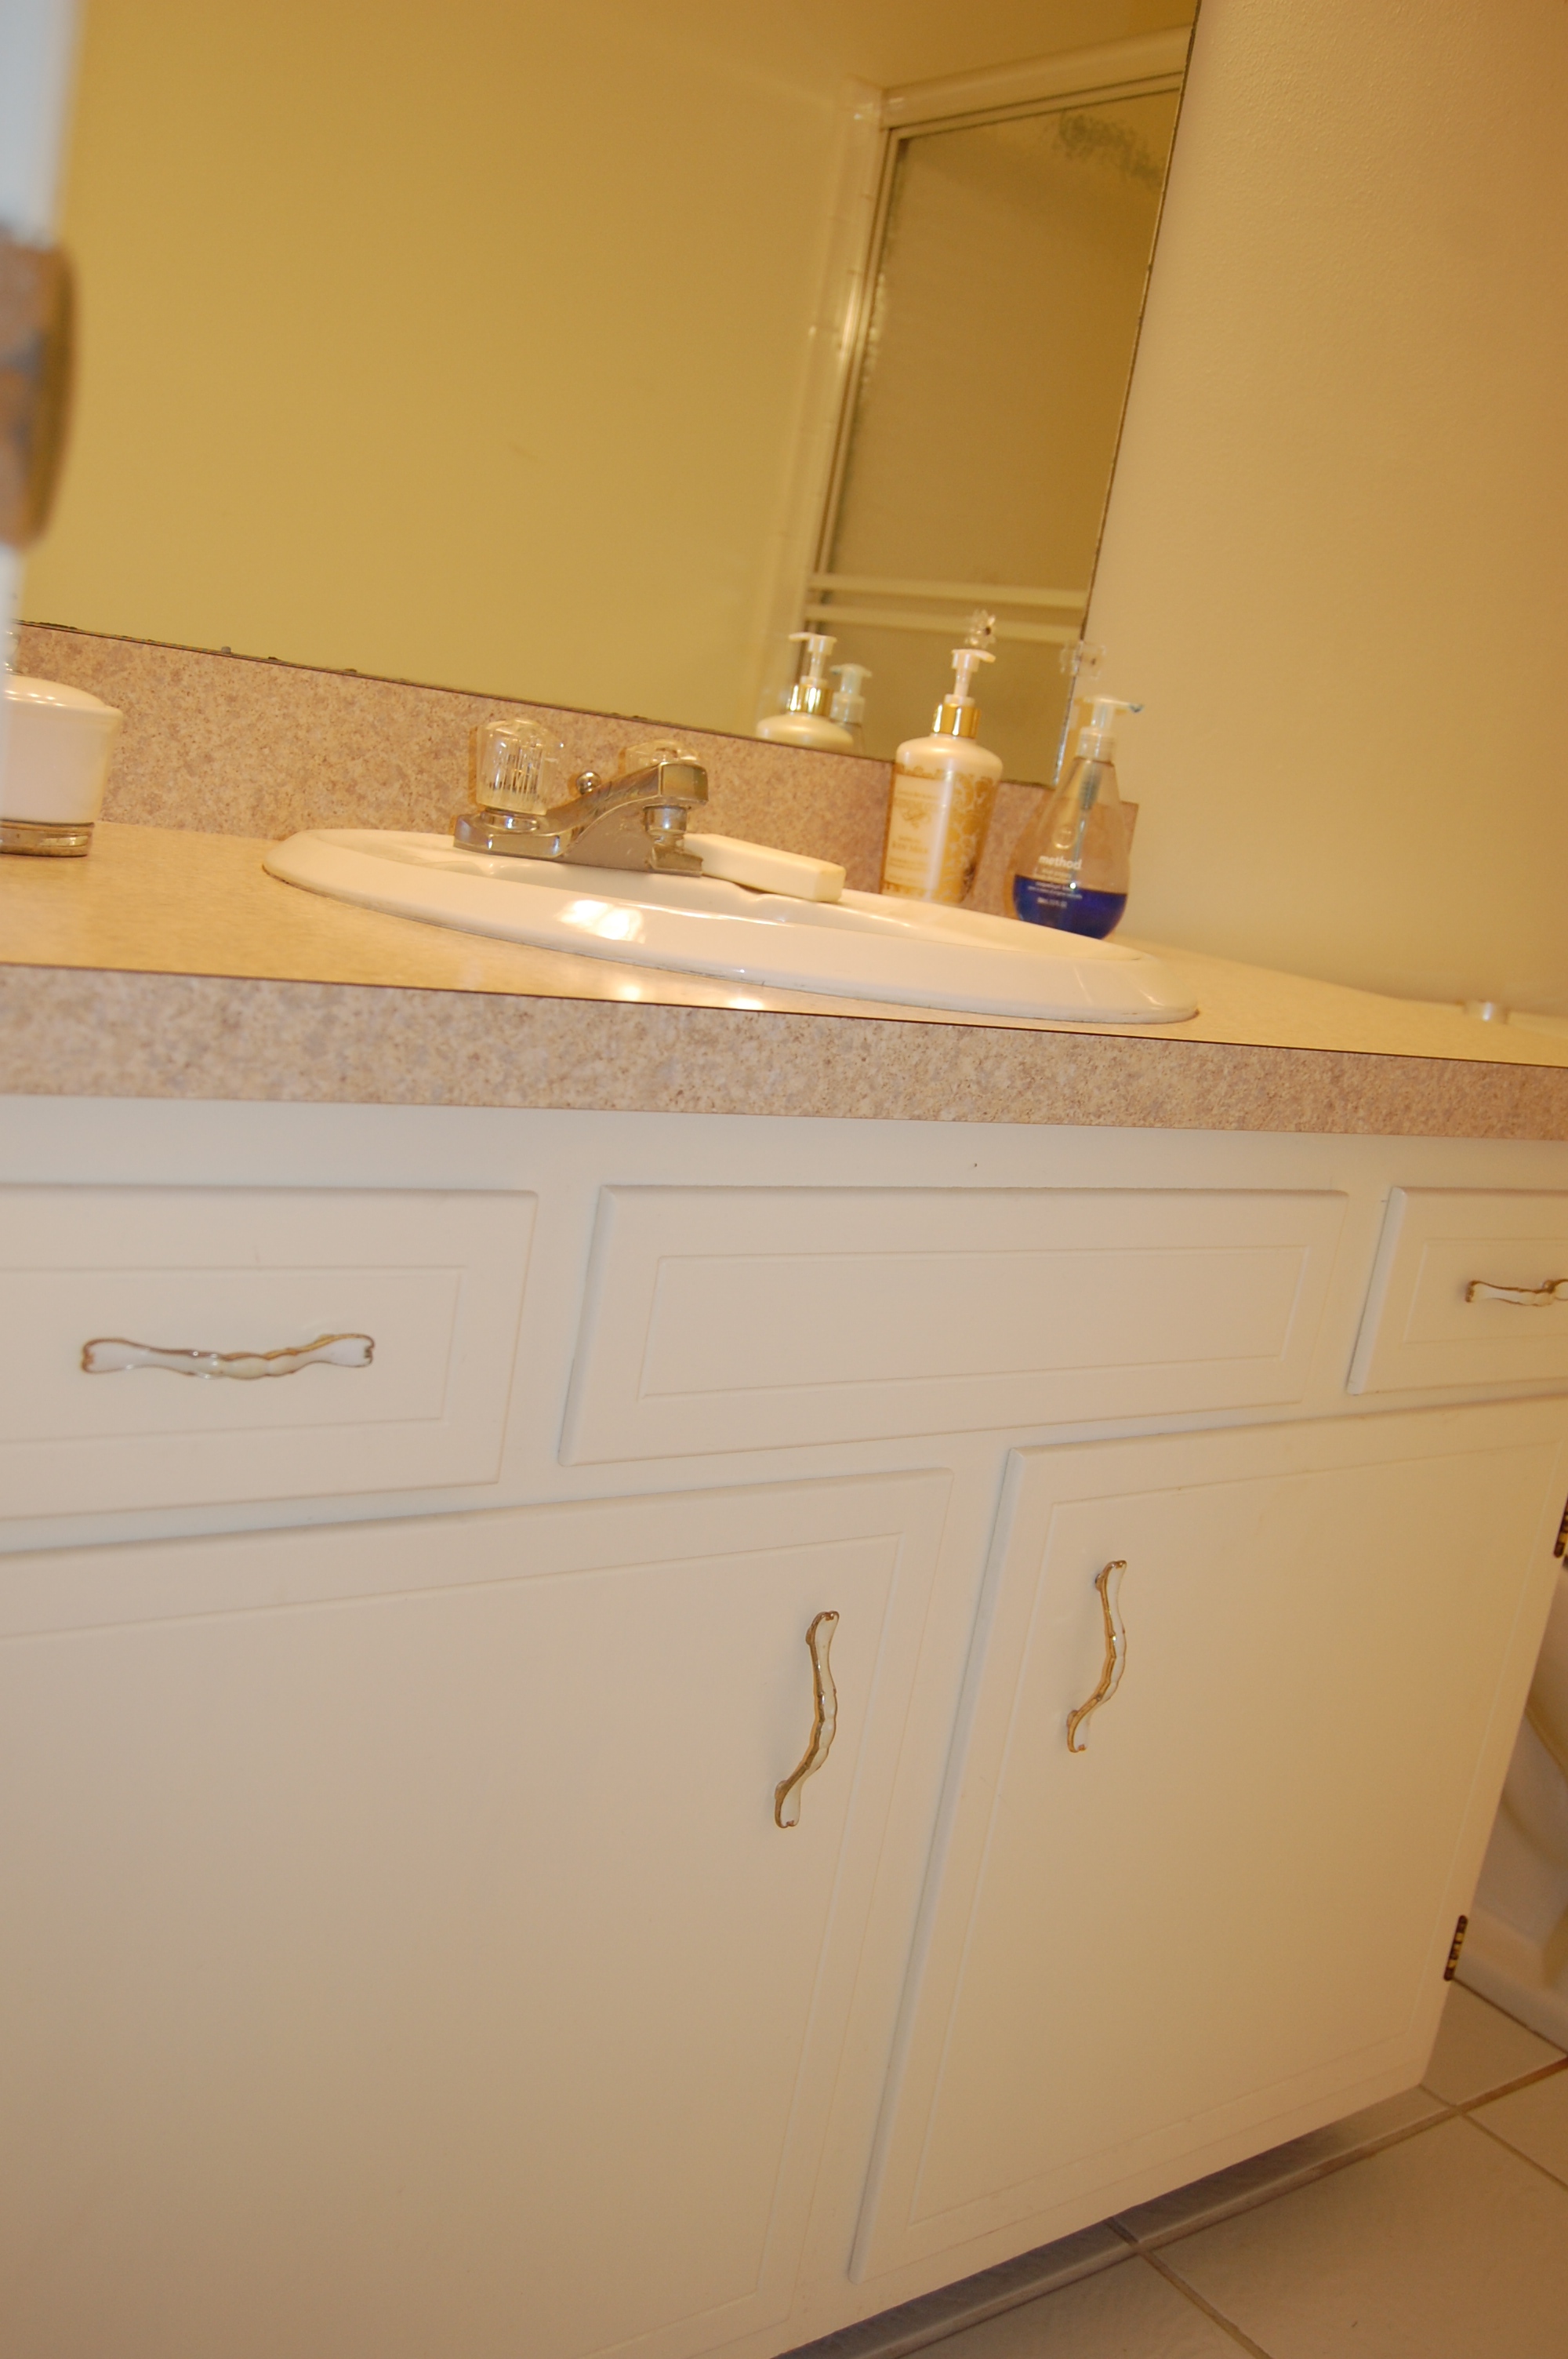
I was looking for ways to add pops of color to my mostly white hall bathroom when I came across this article from Apartment Therapy.  It details several ways to add color by painting the edges of objects a color that contrasts with the color of the rest of the object.  When I saw the above picture of the edge of a door painted neon orange, I knew I had to do this to my own room.
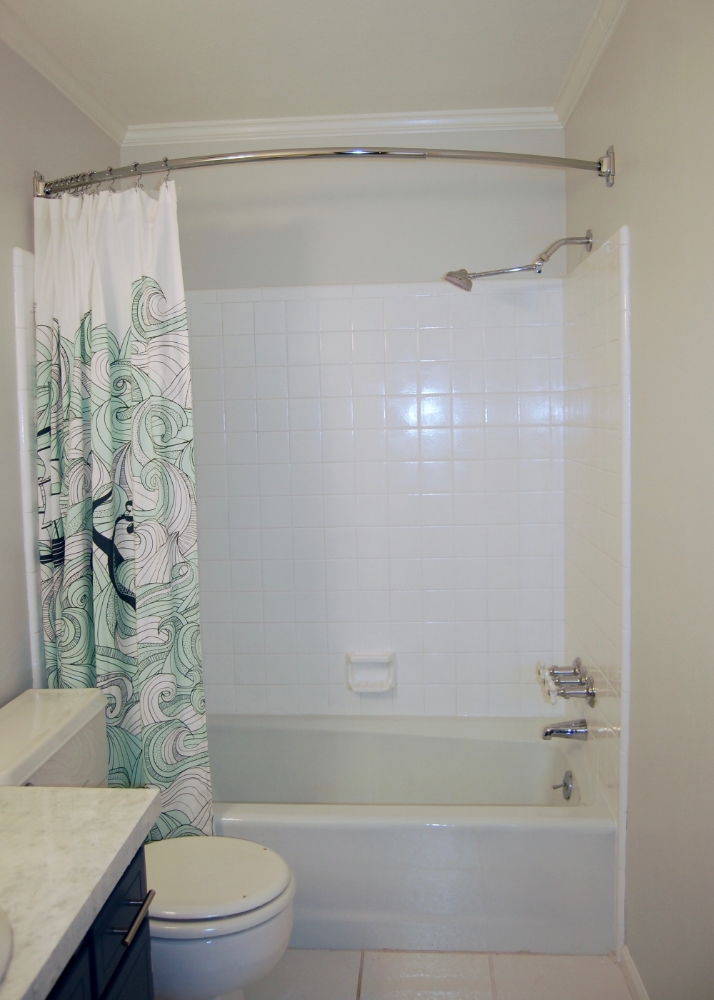
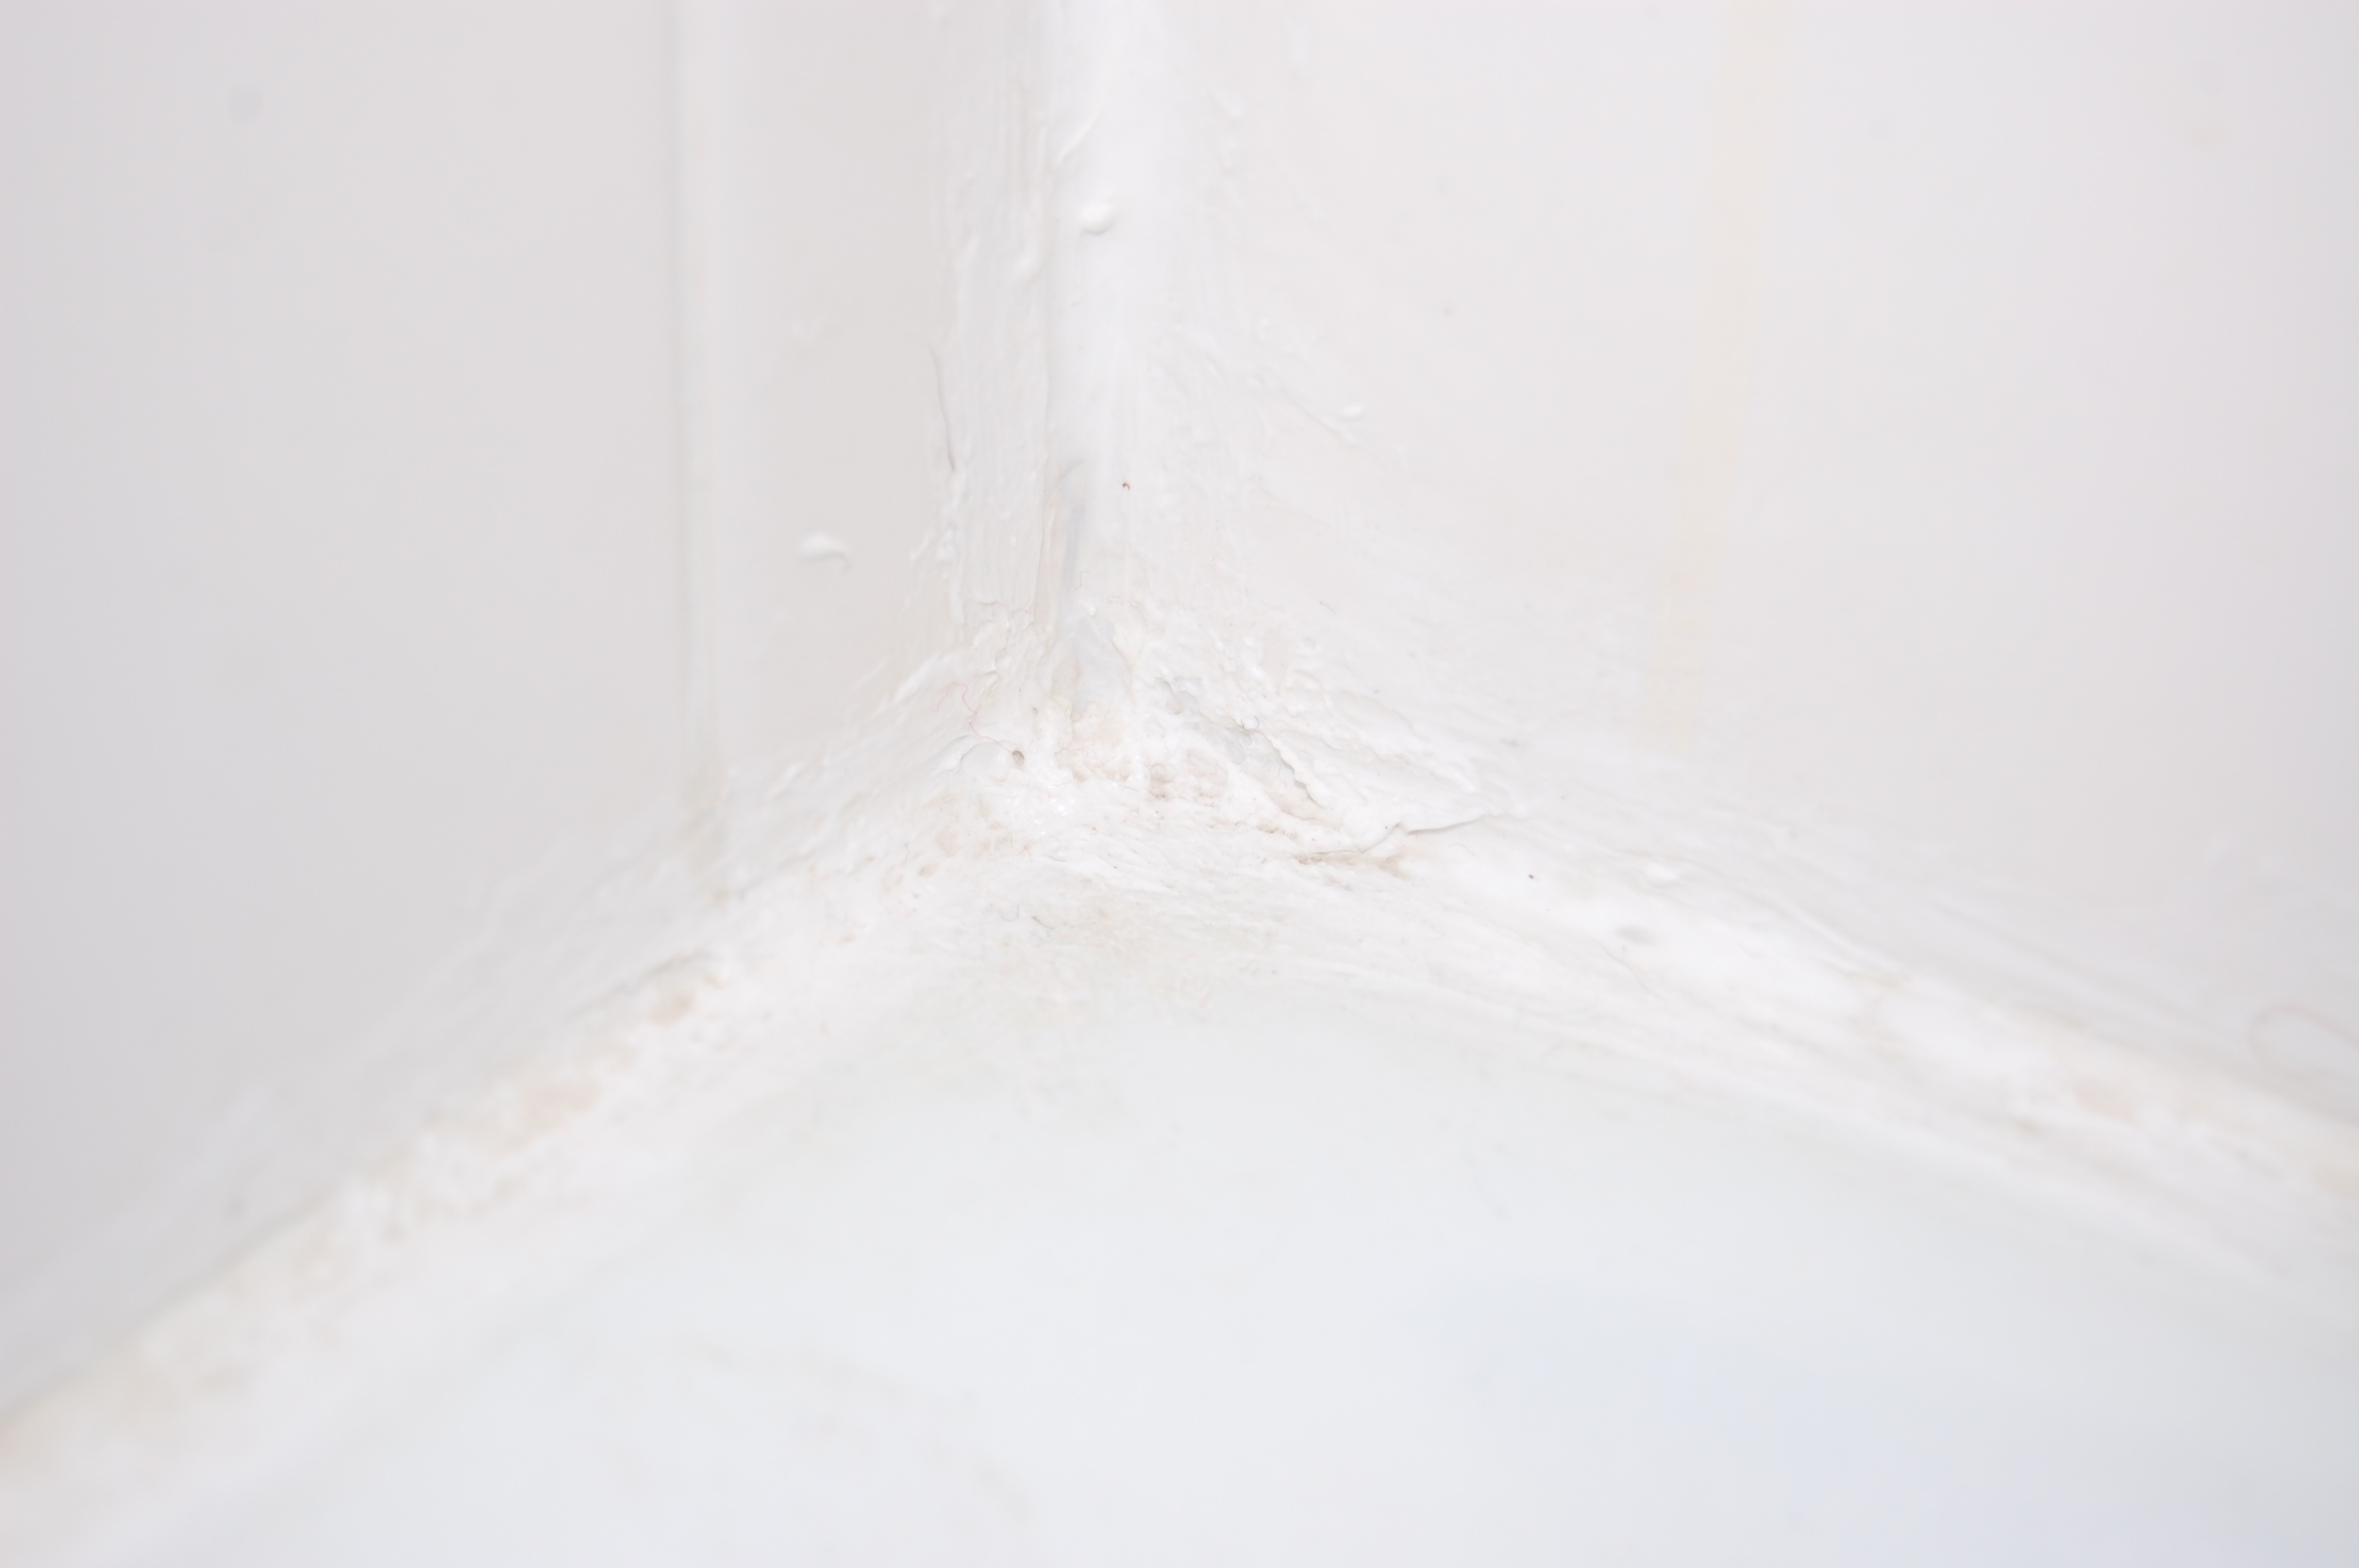
Here is the result:

A subtle hint of color from the now dark hallway.

A subtle hint of color from the now dark hallway.

I painted the edge of the door  Seaside Villa, in Home Decor Chalk Paint by Folk Art because I had it on hand and it was the perfect color.  Chalk paint tends to be a bit softer and more prone to scratching than traditional acrylic paint, so I am a bit concerned that it will not hold up over time.  I used Folk Art Home Decor Clear Wax over the paint to protect the finish, and I have had good luck with the durability of this paint previously, but only time will tell how well it will do for this application.   The door (and the rest of the trim), is painted in Simply White by Benjamin Moore, a slightly warm white that contrasts nicely with the cooler Seaside Villa.

This mini project really gave me a lot of bang for my buck.  The only cost to me was a little time, but the impact of this small change is surprisingly big.  It is hard to describe the difference this small change made, but I can say that somehow the room now feels more playful, and complete, and like details are a priority.

If you have done any surprisingly impactful small projects, or know a clever way to add a pop of color to a room, let me know about it in the comments.


At What Height Should a Shower Curtain be installed?

How high up should a shower curtain be installed?  It depends on the length of the shower curtain/shower curtain liner being installed, the height of the tub/lip of the shower, and personal preference.  However, in an effort to figure out the appropriate height for the shower curtain in my own bathroom, I created a simple equation that can be used to determine the minimum and maximum appropriate shower curtain height that you can use in your own house. 

Here is how it works:

Shower Curtain Height Measurements

Shower Curtain Height Measurements

First determine the length of the shower curtain/shower curtain liner.  To make things easy I am going to assume that the shower curtain and shower curtain liner are the same length.  Here in the US the standard shower curtain length is 70 to 72 inches (178 to 183 cm) and square, but it is getting easier to find shower curtains that are not the standard length.  In my case my shower curtain was 71 inches (180 cm) long.

Next determine the shower curtain hook/ring drop.  This is the amount of space between the top of the shower curtain and the bottom of the shower curtain rod when the shower curtain is hung on the rod with whatever hook/ring you will be using.  Depending on your shower curtain hooks this amount may be negligible, but if it is more than .5 inches (1.3 cm), or you are working with very tight tolerances,  it should be taken into account when figuring out the shower curtain height.  In my bathroom the drop was about 1 inch (2.5 cm).

Then determine the exterior interior height of the tub or shower lip.  To determine the exterior height measure the distance between the floor outside the tub/shower and the top of the tub/shower lip.  My tub was 14 inches (36 cm) tall.  To determine the interior height measure the distance between the inside tub/shower floor and the lip of the shower.  The interior height of my tub was also 14 inches (36 cm).

Last determine the amount the shower curtain liner should overlap the tub or shower lip so that it does not allow water out.  In a shower you generally want the shower curtain to overlap the lip of the shower by at least 1 inch.  Minimum overlap in a tub is generally 3 inches (7.6 cm), since tubs are curved and the shower curtain liner usually cannot hang straight down a little extra overlap length is needed.  Maximum overlap should still leave the liner about .5 inches (1.3 cm) from the floor so that it will not be stepped on.  Subtract .5 inches (1.3 cm) from the interior tub height to determine the maximum overlap.

 Now put all of your measurements in the below formulas:

  • Maximum Shower Curtain Height = Shower Curtain Length + Shower curtain hook drop + Height of tub/shower – Minimum shower curtain liner overlap
  • Minimum Shower Curtain Height = Shower Curtain Length + Shower curtain hook drop + Height of tub/shower – Maximum shower curtain liner overlap

In my bathroom the maximum shower curtain height = 71in (the shower curtain length) + 1in (the hook drop length) + 14in (The exterior shower height) – 3in (the minimum overlap for a tub) = 83in (211 cm)

The minimum shower curtain height in my bathroom = 71in (the shower curtain length) + 1in (the hook drop length) + 14in (The exterior shower height) – 13.5in (the maximum overlap for my tub) = 72.5in (192 cm)


Since my bathroom will be used by children, who are liable to splash water out of the tub accidently, I decided to go with a bit more than the minimum amount of overlap as a safety measure and hung my shower curtain rod 80 inches (203 cm) from the floor.

Within the range of Minimum to Maximum shower curtain height how do you determine how high you should hang your own curtain? 

Here are a few considerations that may help you out:

  • If there is an extra tall person in your household (like Firebeard in my house), make sure that the shower curtain is hung at least a couple of inches higher than they are tall or they are likely to hit their head on the rod every time they get in the shower.
  • Is the front of your tub/shower especially ugly?  Hang the curtain a bit lower to hide it.
  • Is the front of your tub/shower good looking?  Hang the curtain a bit higher to show it off.
  • Want to make the ceiling appear higher than it actually is?  Hang the curtain as high as possible (even consider buying an extra long shower curtain or a long window curtain to hang at ceiling height) to give the illusion of extra height.

What about width?

Most tubs and showers are about 60 inches wide.  The average shower curtain is 70 to 72 inches wide, or 10 to 12 inches wider than the average tub/shower.  This allows the shower curtain and liner to overlap the shower by a few inches on each side to keep water from escaping.  If your shower is significantly wider or narrower than 60 inches, you may need to find a specially sized or custom shower curtain.  If you have a wide shower, or just want a fuller looking shower curtain, an alternative to custom curtains is to use two shower curtains or two standard window curtains in place of just one. 

Now a bit about my own new curtain rod and curtain.  

Screw Mounted curved curtain Rod by AQ

Screw Mounted curved curtain Rod by AQ

Installing the Screw Mounted Rod

Installing the Screw Mounted Rod

Curtain Rod

I went with a screw mounted curved curtain rod by AQ that I found at my local TJ Maxx for $16.  This was an especially good deal, because screw mounted curved rods are surprisingly hard to find.  Most of curved rods I found in my price range were tension mounted rods.  I specifically sought out the screw mounted rod rather than the tension rod because I felt that it would be less likely to fall on the head of the child that inevitably tugs the curtain getting into the shower.

Double Glide Roller Shower Curtain Rings by Utopia

Double Glide Roller Shower Curtain Rings by Utopia

The Hooks/Rings

I got double glide roller shower curtain rings by Utopia for $7 on Amazon.  This is the first time I have used this style of hook/ring, and I love it.  They are easy to get on and off the rod if needed (but do not fall off), and I can easily take off the liner to clean while leaving the curtain in place.

The Liner

The liner is a Mildew-Free PEVA 3 Gauge Polyester Shower Liner by InterDesign which I also got on Amazon.  It was only $5 when I got it.  While I think it may be one of the cheapest liners available on Amazon it is still relatively substantial considering the price, and hasn’t tried to attach itself to anyone trying to take a shower yet like some cheap lightweight liners will.

Odyssey shower Curtain by Danica Studio

Odyssey shower Curtain by Danica Studio

The Curtain

Now the pièce de résistance, the shower curtain, which was the inspiration for the entire bathroom.  The shower curtain is Odyssey by Danica Studio.  I also got it on Amazon, and it was $50.  $50 is more than I would normally spend on a shower curtain, and I debated this purchase for a while, but in the end I feel like it was worth it.  Everytime I see it, it makes me smile.

Once the shower curtain went up the bathroom really started to feel more complete, and I could start to see my vision for the room coming together.  Even though we still have several things left to do, it is starting to feel like we are on the downhill side of an unexpected mountain climb, and I can’t wait to get to the bottom.

(This post contains affiliate links, but I have not been paid to review any of these products)

Listen while you work

I like to listen to podcasts when I am working on a project, or driving, or brushing my teeth, or awake.  I listen to a lot of them, but sometimes have a hard time finding new ones to listen to that I enjoy.  In an effort to spread the word about great podcasts, here are a few of my current favorites;


The Allusionist

http://www.theallusionist.org/

The Allusionist is a unexpectedly funny podcast about language and etymology by Helen Zaltzman.  My favorite Episode is #2 Bosom Holder, which is about the language surrounding undergarments. 


Lore

http://www.lorepodcast.com/

Lore is a podcast about folklore and real life scary stories by Aaron Mahnke.  Lore walks the line between fantasy and reality, and makes you feel as though for some scary stories,  maybe there really is more than meets the eye. My Current favorite is Episode #31, Lost and Found, which is about finding dead bodies.


Surprisingly Awesome

https://gimletmedia.com/show/surprisingly-awesome/

Surprisingly Awesome is about things that seem boring, but are actually really cool if you know more about them.  It is hosted by Adam Davidson, from NPR’s Planet Money and Adam McKay, former head Saturday Night Live writer.   My current favorite is Episode #3, Concrete, and it’s surprisingly important contribution to modern civilization. 


The Black Tapes

http://theblacktapespodcast.com/

The Black Tapes is a docudrama about finding the truth behind a collection of unsolved paranormal mysteries.  It is hosted by  Alex Reagan, but has a full cast of interesting characters.  Since this is a serialized drama, I recommend that you start at the beginning of this series so that you get the whole story.  

Do you love a great podcast that is languishing in anonymity that the world needs to know about?  Tell my readers about it in the comments – spread the word.

Quick Tip: Removing Chipping or Peeling Paint

We have had a lot of chipping and peeling paint to deal with in our new house, and as a result I have had many opportunities to experiment with the different ways to remove it.  My new favorite way to remove chipping or peeling paint is a real blast – of heat.  Ha, ha, ha!  (I know, I’m a dork).

What do you need?

  • A heat gun if you have one, or a blow dryer with a high heat setting
  • A scraper – Either stiff plastic or metal.  If you use metal remember that it can easily gouge soft wood.  I like to use a painter’s 5 in 1 tool.

How do you do it?

Heat Guns Soften the Paint

Heat Guns Soften the Paint

Using the heat gun or blow dryer warm up the paint until it is slightly soft.  It might take a little trial and error to figure out exactly how warm you need your paint to be.  Too little heat and it won’t be any easier to scrape, too much heat and the paint will get gummy and smear.  Make sure to keep the heat guns moving to spread out the heat (and prevent scorch marks).

The softened paint scrapes of easily.

The softened paint scrapes of easily.

Then scrape your paint – it should come off with significantly less effort than when the paint was cold.

We sand anything that we can’t scrape off, and then if possible scrub the crap out of the painted object with an abrasive pad and a vinegar and water solution.  Anything that is left after that just gets painted over (if it hasn’t come off after all of that it is probably going to stay attached).

So far this method has yielded the best results in the least time for us, which is important for a person with high standards and limited time. 

Do you know a better way?  Let me know about it in the comments.

DIY Countertop Refinishing

Regular Readers know that so far our mini bathroom remodel has not been as mini as we had anticipated.  Things have cost more than we planned, taken longer than we planned, or just not gone to plan.  But the way our bathroom countertop looks now makes me feel like it was all worthwhile.  It was the kind of project that I need every once in a while to restore my faith in DIY – a quick win. 

Before - Unattractive Laminate

Before - Unattractive Laminate

After -  my Mom Thought we installed marble 

After -  my Mom Thought we installed marble 

I really am incredibly happy with our new bathroom countertop, and really excited to share it with you all, so let’s get started, by taking it from the beginning;

One of the things that I knew I wanted to do when we started this mini bathroom remodel was update the countertop.  The old countertop was a sandy colored laminate.  It was in good shape, but it added nothing to the space.  Initially I had visions of granite and marble dancing in my head, but a limited budget put the cabash on that pretty quick.  I considered a lot of refinishing options, from using a countertop restoration kit, to building a new one out of planks, to covering the existing countertop in concrete.  I also considered faux marble, which looks beautiful when done correctly, and pretty terribly when done poorly, and decided that my artistic skills were not quite up for it.  I finally came across what looked like a pretty simple countertop painting and sealing technique on Designing Dawn.  The technique basically involved sponge painting a variety of colors in layers (true artistic talent not required), and pouring on a thick sealant called Envirotex Lite.  Her results looked pretty amazing, and she even had a follow up post showing how well it had held up over time (very well).  I was sold.

The entire process started by taping off the area that would be painted, and draping everything the Envirotev could drip on in plastic so I wouldn’t have a giant mess to clean up later (since I am messy and couldn’t drape the entire room in plastic I still had a bit to clean up – it doesn’t come off of things easily).  Then we sanded and primed the existing laminate countertop.  We started with a general purpose primer which was a complete disaster (you can read more about here), but the second primer we used (Zinnser Bin) worked like a charm.  For the record, my primer recommendation for this project is Zinnser Bin, but Primers should always be selected with the surface they are priming and the medium that will cover them in mind. I would also recommend sanding prior to taping, because the sanding dust gets caught in the tape.  This wasn’t a problem for us since we had to re-tape everything anyway (see priming post).  We also ended up removing the sink entirely even though we didn't originally intend to (again see the priming post).  I would remove the sink from the start if I was doing this over again.  The sink really isn't hard to remove (or put back on), and it makes the surface much easier to work on.

1st Disastrous Priming Attempt while the sink was still in place - Looking pretty sad

1st Disastrous Priming Attempt while the sink was still in place - Looking pretty sad

After the 2nd Primer Attempt and removal of the sink - Looking much Better

After the 2nd Primer Attempt and removal of the sink - Looking much Better

Next was the artistic painting which I was most nervous about.  Once the primer was fully cured I laid down 3 coats of my base color, Benjamin Moore Simply White in Satin.  I waited the recommended recoat time between coats, so this took a while. 

Three Layers of of Base Color Applied.

Three Layers of of Base Color Applied.

Then it was time to let my inner artist free.  I put a bit of each of my 3 paint colors in a plastic container and added a bit of water to thin them out.  Then I dampened my sponges before dunking them in my thinned out paint. 

Paint Colors Used to Create the Faux Stone Look.  Clockwise from the upper left BM Moonshine, BM Simply White, and Grey Craft Paint.

Paint Colors Used to Create the Faux Stone Look.  Clockwise from the upper left BM Moonshine, BM Simply White, and Grey Craft Paint.

To make my pattern I started with my darkest color and basically dabbed it all over the countertop using the kitchen sponge.  Then I did the same with the medium paint, and the base color paint, letting some of the color that went before peek through each time.  I didn’t let the paint dry between the colors so they ran together a bit, which I felt made it look even more natural. 

The first of my 3 colors applied, and not looking super promising.

The first of my 3 colors applied, and not looking super promising.

While the paint was still wet I sprinkled super fine glitter over the countertop to give the finished product a bit of depth, like real stone.  I was pretty reluctant to bring glitter into my house because, as my sister’s friend says “Glitter is the Herpes of the craft world – once you get it you can’t get rid of it,” but it made the finished product look so good that it was worth it (even if I keep finding glitter around the house for the next 3 months).  Then I let everything dry.

All three paint colors and glitter applied - starting to look pretty nice.

All three paint colors and glitter applied - starting to look pretty nice.

Confession time:  The next morning after painting I decided that the left side of the countertop was too lite and I did a bit of touch up painting.  This was a mistake.  The newly applied paint just didn’t blend well with the previously applied paint.  I should have left it the way it was, and now I regret touching it up.  If you do this yourself reconsider touch up painting.  Maybe wait a day or sleep on your touch up painting decision.  If you do decide to do some touch up painting keep in mind that the newly applied paint probably won’t blend perfectly with the initially applied paint and make sure you are ok with that.

Ok, so everything is taped, draped in plastic, and artistically painted – now it is time for the magic sealing ingrediant - Envirotex Lite.  Envirotex Lite is a two part reactive polymer compound (a resin and a hardener) that is mixed in two stages, then poured on top of whatever you are sealing.  Basically you pour equal amounts of the resin and hardener in a mixing container, mix for the prescribed period of time, pour it into a new mixing container, and mix it again for the prescribed period of time, then pour it on whatever you are sealing and spread it out so that it covers the whole surface.  We found some of the directions for this product kind of insane, but we followed them to the letter, including timing the mixing, switching containers, the whole nine yards, and we had absolutely no issues with the product hardening properly and found it relatively easy to apply, so at least they work. 

To use the Envirotex Lite, you mix it up per the directions, pour it on, then spread it out (we used cheap plastic putty knives which we have been able to reuse).  It was pretty easy to spread out with the putty knives, but it doesn't easily flow over the surface you are covering.  It is more like moving corn syrup than water.  You also have to work pretty fast because the mix starts setting up pretty fast, and once it starts to set you shouldn't move it any more (more on that below).

Amazingly Smooth Glassy Horizontal Surface actually reflecting!

Amazingly Smooth Glassy Horizontal Surface actually reflecting!

Since Envirotex lite is really made for horizontal surfaces, the vertical surfaces we needed to cover were a bit more of a challenge.  When we poured the mix onto the countertop we poured a bit extra near the vertical surfaces then used our putty knives to lift and spread the mix onto the vertical surfaces like we were icing a cake with really thin sticky icing.  The result was very well covered vertical surfaces, but unlike the perfectly smooth glassy horizontal surfaces the vertical surfaces are a bit textured.  This really isn't a big deal.  I had to try very hard to get this texture to show up in a picture as it is pretty hard to see.  The pic below shows the texture in literally the worst possible light.

Vertical Surfaces are textured.

Vertical Surfaces are textured.

When the Envirotex starts to set up bubbles will form that need to be popped.  According to the  directions you can use a blow torch to pop the bubbles or blow on them.  We got a blow torch for this purpose, but ended up just blowing on them and it worked fine on our relatively small application.  If I were using the Envirotex on something larger I would go the blow torch route.

One thing that we learned while attempting to pop bubbles is that you should not touch them - AT ALL.  This is what happens if you do;

Be warned - DON'T TOUCH THE BUBBLES or THIS will happen!

Be warned - DON'T TOUCH THE BUBBLES or THIS will happen!

Our bubble touching mess was so bad that we ended up putting on a second coat of the Envirotex the next day right on top of the first.  The second coat looks fantastic.

The Finished Countertop!

The Finished Countertop!

Want to know exactly what we used to make this happen?  Here are the details;

  • Paint:
    • Primer:  Zinnser Bin
    • Base Color:  Benjamin More Simply White
    • Medium Grey:  Benjamin Moore Moonshine (similar to, but slightly darker than our wall color)
    • Dark Grey: Anita's All Purpose Acrylic Craft Paint in Grey
  • Painting Supplies:
    • Paint Brush- To Lay down the base coat and primer
    • 3 Clean kitchen sponges – To Layer my paint colors (in retrospect natural sea sponges would have probably been easier to work with)
    • 3 Disposable plastic containers to hold paint (something clean from the recycling bin works great)
    • Water to thin the paint
    • Painters Tape
    • Plastic Tarps (we used cut up garbage bags)
  • Finishing Touches:
    • Tree House Studios Extra Fine glitter:  Super small glitter used to add a bit of depth and sparkle like you see in real stone
  • Sealing Supplies:
    • 2 4 oz boxes of Envirotex Lite (we ending up doing 2 coats – 1 box per coat)
    • 4 flat bottomed cylinder plastic containers (2 per coat for mixing the Envirotex)
    • 4 wooden stiring sticks (2 per coat for mixing the Envirotex)
    • Cheap Plastic putty knives (for spreading the Envirotex over the countertop)
    • Hot Breath for popping bubbles

Let me know what you think, and if you would consider doing it yourself in the comments.

(This post contains affiliate links, but I was not paid to review or use any of the products mentioned.)

Avatars

The countertop I had started working on last time is finished and looks really fantastic, but I won’t be talking about it in this post.  I really want to do it justice, and just haven’t had enough time this week to do that.  I did want to make sure I got in another post this week however, so I will be telling you about the family’s new avatars. 

Recently I have been working on updating the about page, and realized that it would be nice for my readers to have a mental image of who they are reading about.  The problem is that I don’t often show anyone’s face on the blog.  That’s because there are a lot of creepy weirdos out there, and I don’t want to make it too easy for them to figure out what me are my kids look like, and do their creepy weirdo thing.  Enter the Avatar.

An avatar is a symbol or figure that represents someone in a computer game.  While this isn’t exactly a computer game, the blog is on a computer, so close enough.

The kids already had the perfect medium for making avatars – Lego!  So I asked them to help me make some Lego minifigures that really reflected our family.  This is what I got back;

The Family Avatars

The Family Avatars

Let’s take this one by one.  Starting on the left we have Firebeard.  Husband, father, and Star Wars droid wrangler?  The likeness really isn’t too bad, but I have no idea what is going on here.  Perhaps the combination of the superhuman strength and and the hammer imply modern day Thor like abilities but with droids instead of goats.  When I asked the kids, they told me, “It's just fun.”  At least it is better than the drunken stormtrooper minifig they keep trying to use as his stand in for board games.

Firebeard

Firebeard

The little black figure is our Boston Terrier, Earl.  I think the food represents what Earl would like to eat, rather than what he does eat, even so, I am glad that clouds of gas are difficult to represent with Lego. 

Earl

Earl

Next is me, Gerwerken.  My figure is by far the plainest, lacking any outrageous accessory.  It looks pretty much like me, except that I rarely wear pants.  In one hand I have a coffee cup, and in the other I have the plans for “Taco Tuesday,” which sounds innocent enough, until you realize that in the Lego Movie the Taco Tuesday plan was basically the plan to take over the world, enslave the population, and crush creativity.  Was this a subtle hint that they feel crushed under my authoritarian regime, or just a bid for me to make tacos on Tuesdays?  When I asked the The boy about it he said, “that's what you need when you work in an office building job.”  I’m not sure what that says about office workers.

Gerwerken

Gerwerken

Now the Kids, both of whom are riding dinosaurs.  I wanted to know what this might mean psychologically for them so I looked it up.  Dinosaurs symbolize the fear of no longer being needed or useful.  Perhaps Thomas the Tank engine caused a lot more psychological damage than I realized.

The Boy is on the right with the raptors.  He is holding a video game controller and a can of soda.  While the can of soda is wishful thinking, overall his Avatar is eerily accurate.

The Boy

The Boy

The Girl is in the middle.  She is riding a dilophosaurus (the kind of dino that spits acid in the Lego Jurassic Park game), dressed as a princess, and holding a lightsaber.  Somehow, the little plastic figure gives off the impression of leading a marauding horde into battle.  So, it’s pretty accurate too.

The Girl

The Girl

Stay tuned for updates to the about page using our highly accurate avatars, and don’t miss next week’s post on how the countertop turned out – it will be worth it.

Primer on Primer

This weekend we started refinishing our bathroom countertop, and like nearly every other aspect of this Mini Bathroom Remodel, things didn't go quite to plan.  This is the story of how we discovered that not all primers are created equal, and I discovered the primer that I will be using on all shiny surfaces from now on.

The current countertop in our bathroom is a sandy beige laminate, that is very likely original to the house.  While it is not the worst looking laminate countertop I have ever seen (our Master Bathroom Countertop is significantly worse), it doesn't match with the rest of our updated bathroom, so we decised to refinish it, since it was an inexpensive alternative to replacing the countertop.  Initially we considered overlaying the countertop with concrete, as was done here, but eventually we settled on painting and sealing the countertop, because it was (at least theoretically) faster and less messy than concrete.

The ORIGINAL countertop - sandy beige.

The ORIGINAL countertop - sandy beige.

Since laminate is a hard, slick surface, paint has difficulty sticking to it, so we made sure to prepare the surface for the paint by roughing it up and thoroughly cleaning it.  I started with a 150 grit sandpaper, and finished with a 220 grit.  There really wasn't much visible difference after the sanding, but the countertop felt subtly less slick.  After removing all of the sanding dust I thoroughly cleaned the counter top, first with my normal all purpose cleaner, then with a calcium, lime and rust remover.  I have seen a lot of people use TSP to clean countertops and cabinets prior to painting.  Personally I wouldn't use TSP to clean any interior surfaces because it needs to be really thoroughly rinsed off with water, and generally I don't want to be using that much water on an interior surface.  And because anything that is worth doing is worth overdoing, as a last step before paint I used a de-glosser, also known as liquid sandpaper, to further remove the shine from the countertop.  Oh, and we also lifted the sink out a bit so I could paint under the lip – no shortcuts here.  Then it was go time. 

Sanded, cleaned, sink elevated, taped and ready to be painted.

Sanded, cleaned, sink elevated, taped and ready to be painted.

I had a giant container of Kilz Hide-All Primer (similar here) left over from another project so I decided to use that.  It was after all primer, and it had worked perfectly fine on other projects, and as they say waste not want not (foreshadowing anyone?).  This is what it looked like after the first coat – not too shabby.

After one coat of kilz hide-all primer

After one coat of kilz hide-all primer

After waiting the prescribed recoat time I went back in for a second coat, and that is when things went wrong.  As I began painting I accidently scraped the dry surface with a fingernail.  The paint didn’t scratch – it completely came off.  I tried to simply fill in the hole with more paint, but as I did so additional paint began to bubble up.  I decided that perhaps I hadn’t waited long enough – paint drying times are not exact after all.  So I carefully scraped off the bubbling paint, and still more carefully patched the hole I had made with more paint. Then I left the mess to dry ever longer.

Several hours later (around 10 o’clock at night), I went back to the bathroom to put on the second coat of paint before I went to bed so that it would be ready for its 3rd coat in the morning.  Before I got started I gently touched the dry paint and it came off in my hand.  Tired and frustrated at a day wasted, I began scraping off the paint.  It was so poorly adhered that it came off in wide swaths, and only 10 minutes later I was done.  The countertop looked exactly as it had before I had started painting.

Kilz hide-all primer coming off in strips.

Kilz hide-all primer coming off in strips.

After ten minutes of scraping the countertop is back to it's previous state.

After ten minutes of scraping the countertop is back to it's previous state.

To ward off nightmares of endless repetitions of painting and scraping and repainting, I began my research into primer types and their applications that night.  I had seen examples online where countertops had been successfully painted so I knew it could be done, but most of the time the bloggers that had done the painting didn’t specify the type of primer used.  I had to go a bit deeper and ended up searching on the major Primer Manufacturer’s websites.  On the Zinsser website I found a likely candidate, Zinsser Bin, which was touted as ideal for hard slick surfaces.  Zinsser Bin is a shellac formula primer with an alcohol base.  This primer cures in about 45 minutes (once all of the alcohol evaporates), and water based paints can be used on top of it.  I decided that I would go straight to the hardware store the next morning to pick some up, and had mercifully paint free dreams that night.

The next morning Firebeard helped me remove the sink completely (it was a pain to work around) and I sanded and cleaned the countertop again before we headed to the hardware store.  I was able to pick up a quart of the primer for $13, and had it shaken at the store (apparently alcohol based paint separates pretty easily).   I also picked up some cheap foam brushes to apply the primer because it does not clean up with soap and water.  When we got home I set to work.

Re-sanded, Re-cleaned, re-taped and sink removed - Ready for round two

Re-sanded, Re-cleaned, re-taped and sink removed - Ready for round two

The Zinsser primer was much thinner than I expected but went on pretty easily.  The whole bathroom smelled like alcohol for about an hour after painting, but it was by no means the worst smell we have encountered in this mini remodel.    Below is what it looked like after application.   It seemed about the same as the Kilz primer after its first coat, so I wasn’t holding my breath expecting success.  I was in fact expecting another failure, and wondering if home depot would take it back as defective. 

After a coat of Zinsser Bin.

After a coat of Zinsser Bin.

After an hour I nervously came back into the bathroom and gently scratched the countertop – nothing happened.  I couldn’t believe my eyes, surely this was a fluke, so I scratched a bit harder – still no damage.  The primer stuck!  It worked!  Finally something had gone to plan!  I was so excited I think I might have danced a little jig.  We were back in business.

So I have officially found my go to shiny, hard surface primer – Zinsser Bin.  And until it fails me, or I find something better, I am going to preach it to the masses in blog land.  Zinsser Bin is, as far as I know, the best primer out there for shiny hard surfaces.  If you are planning to paint your laminate countertop, save yourself a headache and a day of wasted work, and start with this stuff.

Next time I hope to show you the finished, refinished countertop in all of its shiny glory.  Until then, please let me, and fellow readers, know about your favorite primers and their ideal applications in the comments.

This post contains affiliate links.  All opinions are my own.

Caulk Up

I finally caulked the bath tub, and it looks pretty good if I do say so myself.

Newly Caulked Bathtub looking mighty fine!  Tub spout not fully installed.

Newly Caulked Bathtub looking mighty fine!  Tub spout not fully installed.

This was actually my first time caulking a bathtub, so I am not going to give you a play by play on my caulking technique (it was pretty bad).  I am however going to tell you why my bathroom caulk looks good now despite my poor technique, and a few lessons I learned along the way.

Before I took the plunge I read a LOT of tutorials on how to caulk a bathroom.  Here are a few:

There are a few things that nearly all of the tutorials seem to agree on, like using painters tape, and caulk that is supposed to be used in a bathroom, and there are a few things that the tutorials seemed to disagree about, like the angle the tube of caulk should be cut at, and angle that the caulk should be applied.  I decided to use the advice that the tutorials all agreed on, and do what felt right for the rest of it.

To angle or not to angle that is the question.  Also - Check out our mad graphic design skills :)

To angle or not to angle that is the question.  Also - Check out our mad graphic design skills :)

Here is what I learned:

1.  Initially you should cut the smallest possible hole in the tube of caulk – you can always cut it larger.

I cut the hole on the tube of caulk too big, and as a result the caulk came out MUCH faster and thicker than I had anticipated.  It was a bit of a mess.

Hole cut MUCH too large.

Hole cut MUCH too large.

2.  Use painters tape to define your caulk lines (and protect you from excess caulk).

This SAVED me.  If I had not done this the caulk that I applied would have looked SOOOO much worse than it did before I removed the horrible preexisting stuff.  As I said previously, I used too much caulk, WAY too much caulk.  As I was smoothing the caulk into the grooves it belongs in, the excess caulk built up on the sides of the tape.  Since the tape was easily removed, this was not a problem at all.  Had I not used the tape, all of that excess caulk would have gotten all over my tile.

Defining those caulk lines

Defining those caulk lines

3.  Wide painters tape is better than narrow painter’s tape.

I used thin painters tape, and it was amazing, but because I had so much excess caulk some of the excess still ended up on my tile.  Had I used wider tape I think all of the caulk would have stayed on the tape.

4.  Keep a wet rag nearby.

If you can get a wet rag on errant caulk as soon as possible it cleans up pretty easily.  Looking at my completed caulking job you would have no idea that wayward caulk got all over my bathtub.

5.  A finger is a surprisingly good caulk applicator.

I saw a lot of different tools recommended to smooth the caulk out once it was applied, from specially designed professional implements to plastic spoons to ice.  I just used my finger, and it turned out great.  I was able to tell how much pressure should be applied, and my hands were able to catch the caulk that didn’t pile up on the tape.

6.  Keep paper towels nearby – a lot of them.

All of the caulk that piled up in my hands (see #5) had to go somewhere.  Many paper towels were needed to contain it all.

7.  Work Quickly

While caulk is pretty fresh it is easy to manipulate, adjust, and correct.  As soon as it gets a “skin” you might as well leave the mistake, because trying to correct things will just make them worse.  The good news is that if you have all your supplies ready to go, caulking goes remarkably quickly.  I went from applying the tape to pulling it back off in under 30 minutes.

Check out that beautifully applied caulk.

Check out that beautifully applied caulk.

Finally, the hardest of all the lessons I learned.  Tape will pull epoxy paint off tile.

As frequent readers know we painted our bathroom tile with a Rust-Oleum Tub and Tile Refinishing Kit.  Despite waiting more than the prescribed 3 days to allow the paint to cure, and despite our excessive prep work, the painters tape used to apply the caulk removed the tile paint when it was pulled off.  This was REALLY upsetting to us.  The bare patches of tile were like emotional black holes, sucking all of the happy feelings out of the room and threatening a permanent fugue state.  Firebeard immediately mixed and applied more of the paint to keep us all from falling into pits of despair.  I didn’t get a picture first.

With the amount of work that we put into painting the tile, we had hoped that it would last for a least 2 or 3 years while we were doing work on the rest of the house.  Right now it doesn’t look like that is going to be likely.  But on a positive note, the caulk should last for many years to come.

Coat Closet Inspiration

Firebeard decided to touch up the paint on the bathtub surround tiles after all, so we are staying out of the bathroom, and away from the paint fumes for a few days.  I thought in the meantime I would show you the inspiration our next project - The Coat Closet Makeover.  

At the end of this winter our tiny foyer adjacent coat closet looked like you would need a crow bar to cram one more coat into it.  It had become completely unusable, and coats had started to pile up on the floor not feet from the closet.  I began scouring Pinterest for a beautiful solution to my coat closet problem, as you do, and I found this;

Gorgeous Coat Closet Makeover from Classy Clutter.

Gorgeous Coat Closet Makeover from Classy Clutter.

This is a coat closet makeover from Classy Clutter, and I love EVERYTHING about it, from the little gold hooks to the minty paint color!  

The thing that first caught my eye was the lack of hangers.  Who really wants to take the time when they walk into their house and put down their stuff to take out a hanger to hang their coat?  Not me. Hooks are easy.  There is very little effort involved in hanging something on a hook,  and something that involves very little effort is exactly what I need at the end of a long day!  It is also pretty easy to assign each family member a hook, and by extension, see who has too many coats in the closet at a glance.

The classy clutter closet also had two rows of hooks.  The lower row of hooks is ideal for hanging purses and bags, something that my closet, with it's single clothes rod, was completely lacking and in desperate need of.  

Since initially finding the Classy Clutter closet maker on Pinterest I have found several other inspirational closet makeovers.

Row 1:

  1. Herringbone Mud Bench from The Rooster and the Hen.  I love the texture of the Herringbone wood, and the addition of seating is a nice touch.
  2. Polka Dot Closet from Lil' Luna.  The shelving and two rows of hooks give this small closet a lot of room for storage, and the polka dots are really fun.
  3. Faux Wainscoting from The Real Housewives of Riverton.   Paint was used to great effect on this one.  I think that the white used below the 2nd row of hooks gives the impression of wainscoting.  Just a little bit of additional molding would complete the look.

Row 2:

  1. Yellow Striped Closet from Away We Go.  I'm a big fan of the built-in shoe storage shelves in this one.
  2. Closet turned Mudroom original source unknown.  I found the pic of this closet turned mud room on the This Suburban Life blog.  If anyone knows the original source please let me know so it can be credited properly.  I LOVE the shoe storage on this one - it even has room for boots!
  3. Beautiful Storage Shelf from The House of Smiths.  This is by far the most innovative closet shelf I have seen for this type of application.  I love the cubbies for baskets filled with small items plus the upper shelf larger stuff.

We will not be doing much on our closet makeover until the Mini Bathroom Remodel is complete.  For now I will just be planning our idealized inspirational Frankenstein closet.  

If you have any ideas that you think might strike my fancy, please pass them along in the comments.

Worthwhile Tile Smile

I watched the Simpsons movie for the first time the other day.  It was ok.  I’m not sure if it just hasn’t held up that well over time, or if it wasn’t especially funny to begin with.  I think my favorite part was probably Homer “fixing” a sink hole in the yard by sticking baby Maggie in it, and the fact that “fix sinkhole” was on Homer’s to do list in the first place.  I will try not to spoil a nine year old movie, but suffice it to say that sticking the baby in the sinkhole did not fix it, and because The Simpsons is a cartoon where everything works out in the end, the expanding sinkhole actually benefited the Simpson family, rather than hurting it like it would in real life.  Oh, if only neglecting maintenance,  and a lack of foresight/follow through were as advantageous in real life as they are in the movies.

Hole left over from shower door removal.

Hole left over from shower door removal.

Cracked Tile Discovered under shower door support.

Cracked Tile Discovered under shower door support.

When we removed our sliding glass shower doors we were left with some holes in the tile where the shower doors had been screwed to the wall, and a piece of tile that may or may not have been broken before the shower doors were removed.  Even though we plan to completely remodel the bathroom in a few years, leaving the screw holes open and the tile cracked simply was not an option since water from the shower could seep through the holes destroying the drywall behind the tiles, and worse, the subfloor under the tub (ounce of prevention, pound of cure, etc).  It was clear we needed to fix the tile.  What was less clear was how to go about doing it. 

The obvious choice was bathtub appropriate caulk.  After all, it is designed specifically to waterproof the gaps between tile and other bathroom surfaces.  The problem was that, after the initial caulk removal marathon in the bathroom, I was not feeling very charitable toward caulk, also, a big glob of the stuff on the broken tile would look terrible.  So I headed to Home Depot, looking for another solution, and to my surprise found one.

JB WaterWeld is an epoxy putty designed to repair moist or underwater surfaces.  Better yet, it can be used on ceramic (like my tile) and many other slick surfaces.  It is also pretty cheap (about $4 for enough to rebuild an entire tile), pretty easy to work with (like a cross between drywall spackle and modeling clay), and cures in only an hour.    It is pretty much an ideal tile repair material in my opinion, but there is a catch.  It dries off white, so it may not match your tile, and like dry wall hole filler, it needs to be sanded if you want your patch to be smooth.  Fortunately for us we were already sanding our tile so that we could paint it, so the sanding wasn’t a problem, and we were painting the tile, so the color of the patch wasn’t an issue either.

As a side note, a lot of people use JB water weld to fix plumbing leaks, and a lot of people complain about its inability to fix pressurized plumbing leaks.  I didn’t use it to fix a pressurized leak, so I do not know if it works well for that application or not.  It worked wonderfully for my application, but I don’t think I would use it to permanently fix my plumbing – I would replace the leaking pipe, or call a plumber. 

One Amazon reviewer also mentioned that he used this stuff to fix his bridgework, and it did such a good job that he was able to “eat corn on the cob” ...  I don’t recommend this application either.

As a side, side note, some of the questions and answers for this product on Amazon are really funny.  My Favorite Question:  “bathtub”.  That’s right, simply “bathtub”.  The answers are the best.

To use JB WaterWeld;

  • Prepare the surface to be repaired by sanding (if possible), cleaning, and drying
  • Cut off a piece and squish it up for a bit (like sculpey clay), until it becomes soft. 
  • Stick it on the surface to be repaired, and kind of smoosh it in to all of the cracks and holes and things that need to be filled. 
  • Smooth it out a bit at this point so you don’t have to sand as much later (it cures pretty hard), just be sure all the cracks and holes you filled stay filled while you are smoothing it out.     
  • Let it dry/cure.  It should take about an hour.
  • Sand it smooth/level with the surrounding surfaces (if desired).
  • Paint or otherwise finish the surface (again, if desired).
JB WaterWeld Applied

JB WaterWeld Applied

After Sanding

After Sanding

We of course sanded and painted our patches, and when we were finished the holes left by the shower doors were nearly invisible, and it was even hard to tell the broken tile was ever broken.

After Painting - The repair is nearly invisible!

After Painting - The repair is nearly invisible!

All in all the easiest fix we have made to this bathroom so far, and I recommend JB WaterWeld without hesitation to fix your tile, but not your teeth.

(This post contains affiliate links, but I was not paid to review this product, I just like it).

Tile Time

Last time I told you about the self-induced nightmare of prepping our tub surround tile to be painted.  It was an activity that should have taken hours, but took us over a week.  We went so far beyond the manufacture’s recommendations for surface prep that by the end we were questioning our own sanity, and wondering if it was all worthwhile.

Near the End of our Tile Prep Nightmare.

Near the End of our Tile Prep Nightmare.

The painting portion of this project didn’t take that long, but it wasn’t a lot of fun.  With our Rust-oleum Tub and Tile Refinishing kit Firebeard was able to do 3 coats of paint on the tile during the course of several hours while I was at work, and I am still thanking him for saving me from this.  The paint smelled so badly and so strongly that when I got home I could smell it feet from our front door.  Even with windows open and fans on It was truly, overwhelmingly bad.  Firebeard had been wearing a pretty high quality respirator while painting all day, and was still feeling pretty sick from the fumes when I got home.  We actually left the house for several hours that evening to give the paint smell a bit more time to dissipate, and it was JUST bearable by the time we got home.  Fortunately The Boy and The Girl were on a sleepover, so they were not subjected to the worst of the smell, but it took an additional 2 days for the lingering paint smell to leave the house, and even now, about a week later, the bathroom still smells unpleasantly odd.

Per Firebeard the actual painting was not as easy as a typical painting project.  The epoxy paint dried quickly, so there was very little time to fix mistakes.  The paint also seemed to eat the foam paint brushes and rollers he was using, and a new one had to be used for each coat, or he risked pieces of foam being embedded in the paint.  Combine that with the brain killing fumes, and this was not one of his favorite projects.  However, even given all of the brilliance of hindsight, he is considering getting another kit and doing one more round of painting before we caulk because a few spots did not get as thoroughly covered as he would have liked.  I guess it couldn’t have been that bad if he is willing to do it again.

Before - Pink Tile

Before - Pink Tile

After - Bright White Tile

After - Bright White Tile

There is no denying that the overall look of the tile now is a tremendous improvement.  It looks clean and fresh, and surprisingly shinny.  It does have a slightly odd texture now though, a bit like orange peel texture but more subtle.  We also have a few spots that are a less perfect than others as is pretty typical when painting by hand rather than with a sprayer.  This doesn’t really bother me, but it is worth knowing if you decide to do it yourself.  The paint also perfectly covered the patched holes left behind after removing the sliding shower doors which was a big plus (I will tell you how I patched those next time).

Close up of the tile's new texture.

Close up of the tile's new texture.

One of the less perfect Spots.

One of the less perfect Spots.

So was all of the prep work worth it?  At this point it is hard to tell.  Bad prep work usually doesn’t become obvious until something has been used for a while and all of the paint suddenly starts peeling off, and good prep work usually goes unnoticed.  What I can say for sure is that we did not experience the peeling or puckering paint that some Amazon reviewers said they experienced.  So far our paint seems VERY securely attached, whether that is from our obsessive prep work or not, I don’t know.

Bottom Line, Knowing what we know now would we do it over again?

I think we probably would.  The improvement in the tile’s appearance was worth the effort we put in, but if we were going to do it again, I think we would put in less effort.    The instructions on the box are there for a reason.  They have been tested, and if they didn’t work they wouldn’t be on the box.  We went totally overboard on the prep work, making this project much harder than it should have been, and I think we have learned our lesson. 

In conclusion, painting the tile was worth it, follow the directions on the box, and for god’s sake ventilate, ventilate, ventilate. 

Tile doesn't sand

If you have ever watched Supernatural, you know that the beginning of every show starts with backstory.  So much happens in each show that missing a couple of shows would leave you completely lost.  The backstory provides the context for the current insanity and makes it seem like the logical progression of events rather than a complete plot twist.  I feel like this post deserves backstory, so that you will know what brought us to this point.  We got to the current insanity through a logical progression of events.

We started out just a few weeks ago with the dream of a quick bathroom refresh.  A little paint here, some accessories there, and voila, a brand new bathroom.  Sure we wanted to fix a few small things along the way and remove those disgusting shower doors, but those were quick projects that wouldn’t take any time at all, right? 

Wrong!  We were wrong.  So far everything has taken about twice as long as we expected it to.  Well that was until we tried to deal with the tub surround tiles that looked pink after painting the bathroom.  This project was supposed to take a day of work, and 3 days of dry time.  So far  it has already taken 2 weeks, and we are all feeling a bit crazed.

So, what brought us to this point?  Here is the back story;

Sickly Beige Tile.

Sickly Beige Tile.

Next to our swatch of Paper White paint, our tiles looked sickly beige.  While I am not a fan of sickly beige, I felt like it wouldn’t stand out, and I could pretend that they were just slightly off white and I could live with it until we were able to do a full bathroom remodel in a couple of years. 

Tile looks pink after painting.

Tile looks pink after painting.

Once the Paper White covered the entire wall the tile no longer looked sickly beige.... it looked pink.  I will admit, I had been hoping that the slightly cool Paper White would tone down the yellow in the tile a little bit, but it worked a little too well.  The yellow undertones in the tile were nearly eliminated, but the red undertones were accentuated. 

After about a day of trying to convince myself that the pink tile didn’t bother me (and failing miserably), I started looking for a solution.  I had a couple of options;

  • Living with the pink tile until we could do a complete remodel, the pink grating on my aesthetic sensibilities every time I walked by the bathroom.
  • Getting one of those drop in plastic bathtub surrounds (I would rather live with the pink tile)
  • Tiling the bathtub surround (I seriously considered this option, but it was so far out of the budget that this really wasn’t a viable possibility)
  • Painting the tile

Painting the tile is not something I would have EVER considered prior to this, but suddenly it was an option that seemed filled with possibly.  Since we had already removed all of the caulk there wouldn't be that much prep work.  It would only take a couple of days from start to finish.  I wouldn't have to spend a fortune on new tile, and I could get the white tile I had wanted in the first place.  I could have my cake and eat it too.  In retrospect, painting the tile was too good to be true, and I should have seen this as a warning sign from the beginning.  

We decided to go with the Rust-oleum Tub and Tile refinishing kit.  It is a 2 part epoxy acrylic paint that can be rolled on like standard wall paint, but should hold up well under high humidity.  It was only $25 on Amazon when we bought it, and it had pretty great reviews.  The only warning we repeatedly saw from the Amazon reviewers was that the tile needed to be well prepared.  "No problem," we thought.  The kit would be delivered in two days (thanks Prime!), and we would do the prep while we were waiting on the kit and dive right into the painting when it arrived.  

What did the prep entail you ask?

  1. Removing all of the caulk from the tile that would be painted
  2. Sanding the tile. 

We had this in the bag.  We had already removed the caulk - step one done.  All we had left to do was sand the tile.  The Amazon reviewers really stressed this part.  The most knowledgeable (sounding) among them recommended that the shine be removed from the tile so that the paint would be able to grip the tile.  This made perfect sense (its what you do when you refinish wood), so this is what we set out to do.  

Our tub spout just twisted off.

Our tub spout just twisted off.

About 40 years worth of hard water deposits.

About 40 years worth of hard water deposits.

First we had to remove our newly installed tub faucets, and the tub spout.  The tub spout just twisted off.  We were shocked to find what we think is nearly 40 years of hard water deposits.  It was pretty gross.  The good news is that when everything goes back on we will have a shiny new tub spout to match the new faucets.

We started sanding the tile with the 220 grit sandpaper that the kit recommended.  It didn't seem to do anything at all.

Then we switches to 60 grit (super course) sandpaper.  It made the tile shinier.  

I went to the web searching for a tile sanding solution and found Emery paper, a sandpaper made from silicon carbide.  We grabbed the only kind they had at Home Depot (which did not fit on any of our electric sanders) and went to town on the tile.  It worked, but sanding the tile by hand was maddenly slow.

After the belt sander.

After the belt sander.

Then finally one day while I was at work Firebeard took out the big guns - the belt sander.  While still at work I texted to ask how it was going, and the above picture was the response.  All of the flat tile surfaces had been throughly sanded and were ready to be painted, but the curved edges of the tiles were as shiny as ever.  

At this point we were starting to get a bit desperate, and I opted for some chemical warfare.  Muriatic acid is a fairly strong acid that when pretty heavily diluted is sometimes used as a hail Mary bathroom cleaner.  It is used heavily diluted and as a last resort because it has the tendency to remove the shine/finish from tile, porcelain, etc.  Fortunately this generally negative tendency of muriatic acid was exactly what we needed.  We strapped on the safety gear, and allowed the muriatic acid to eat as much of the remaining finish off the tiles as we dared (while keeping it off of everything else).

After this we did one last round of hand sanding, and then very through cleaning, and we were finally ready to paint.

Next time on, "This is taking significantly longer than we thought it would Mini Bathroom Remodeling Project,"  the painted tile.

(This post contains affiliate links.)

Painting and Magical Color Changing Tile

The last I left you we had just finished removing all of the caulk in our hall bathroom, scrubbing the left over grout and tile clean, and we were waiting for everything to dry completely before we applied the new caulk.  After doing everything we could to remove the insidious mold that grew up under and around the old caulk, we were not about to take any chances caulking over damp crevices, and determined that we would wait at least a day to let everything dry before applying the new caulk.   But not being ones to sit on our laurels watching grout dry, we decided to paint in the meantime.

We had already picked out a few front runners in the paint department that are consistent with the rest of the house’s updated color scheme, and had painted a few swatches on the walls.  The front runners were Edgebomb Gray by Benjamin Moore, Moonshine by Benjamin Moore, and Paper White by Benjamin Moore. 

As soon as it dried it became clear that Edgecomb Gray was not for us.  It looked brown rather than greige in our windowless bathroom, and that was exactly what we were trying to get away from.  So far this has been something of a theme in this under lit house of ours.  The pretty, warm inviting greiges I see all over Pinterest look dirty and muddy when I get them on my walls.  At least it makes picking a paint color a bit easier.

Moonshine and Paper White  were the final contenders, and deciding between the two of them was not easy.  Moonshine and Paper White are pretty similar.  They are both light neutral to slightly cool grays that look a bit silvery or shimmery and change color slightly depending on the lighting.  We liked them both, so we lived with the colors for a few days to see if one of them grew on us. 

I waffled back and forth, leaning more toward one, then more toward the other.  I looked at them during the day, at night, with the lights on, with the lights off, and stole quick glances at them every time I passed the door (as if I might catch the paint off guard while it was revealing its true nature).    I  was not really able to make up by mind until the shower curtain we ordered for the bathroom came in (I’m not showing it just yet – it’s a surprise, and it’s awesome).  When we held the shower curtain up to our paint swatches the choice became clear.  The Moonshine looked perfectly fine, but the Paper White really popped.  We decided to go with Paper White, which is a bit lighter and brighter than Moonshine and looked great with our new shower curtain. 

Money Saving Tip:

If you are planning a painting project and have an Ace Hardware nearby check to see if they are having one of their 2 for 1 paint sales before heading out to buy paint.  A couple of times a year, Ace Hardware has a paint sale in which they sell 2 gallons of paint for the cost of one gallon.  The brand and line of paint that is on sale generally changes each time, so if you are particular about the brand you paint with this may not be the sale for you, but if you are like me, and price trumps brand loyalty, it is a great way to get paint cheap – just make sure you buy enough to finish your project or are willing to pay full price if you run out.

We were lucky enough to buy the paint for this project during one of Ace Hardware’s 2 for 1 sales, so we got two gallons of BM Paper White color matched in Valspar Optimus for $40 .  This should be enough to finish this project, and another we have planned (stayed tuned).

The ceiling paint is BM Simply White color matched to BEHR Premium Plus Ceiling Paint.  It was leftover from painting the ceiling in our office and dining room.  I love this color for a ceiling because it is definitely white, without being stark white.  I feel like it makes the room feel a bit more welcoming than a true pure white.  

We hadn't realized just how yellow the ceiling was until we started painting it.  Just look at the before and after.  It is like night and day!  Next to the Simply White the old color looked like the teeth of a 3-pack-a-day smoker. The really troubling part is that we have no reason to suspect that the prior owner of 30+ years ever smoked in the house - we think they actually CHOOSE that color....   

So here is what it looked like after 2 coats of Paper white on the walls and 2 coats of Simply White on the ceiling.  The trim still needs to be painted and we need to do some touching up on both the walls and the ceiling.  So far I am very happy with the paint color we chose, but there is a problem.  The tile in the bathtub surround now looks pink!

Next time, figuring out what to do about the pink tile.

Mini Bathroom Remodel - DeCaulking

After removing the shower doors we were left with a much more open, inviting bathroom, and a crap ton of caulk that needed to be removed.  I think I need to start by emphasizing just how bad the caulk was in this bathroom.  I have only once ever seen caulk applied more poorly than it was in this bathroom (the worst I have seen is our Master Bathroom).  It looked as if a person that REALLY loved caulk, but had no idea how to apply it decided to try their hand at caulking in the bathroom by literally smearing it in the general vicinity of a corner.  But they didn't try just once, oh no.  It looked they they kept coming back to try again without removing the previously applied caulk.  In other words it was really bad.

Caulk Removal - Surprisingly Interesting

Caulk Removal - Surprisingly Interesting

Since we already had to remove the caulk left behind by the shower doors, we decided that it would be a good time to re caulk the entire bathroom the right way, and got to work removing the old caulk.

We started with layers and layers of peeling caulk.

We started with layers and layers of peeling caulk.

Removing caulk really isn't hard, you basically just scrape it off, but having the right tools can make the job even easier.  My tools of choice are a caulk removing tool, a scraper, a razor blade (in a holder) and caulk softening spray.

My caulk removing tools.

My caulk removing tools.

We started by removing most of the caulk on the flat surfaces with the scraper, then moved onto the corners using the caulk removing tool (it's strangely shaped blade is perfect for getting into the corners).  There was still a lot of caulk left after our first pass (see smeared caulk above), so we went back in with a razor.  

Scraping,

Scraping,

scraping,

scraping,

and more scraping.

and more scraping.

Since there were still a few stubborn pieces left we followed the razor blade up with the caulk softening spray.  The spray really didn't spray for me, so we painted it on with a cheap foam paint brush (which was pretty well disintegrated by the end), let it go to work, and then made another pass with a razor blade.  

Caulk Removed.  Tub Cleaned.  Looking Pretty Good.

Caulk Removed.  Tub Cleaned.  Looking Pretty Good.

The tile is looking pretty good following the caulk removal.  A good scrub down did wonders to remove any remaining residue,  and once it throughly dries we will be ready to re-caulk.

Happy Easter

 It has been a rainy Easter today here in the Big Bend.  We celebrated with out first ever egg hunt in our new house, our first ever indoor egg hunt, and our first ever game of find the chicken lego man (a game invented by The Boy).

I hope your family has also had a great Easter (or a great Sunday if you don't celebrate Easter).  If you have some interesting old or new Easter traditions, I would love to hear about them in the comments.


Mini Bathroom Remodel - Removing the Shower Doors

One of the things I was looking most forward to in this mini remodel was removing the shower doors attached to the bathtub.  You may not agree with me, but I think that framed shower doors are gross.  I’m ok with the frameless variety that are popular now, but 1980s framed sliding shower doors are just disgusting.  Here in warm humid Florida mold develops under the seals on the doors, under the handles, inside the tracks pretty much everywhere scrubbing is impossible.  There is no way to get them completely clean without completely disassembling them including the doors themselves, and dipping them in bleach.  I couldn’t wait to get the repulsive things out!

Before:  Ugly, gross, impossible to clean framed sliding shower doors.

Before:  Ugly, gross, impossible to clean framed sliding shower doors.

Framed sliding shower doors are actually surprisingly easy to remove.  It took us less than 5 minutes to completely remove the doors (although cleaning up the residue left by the doors took significantly longer).  Here is what we did:

Removing the First Door

Removing the First Door

First Firebeard grabbed the door on the outside of the bathtub and lifted it up out of its upper track.  Our door had a small clip holding the bottom of the door to the bottom track as well.  I was able to pop this out with a screwdriver while Firebeard held the door up.  Then we moved this door well out of the way so we could handle the next door.

Next Firebeard grabbed the second door and lifted it out of the upper track.  The upper track then lifted up on its own accord, and it was at this point that we realized that the upper track was being held on by gravity alone.  While Firebeard was still holding on to the second door I removed the upper track (so it didn’t fall on him and brain him), then quickly removed the clip holding the door onto the bottom rail.  I was a little too busy preventing injury to get a picture of this part.

Shower Doors and upper Track removed.  Bottom track and sides remain.

Shower Doors and upper Track removed.  Bottom track and sides remain.

We were left with the bottom track, which appeared to be caulked in place, and two side supports which were screwed in and caulked. 

Unscrewing the side supports.

Unscrewing the side supports.

Scoring the caulk on the side supports.

Scoring the caulk on the side supports.

We removed the side supports by scoring the copious amounts of caulk holding them in place with a razor and then unscrewing them.  The tops of the supports came away easily, but the bottom where the side supports met the bottom track required some additional scoring and a bit of twisting to pry them loose.

Scoring the caulk on the bottom track.

Scoring the caulk on the bottom track.

Removing the Bottom Track.  Gross.

Removing the Bottom Track.  Gross.

The bottom track was held on by caulk and an adhesive strip (under the track).  We scored the caulk on the side of the track to loosen it, then simply pulled it free from the adhesive strip.  Underneath was another confirmation of just how gross framed sliding shower doors really are.

Removal of shower doors complete.  Clean up from removal to come.

Removal of shower doors complete.  Clean up from removal to come.

Even with all of caulk and dirt and god knows what else left behind after removing the shower doors I was amazed by how much better the bathroom already looked.  

Total Cost of the Mini Bathroom Remodel Thus Far: Still $58.96

  • Faucet Kit:  $44.99
  • Stem Tool: $5
  • Tub Spout Rings:  3 at $2.99

Next time - Removing the Caulk Left Behind

Mini Bathroom Remodel - Leaky Faucets No More

The first stop on our journey to a beautiful “new” bathroom, is changing out the tub faucets that have been dripping for months and driving me nuts (but not nuts enough to do anything about).  The drip finally got bad enough that my conscience couldn’t let it go any longer, and we dropped some money on a tub faucet trim kit.  The kit we got was the Danco 39696 Trim kit with Cross-Arm Handles for $45 on Amazon.  I picked this one because the handles look a bit vintage, which is my favorite bathroom look, and it was significantly cheaper than buying all of the replacement parts piece by piece.

The Dance Tub/Shower Remodeling Kit.  Check out the before and after.  Tile magically transforms when the new faucets are installed!   

The Dance Tub/Shower Remodeling Kit.  Check out the before and after.  Tile magically transforms when the new faucets are installed!   


I want to first say that if your tub faucets are dripping you probably don’t need entirely new tub faucets, you probably only need the washer that sits at the back of the stem where the stem connects to the water line (which is MUCH cheaper than changing out the whole faucet).  Since our handles were ugly, our stems had seen better days, and our stem seats had been damaged from months of cranking down the handles to stop the leak, we decided to change out the whole assembly.

We started by turning off the water and removing the old handles, and stems.  The preexisting handles were hideous, 1970’s builder grade blocks of metal that I couldn’t wait to be rid of, so I was extremely happy about this part.  When we removed the stems we found that they were in better shape than we had expected, but we went ahead and replaced them anyway since we had the new parts.  I am glad we replaced them because the new ones are much smoother turning. 

Then we found out that we were missing a tool (don’t believe the box when it tells you everything you need is included).  The seat, which looks a bit like a thick washer with a funny shaped hole in it, and sits in the pipe within the wall, needs a special tool to be removed called a seat tool (Olive, one of the kid’s dolls helped illustrate it’s placement).  There was no seat tool included in the kit, and we had no seat tool, so Firebeard when on his first trip to Home Depot and bought one.  That is another $5 if you are keeping tabs.  Once we got the seat out and compared it to the new one we knew where our leak had come from.  It was in rough shape.

So we had gotten everything out, and it was time to start putting things back together again, starting with the shiny seat.  Then in went the stems, their weird plastic covers, the flanges that cover up everything that comes out of the wall, and finally the handles. 

Giant Gap Between Flange and Handle.

Giant Gap Between Flange and Handle.

But wait, there is a problem.  There is a space between the flanges and the handle where the stem is visible.  Not a good look!  At first we thought we had done something wrong, so we took everything apart, and meticulously followed the directions when we put things back together.  Still a gap.  We took everything apart one more time and put everything back together while willing the length of the stem shorter.  That didn't work either.

You would think that all of the parts in the kit would fit together, but they don't.  So we made our second trip to Home Depot trying to find parts that would work.  We bought the longest flanges available ($7 a piece) in the hope that they would cover the ridiculously long (and more expensive to replace) stems.  There was still a gap.

Miracle Solution - Tub Spout Ring.

Miracle Solution - Tub Spout Ring.

So Firebeard made one last trek to Home Depot in a desperate attempt to find something that would fix the problem before we capitulated and exchanged the kit for a much more expensive faucet set.  He came back with tub spout rings, which are tub spout decorations that just happen to fit our flanges perfectly. 

Tub Spout Rings Installed.

Tub Spout Rings Installed.

 They raised the flanges the perfect amount the fill the gap between the flange and the handle and cover the stems.  At just $2.99 a piece they were the perfect budget saving solution.

After!

After!

The only problem we have with them now, is that they make the rest of the tub look pretty poor in comparison.

Total Cost of the Mini Bathroom Remodel Thus Far: $58.96


Seattle and the Dinosaur

Last week I went to Seattle for a conference and Fire Beard tagged along (he had just finished the bar exam and needed a break).  Even though I didn't really have nearly enough time to explore the city we had a great time, got to see some of the iconic Seattle sites, and now want to go back to see the rest.  

Before we left The Boy gave us one of his Lego dinosaurs to keep us company during the trip.  We carried the dinosaur everywhere we went and took pictures of it exploring the city with us.  He went to the Space Needle, on the monorail, to the Pike Place Market, and to the first Starbucks.  

At the first Starbucks we discovered the “You are Here” mug series, and picked up souvenir mugs for the kids (they actually asked for mugs - even kids know that Seattle is the coffee mecca).  The Girl got the Seattle mug, and The Boy got the Washington mug.

When we got home the kids got their mugs, and the dinosaur was returned to The Boy.  After we explained how much the dinosaur enjoyed Seattle and showed him some of the pictures from our trip, The Boy decided that the dinosaur missed Seattle, and made the dinosaur a home in the Seattle mug.

DSC_0013.jpg

That lasted for a few days, until the Lego Space Needle that we had ordered during the trip as a present for The Boy finally showed up.  Now the dinosaur is trying to claim a new home - the Space Needle.

Happy Saint Patrick's Day

It’s Saint Patrick’s Day!  Here in the US that mostly means wearing green, pinching people that are not wearing green, and drinking!  If you are lucky enough to live in an area with an active Irish community, it can also be a great time to learn more about Irish Cultural Heritage.

Here in the Tallahassee/Big Bend Area we are lucky to have a small but active Irish community.  Every year they put on a Saint Patrick’s Day Parade and Festival.  This year the parade was a lot of fun.  Even The Boy, who generally hates the large crowds and loud noises inherent in parades, had a great time.  That is probably because the Saint Patrick’s Day parade is a rather more intimate affair than most parades.  The Saint Patrick’s Day parade is not a big parade by any means.  There are not a lot of people in the actual parade, and there are not huge crowds attending.  From beginning to end the parade took less than 5 minutes to pass by us, and took at most 30 minutes to make the entire 0.6 mile circuit around Lake Ella.  The people in the parade that hand out candy and necklaces to the kids were able to literally hand out candy and necklaces to the kids rather than throwing it in the general direction of the kids in the crowd, and everyone was very friendly.  Generally my kids want to go back home as soon as a parade is over, so I was pleasantly surprised when they asked to stay longer.  We made our own circuit around the lake before we left, exploring the stands and booths set up for the festival along the way.

But today is Saint Patrick’s Day, which requires some celebration.  If you are staring a pint of green beer in the face, and feeling a bit green yourself, I would like to offer an alternative; The Grasshopper.  The Grasshopper is a mint chocolate flavored, green colored cocktail, that probably originated in New Orleans. It tastes a bit like melted mint chocolate chip ice-cream, and is really good!

The Grass Hopper

Ingredients

  • Creme de Menthe
  • Creme de Cacao
  • Half and Half, Single Creme, or Light Cream

Directions

  • Combine equal parts Creme de Menthe, Creme de Cacao, and the cream of your choice in a cocktail shaker
  • Fill the shaker with Ice
  • Shake the combined ingredients and ice until the outside of the shaker becomes frosty
  • Fill Martini Glasses with the drink, straining out the ice 
  • Garnish with Mint Leaves (Chocolate Mint is preferred if available)


Hall Bathroom Mini Remodel - The Plan

I would like to introduce you to my hallway/kids bathroom.  Since we moved into our new house, almost a year ago now, we have barely touched this room (other than to clean it, and you know...use it).  While it is perfectly functional, it is also extremely boring.

The Before Picture

The Before Picture

When I started feeling bad after Christmas we took a bit of a break from our big remodeling projects.  Even though I am feeling better now, I’m not quite ready to jump back into the heavy work – enter the bathroom mini remodel, also known as, how much can paint really do? 

Before - From the other Side

Before - From the other Side

My vision for the bathroom is to make it a mostly grown up space with a few fun kid friendly touches, that will grow with our children.  We will be fixing some problem areas, painting, adding some storage, and accessorizing in a fun, big kid sea creature theme.  No flooring will be replaced, no walls will be changed or removed.  All of the major features of the room will stay more or less intact.  This is basically a face lift, and I am really excited to see just how much difference it can make.

So what is the plan?

  • Change out the leaky tub handles
  • Remove the sliding glass doors and replace with a fun themed shower curtain
  • Re-caulk the tub and tile (it really is that bad)
  • Color the tub and floor grout since it does not look clean regardless of how much  I scrub it
  • Paint the walls, ceiling, and trim
  • Update the vanity with paint, shaker style molding, and new hardware (and possibly a faux finished countertop)
  • Add some shelving above the toilet and next to the sink
  • Change out the mirror
  • Add some finishing touches, like towel hooks, pictures, etc
  • And now that I have seen the pictures for this post I think improving the lighting may be in order as well

How long will all of this take?  Well since most of our time to work consists of weekends and the evenings after the kids go to bed, it will probably take a while even though this is only a mini remodel.  Oh well, such is life.  I hope you enjoy the journey with us!